How To SSH into your VM? - Google Cloud Platform (GCP | IAP tunnel | OS Login | Audit | Google IAM)
- You can find the source code for this video in my GitHub Repo.
Intro
In this video, I'll show you multiple ways how you can SSH to the public and private instances. We're going to start by managing SSH keys ourselves and upload them to the project metadata and individual instances.
Then I'll show you a more secure way to use gcloud cli to manage SSH keys, as well as show you what firewalls you need to open to use Identity Aware Proxy to SSH to instances with only private IP addresses.
Finally, the recommended way is to use the Google OS Login service, which is a service to map Google Cloud identity with Linux users. In that part, I'll show you how to onboard a new user and grant necessary IAM permissions to SSH to the instances. In one example, we will grant full access to the VM, including sudo privileges, and then we will remove sudo to simulate a regular user.
OS Login also allows you to enable 2-factor authentication to SSH to the virtual machines.
Create GCP VPC using Terraform
If you want to follow along, you can use my terraform code to create some basic networking components in Google Cloud.
First of all, let's define some local variables that you can update based on your GCP project and region.
Then create google terraform provider and use terraform block to define version constraints.
| terraform/1-provider.tf | |
|---|---|
Before you can create VPC in Google Cloud, you need to enable compute API. Then define google_compute_network with some parameters, including deleting the default route to the internet when you create VPC. I like to manage routes separately using terraform as well.
Then two subnets, one of them is private that will use NAT Getaway to provide internet access, and the other one is public.
Google Cloud Router to advertise NAT gateway within the private subnet.
| terraform/4-router.tf | |
|---|---|
Finally, the static public IP address and a NAT Gateway itself.
Let's go ahead and apply terraform.
At this point, you should have a default VPC created when you enable compute API and a custom main VPC.
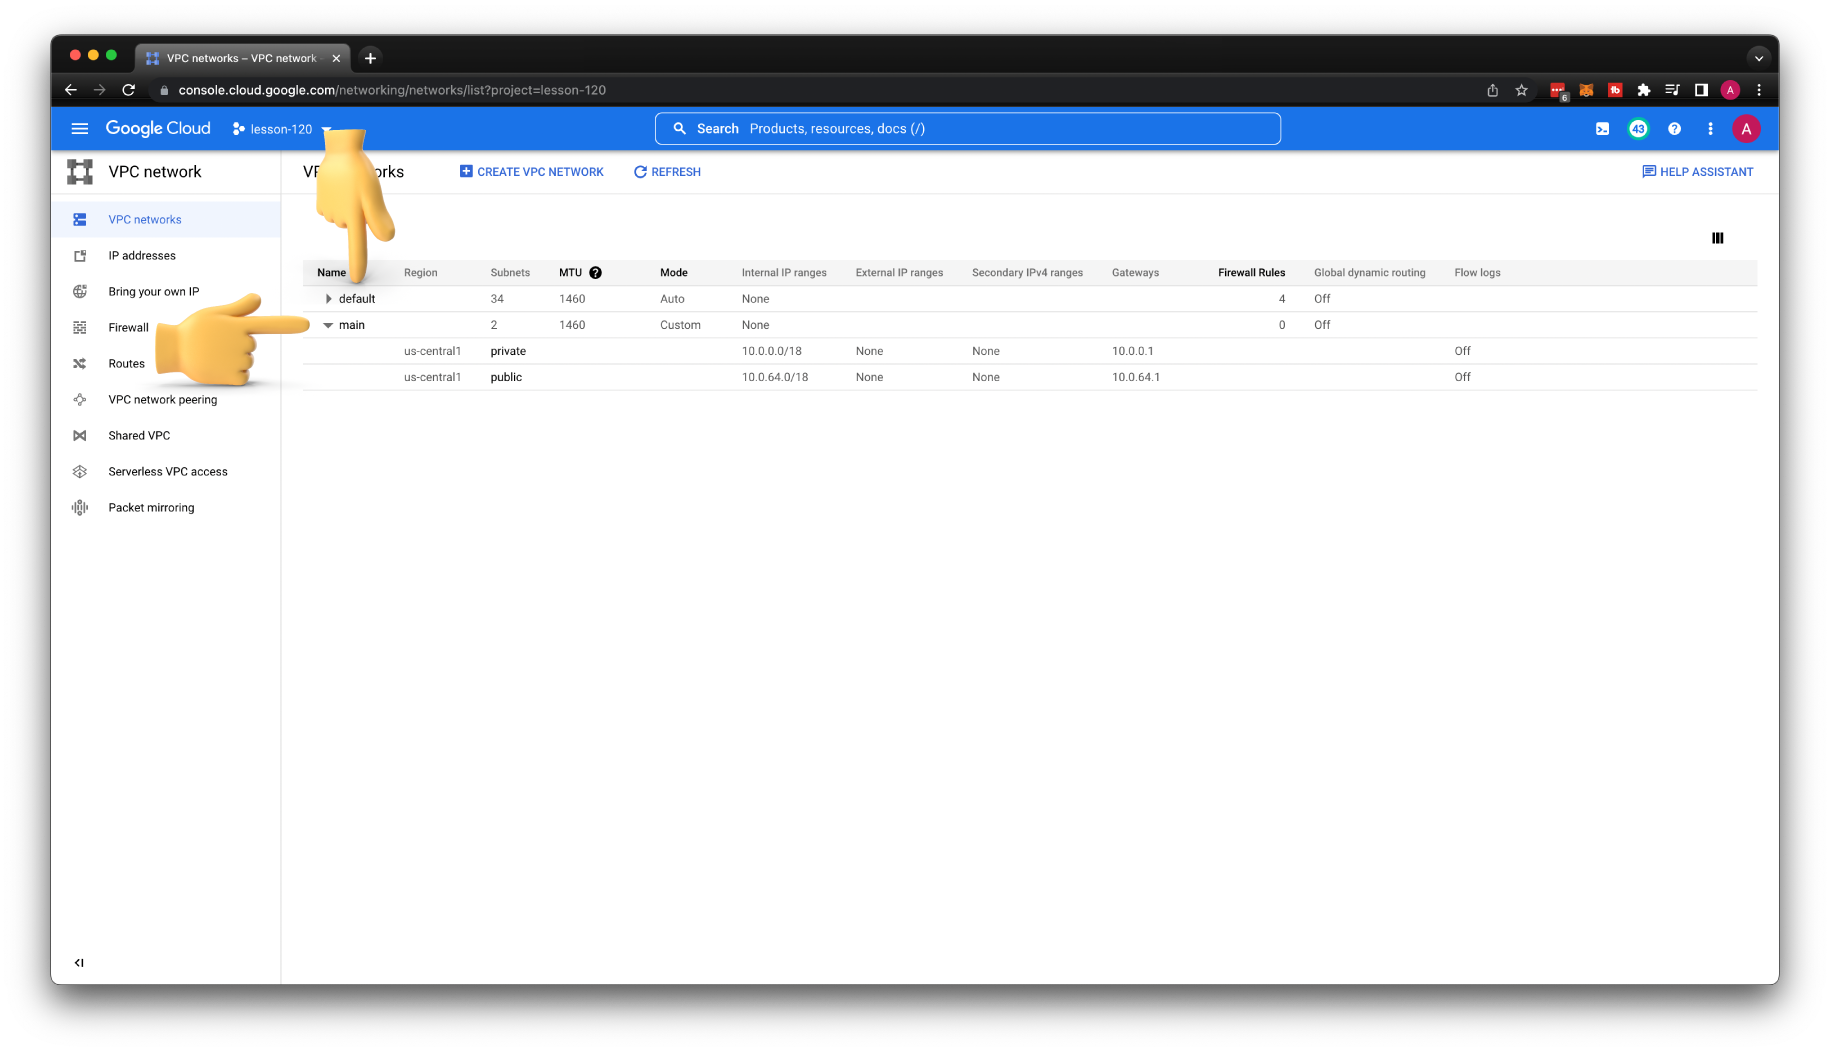
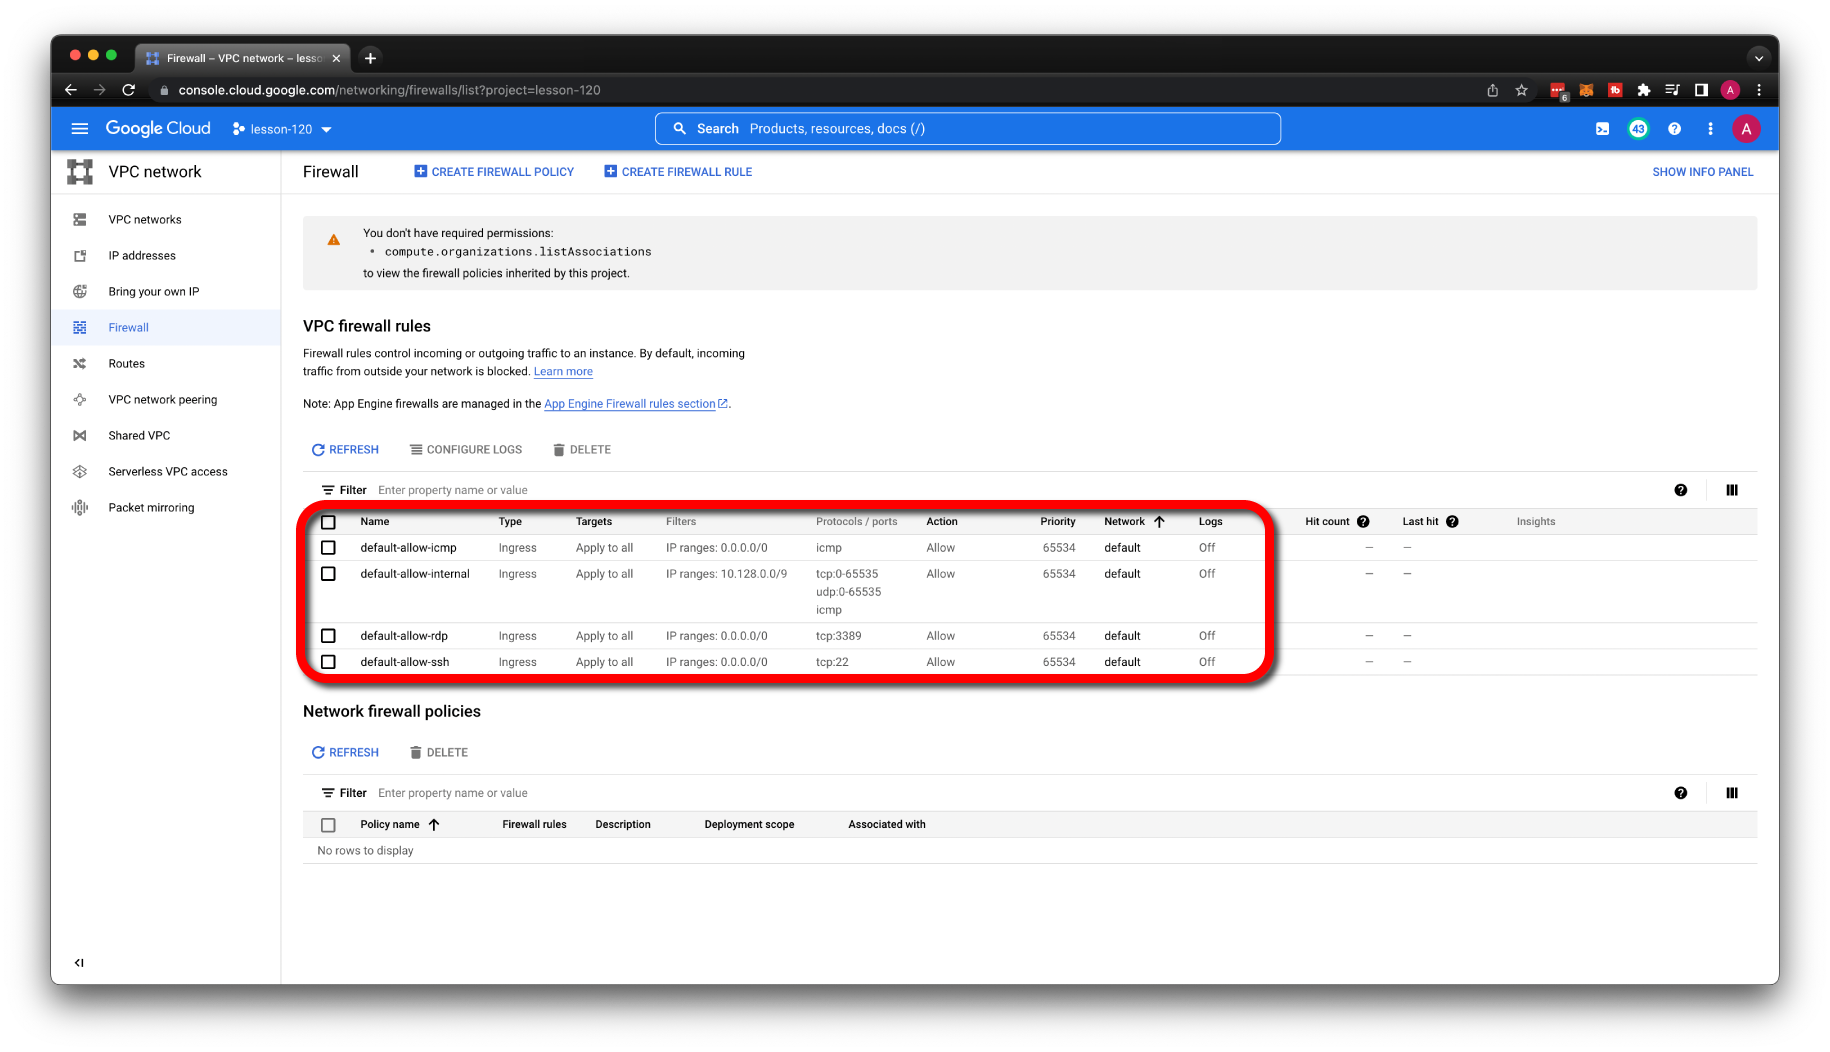
Also, if you go to the Firewalls section, you should find some rules associated with default VPC. To make it more transparent, what firewall rules we would need to create to enable SSH access. Let's remove the default VPC; it will clean up firewalls as well.
Managing SSH keys in metadata
The most basic approach that you can take to manage access to virtual machines in Google Cloud is to manage your own SSH keys using metadata. It has a few drawbacks; for example, when the team members leave your company, you need to manually remove those SSH keys.
Project Wide
One of the options is to manage SSH keys on the GCP project level. All the VMs created in that project will be accessible using those keys unless you explicitly disable them on specific VMs.
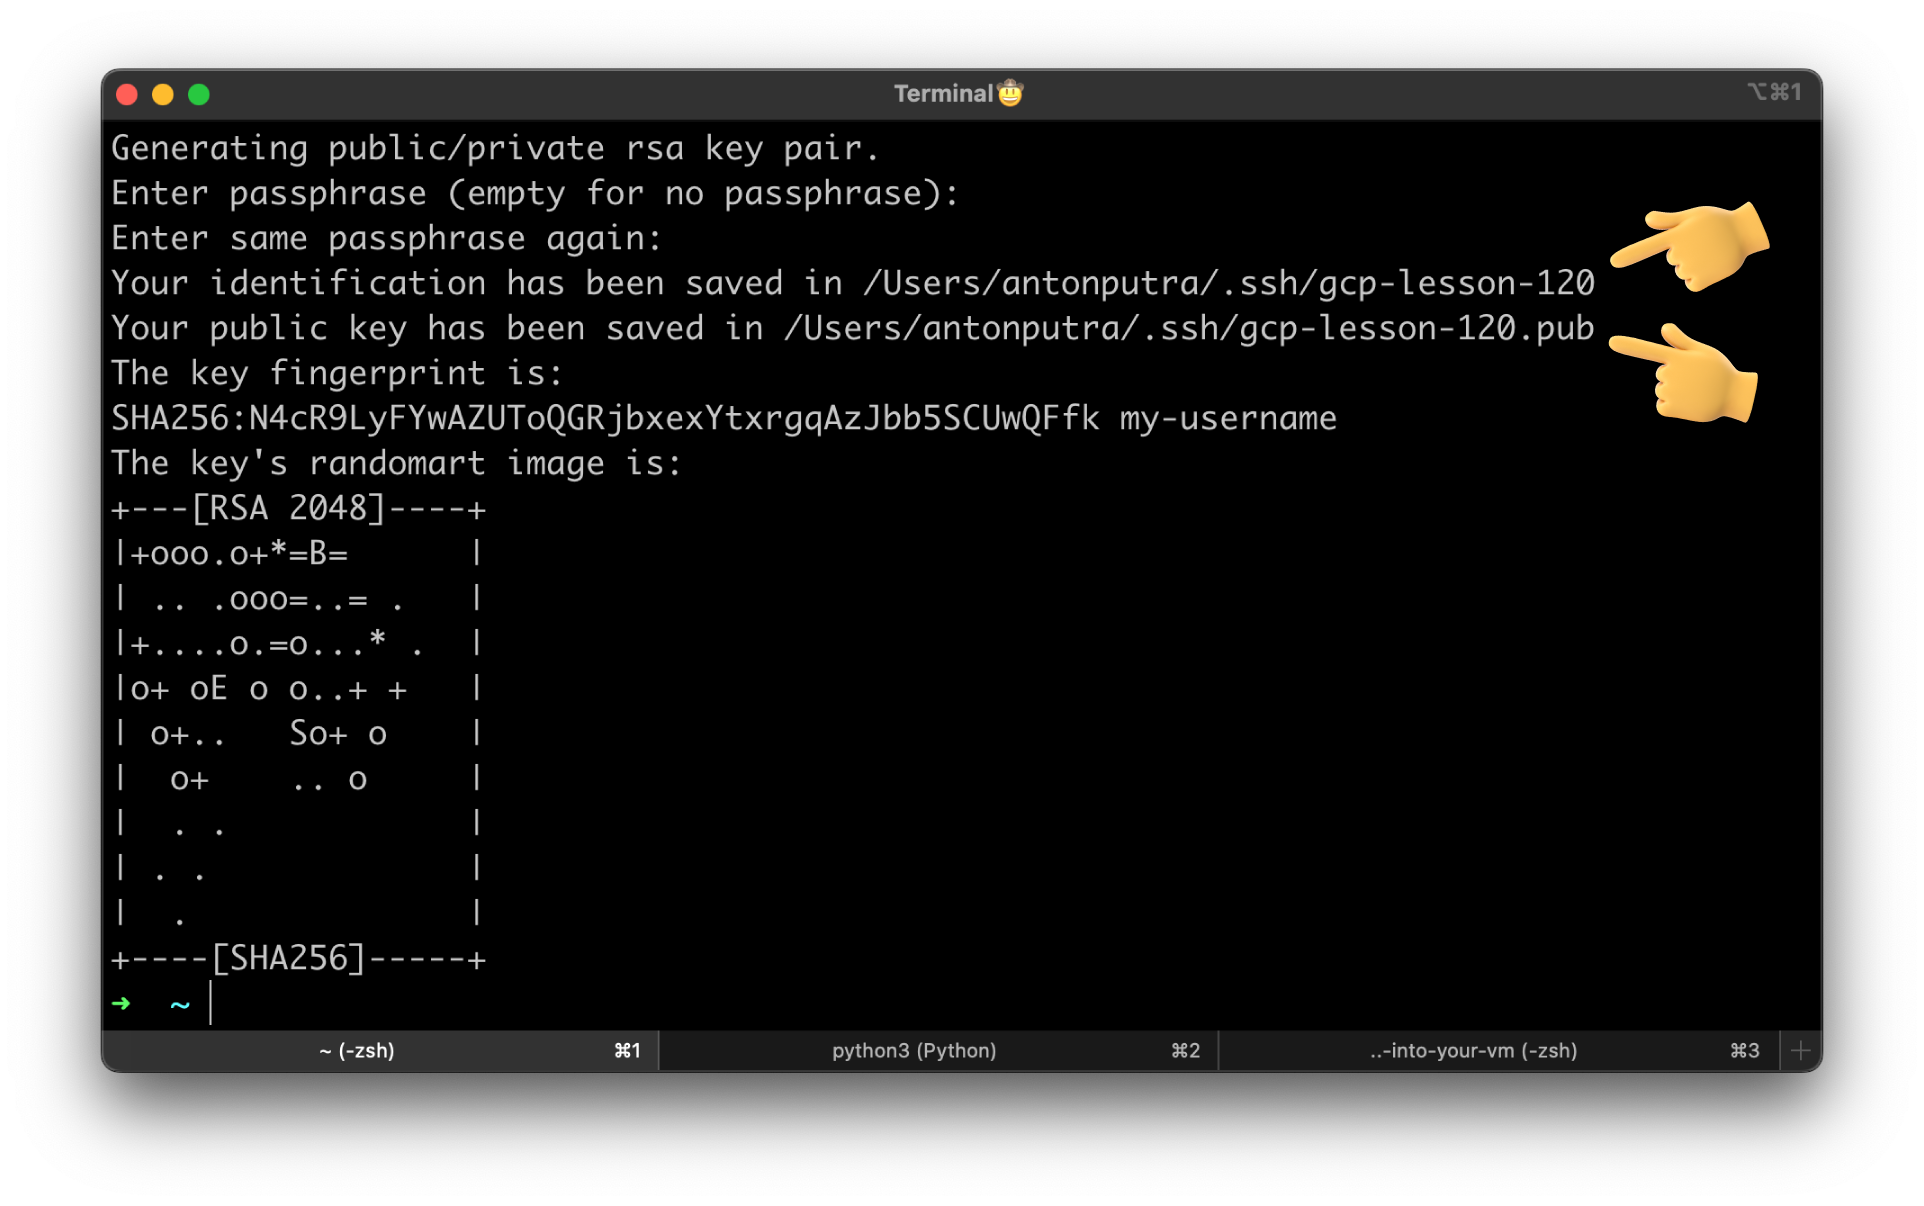
Let's generate an SSH key. Skip the passphrase; otherwise, you would need to enter the passphrase every time you need to SSH to the instance.
It's important to specify the username; you will use it to SSH to the virtual machine. Also, the path to store private and public keys.
You have a private and a public key that we will upload to Google Cloud. Your private key should stay on your local machine.
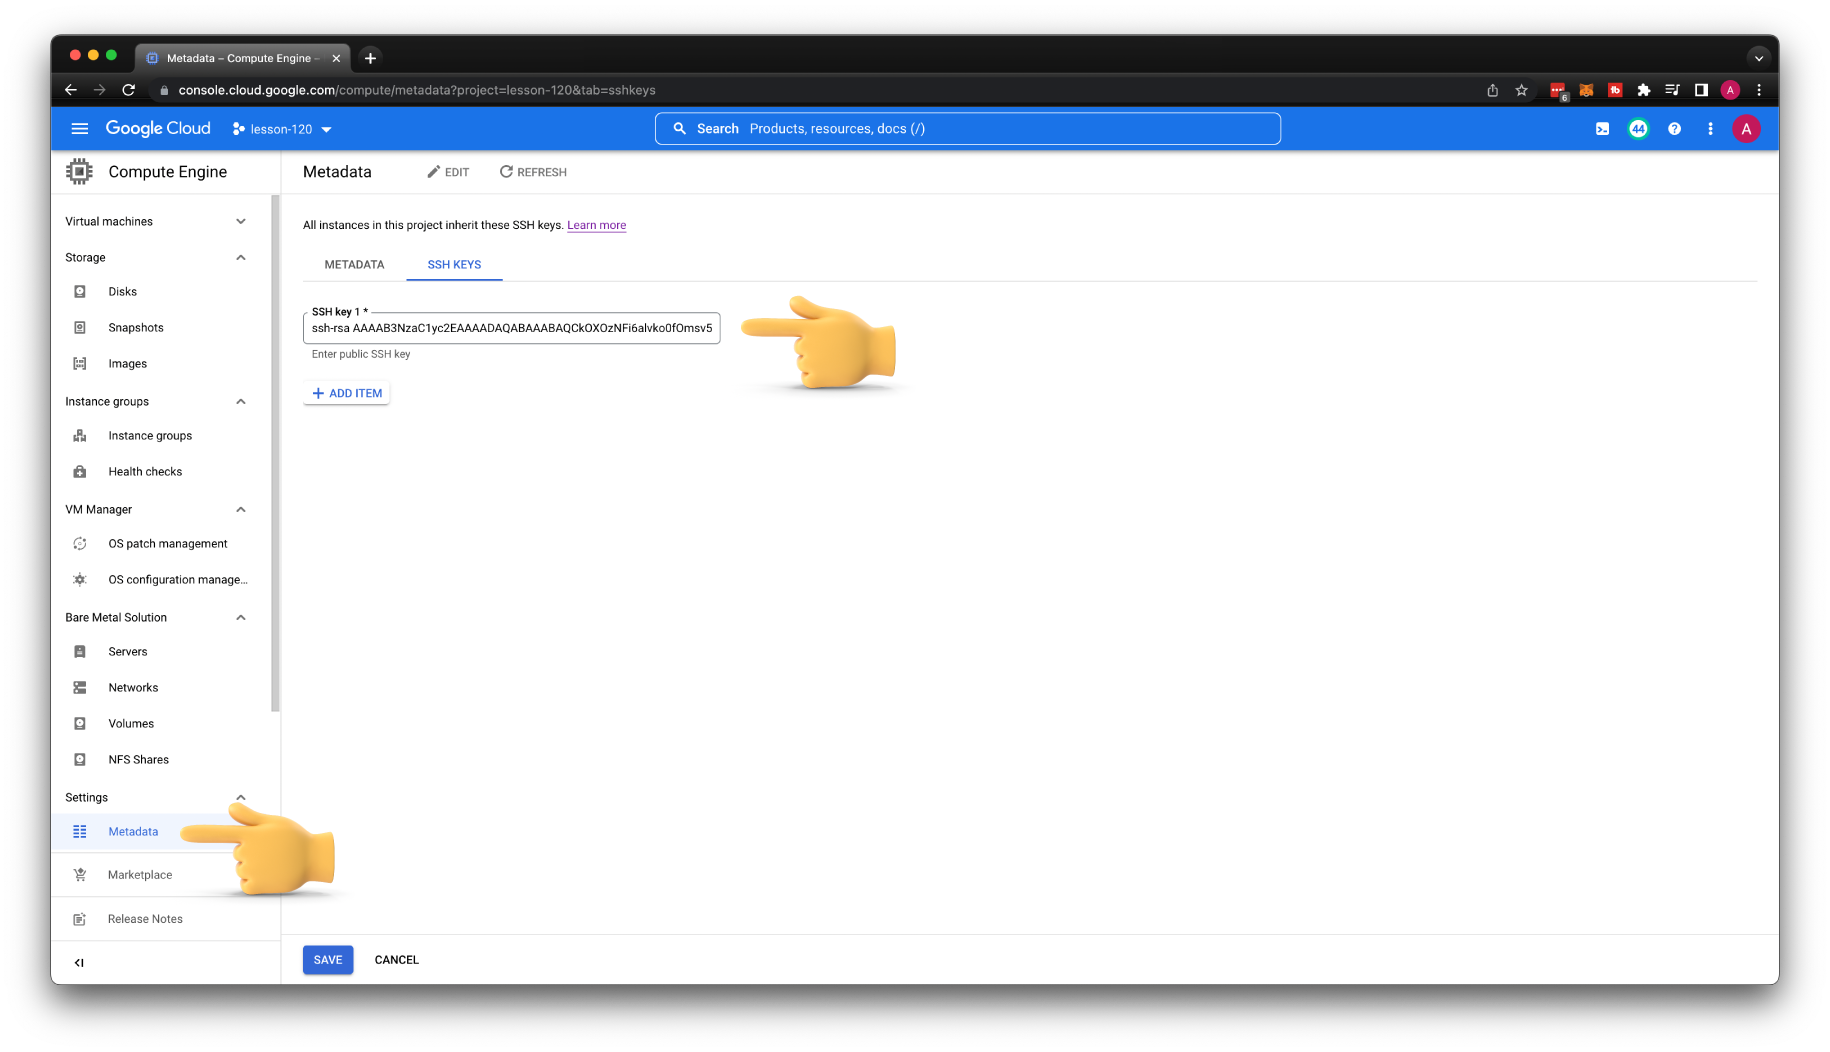
Get the content of the public key.
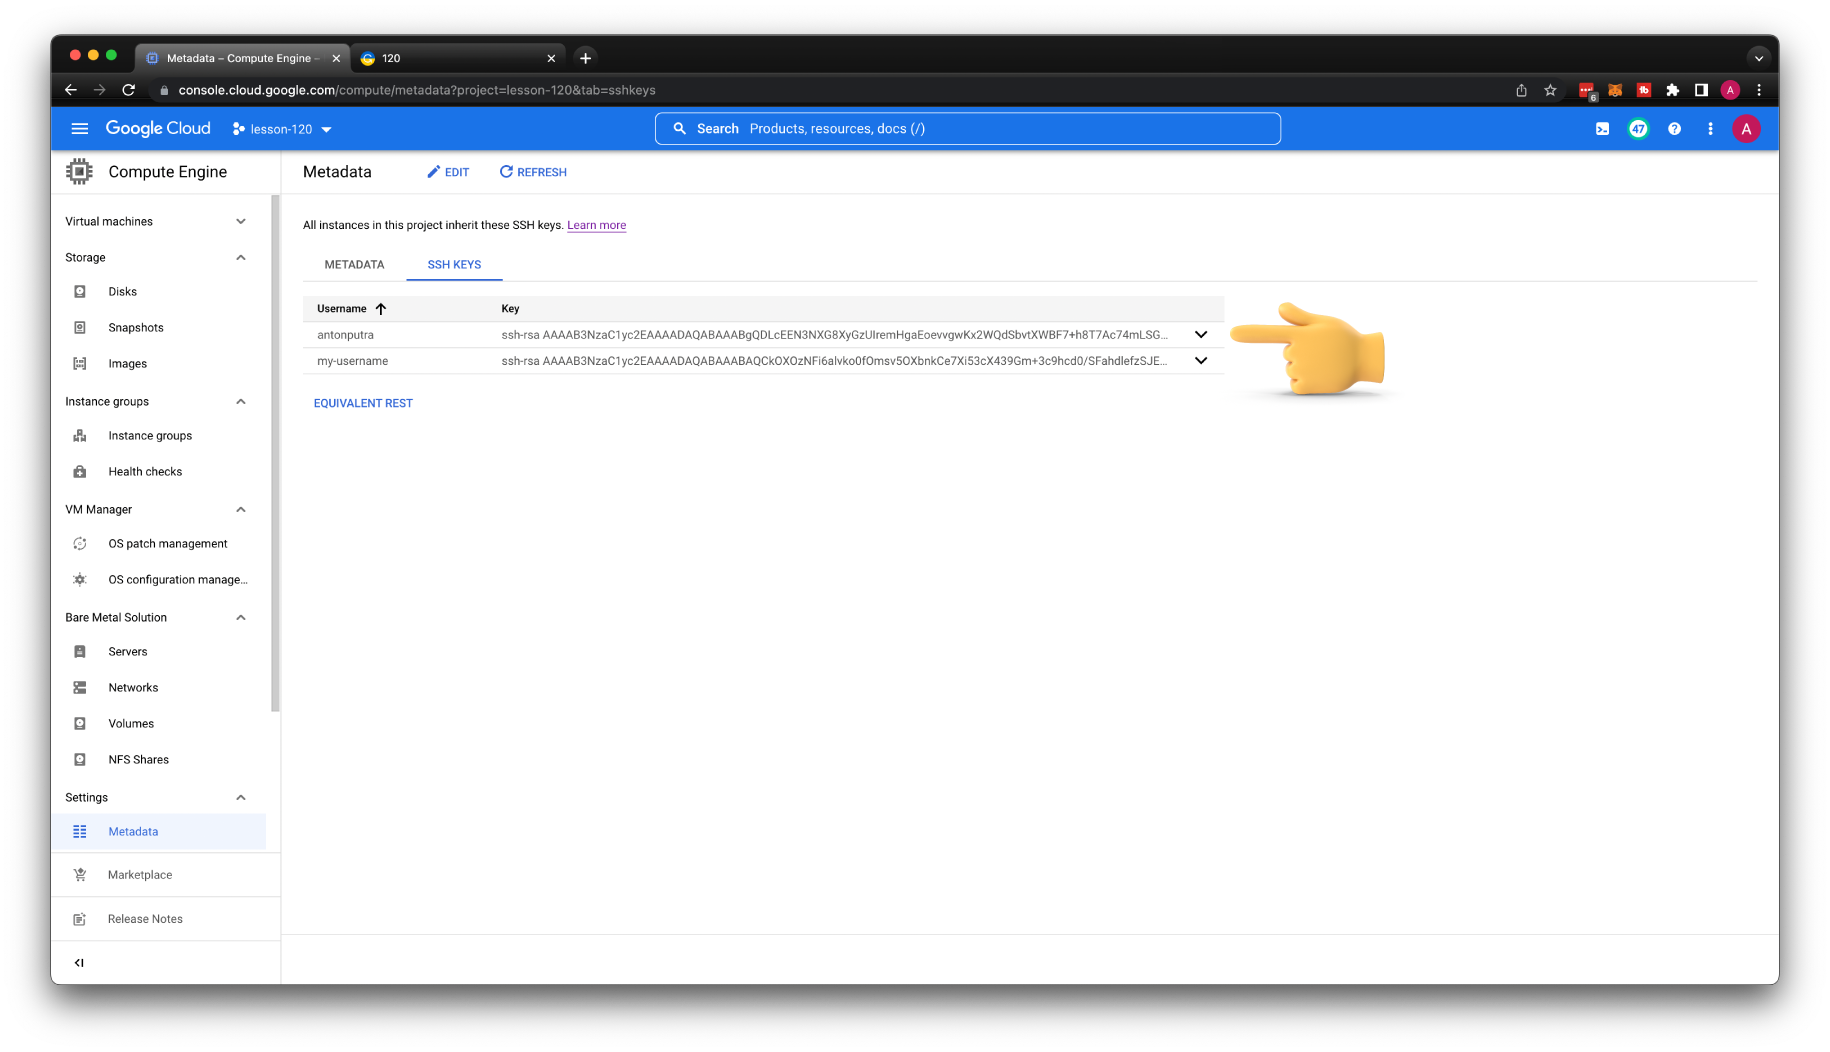
Then go to Metadata under Compute Engine and upload your public key.
Since we deleted the default VPC along with all firewall rules, we need to create one to allow SSH access. Select the main VPC and all the targets in the network. For the source, you can limit it to your IP or, for now, keep it open to everyone. Later, I'll show you another method to limit exposure.

Now, let's see if we can SSH to the virtual machine. Create a new VM, and call it public-instance-1. Then select the region, us-central1 is one of the cheapest regions in Google Cloud. Also, choose the smallest instance type, for example, e2-micro.
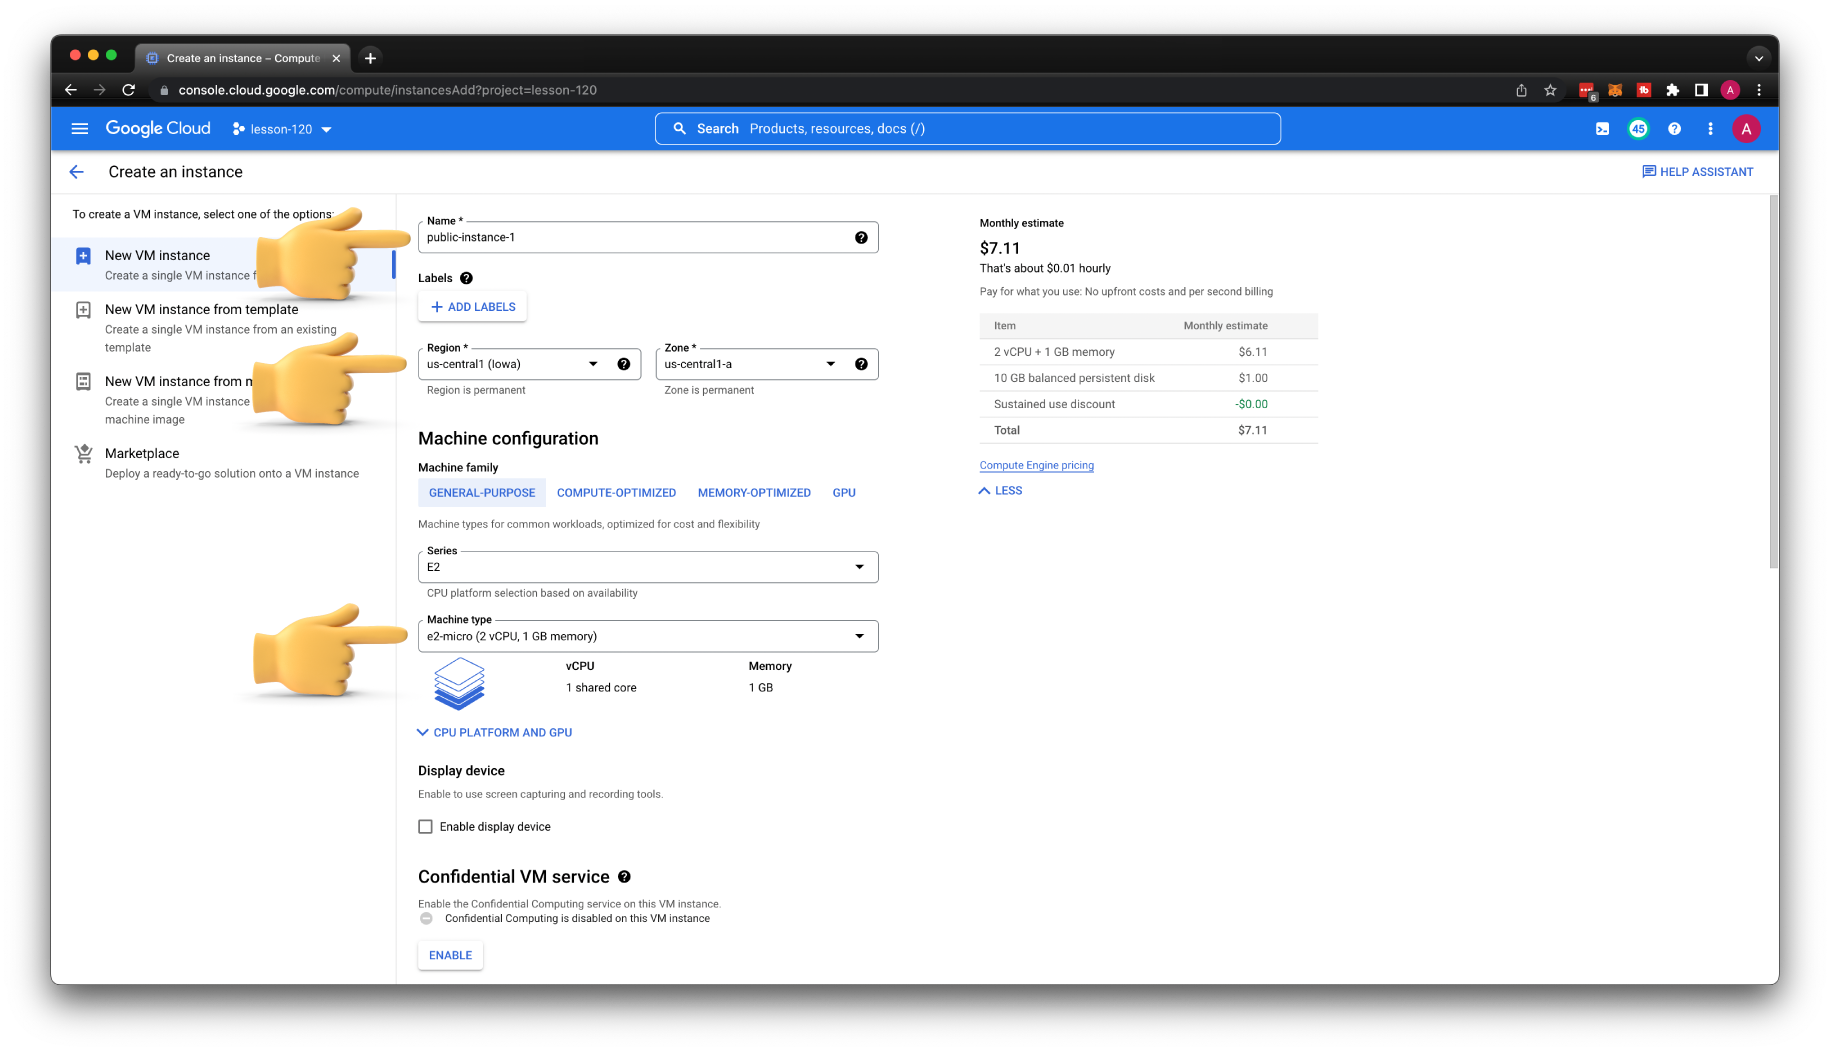
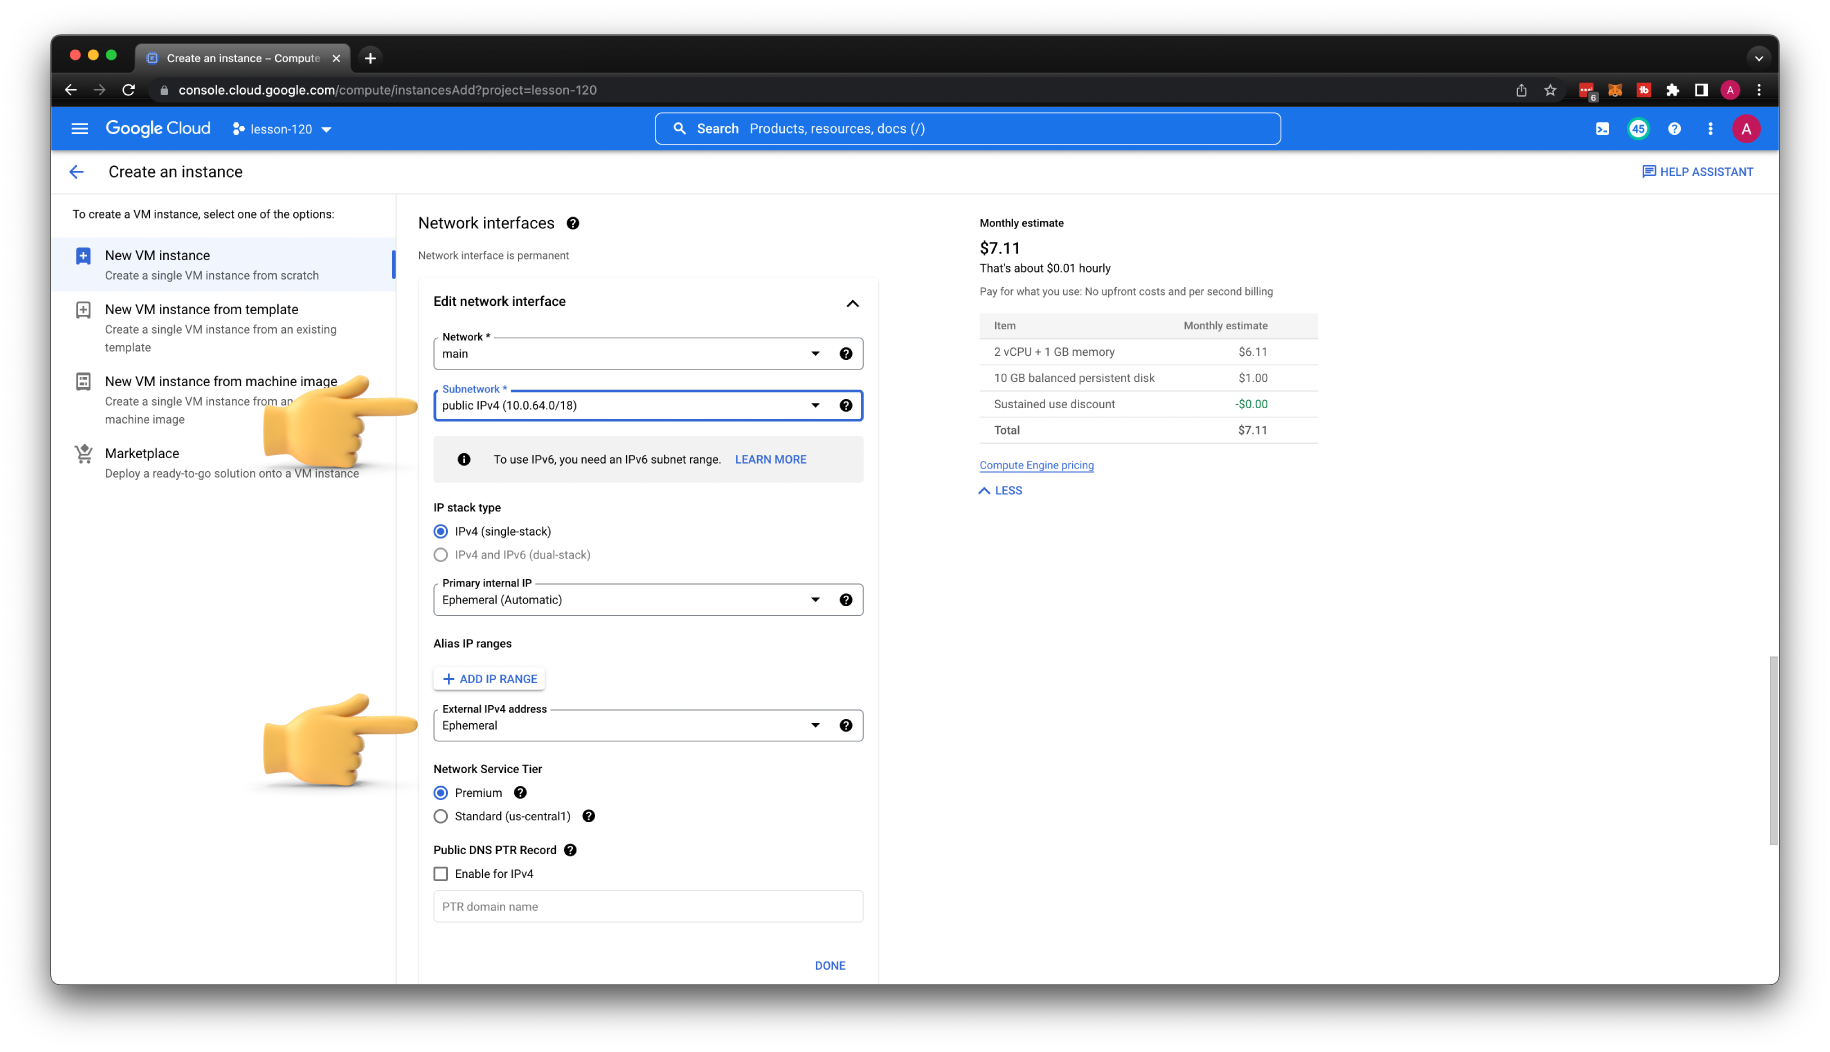
For the subnetwork, select public subnet. Make sure that the External IP address is set to Ephemeral and click create VM.
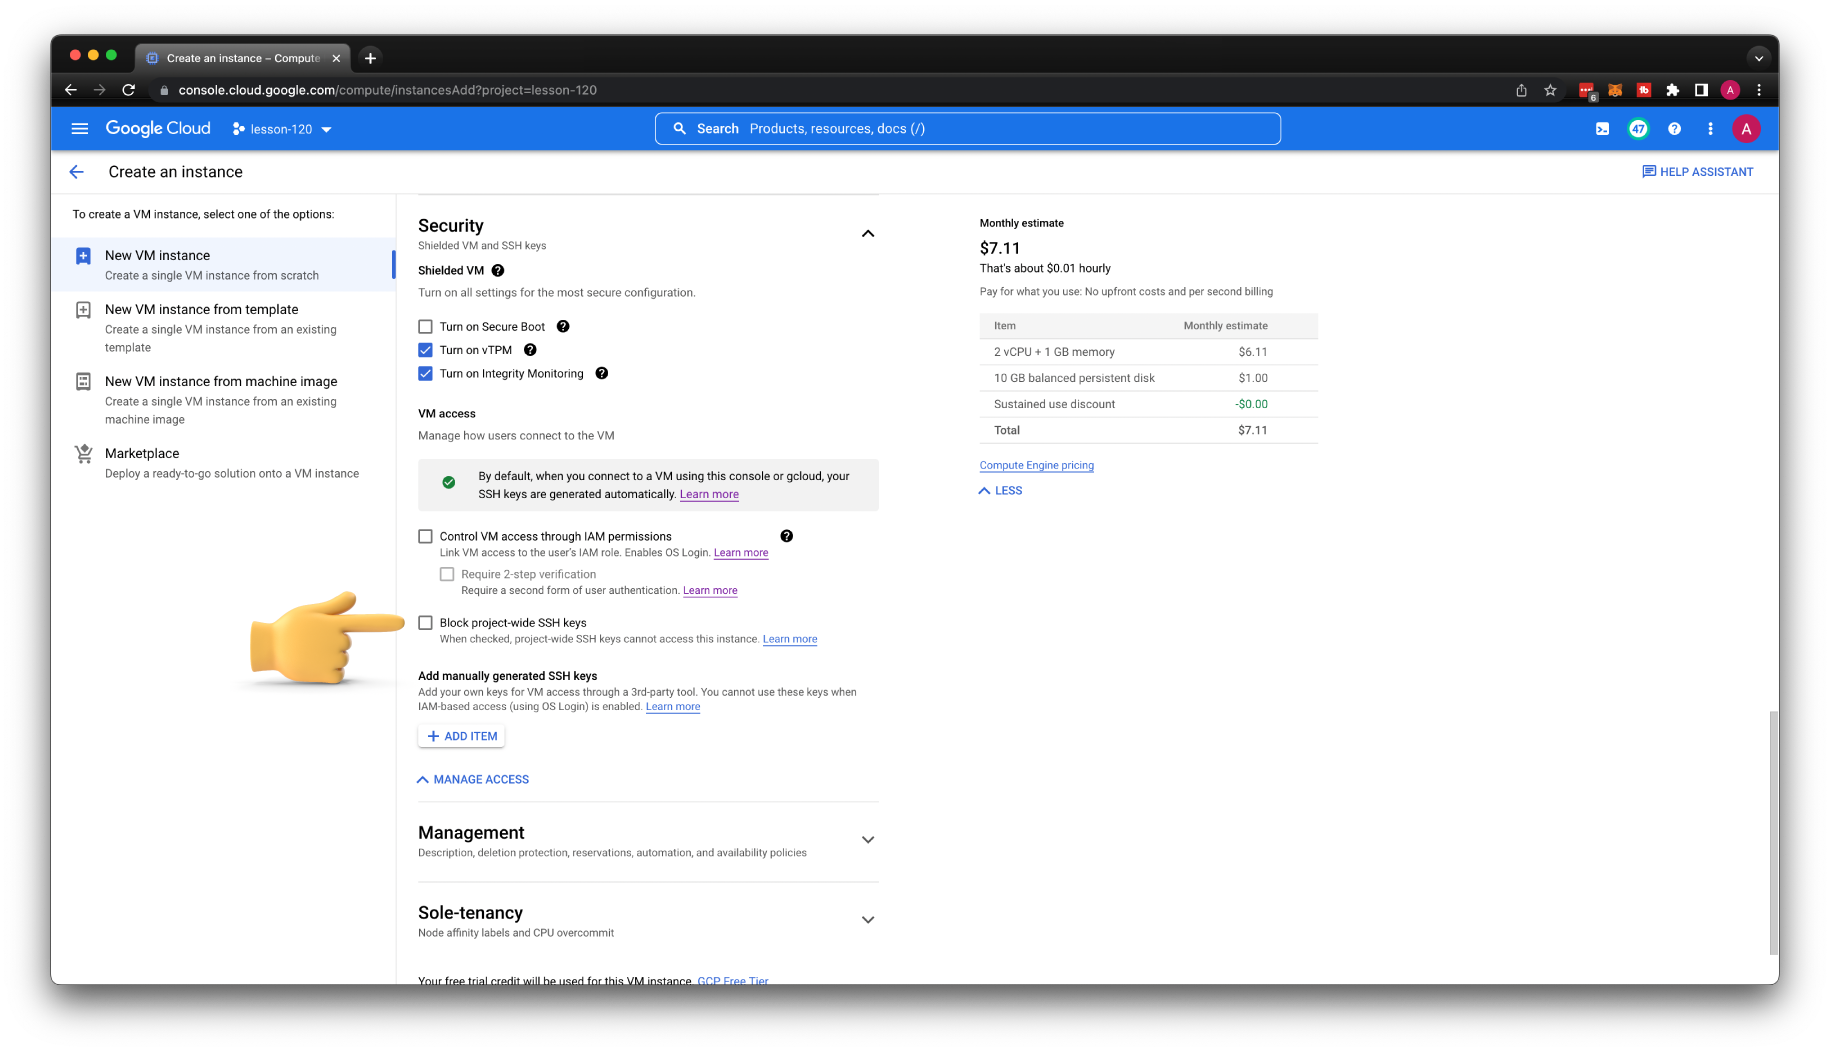
As an option, you can block project-wide SSH keys on specific VMs.
Since we don't have a bastion host or a VPN, let's use the public IP address to SSH to the instance.
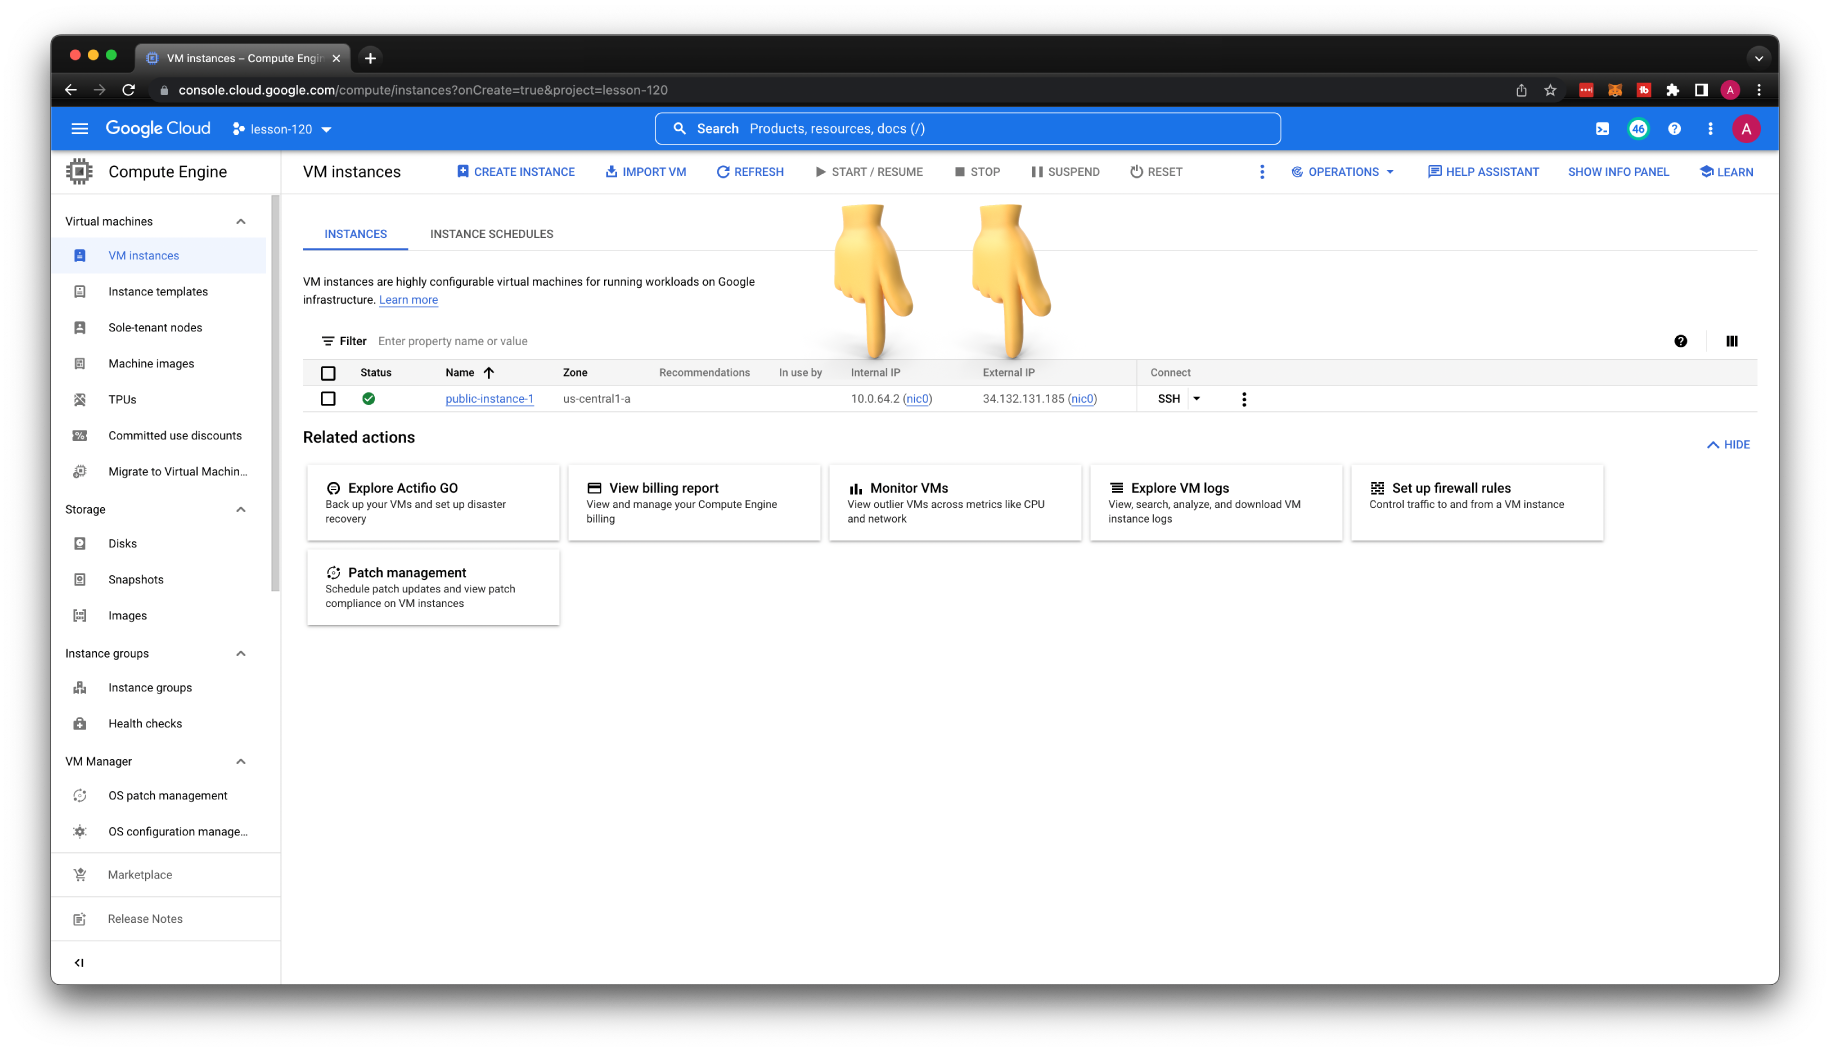
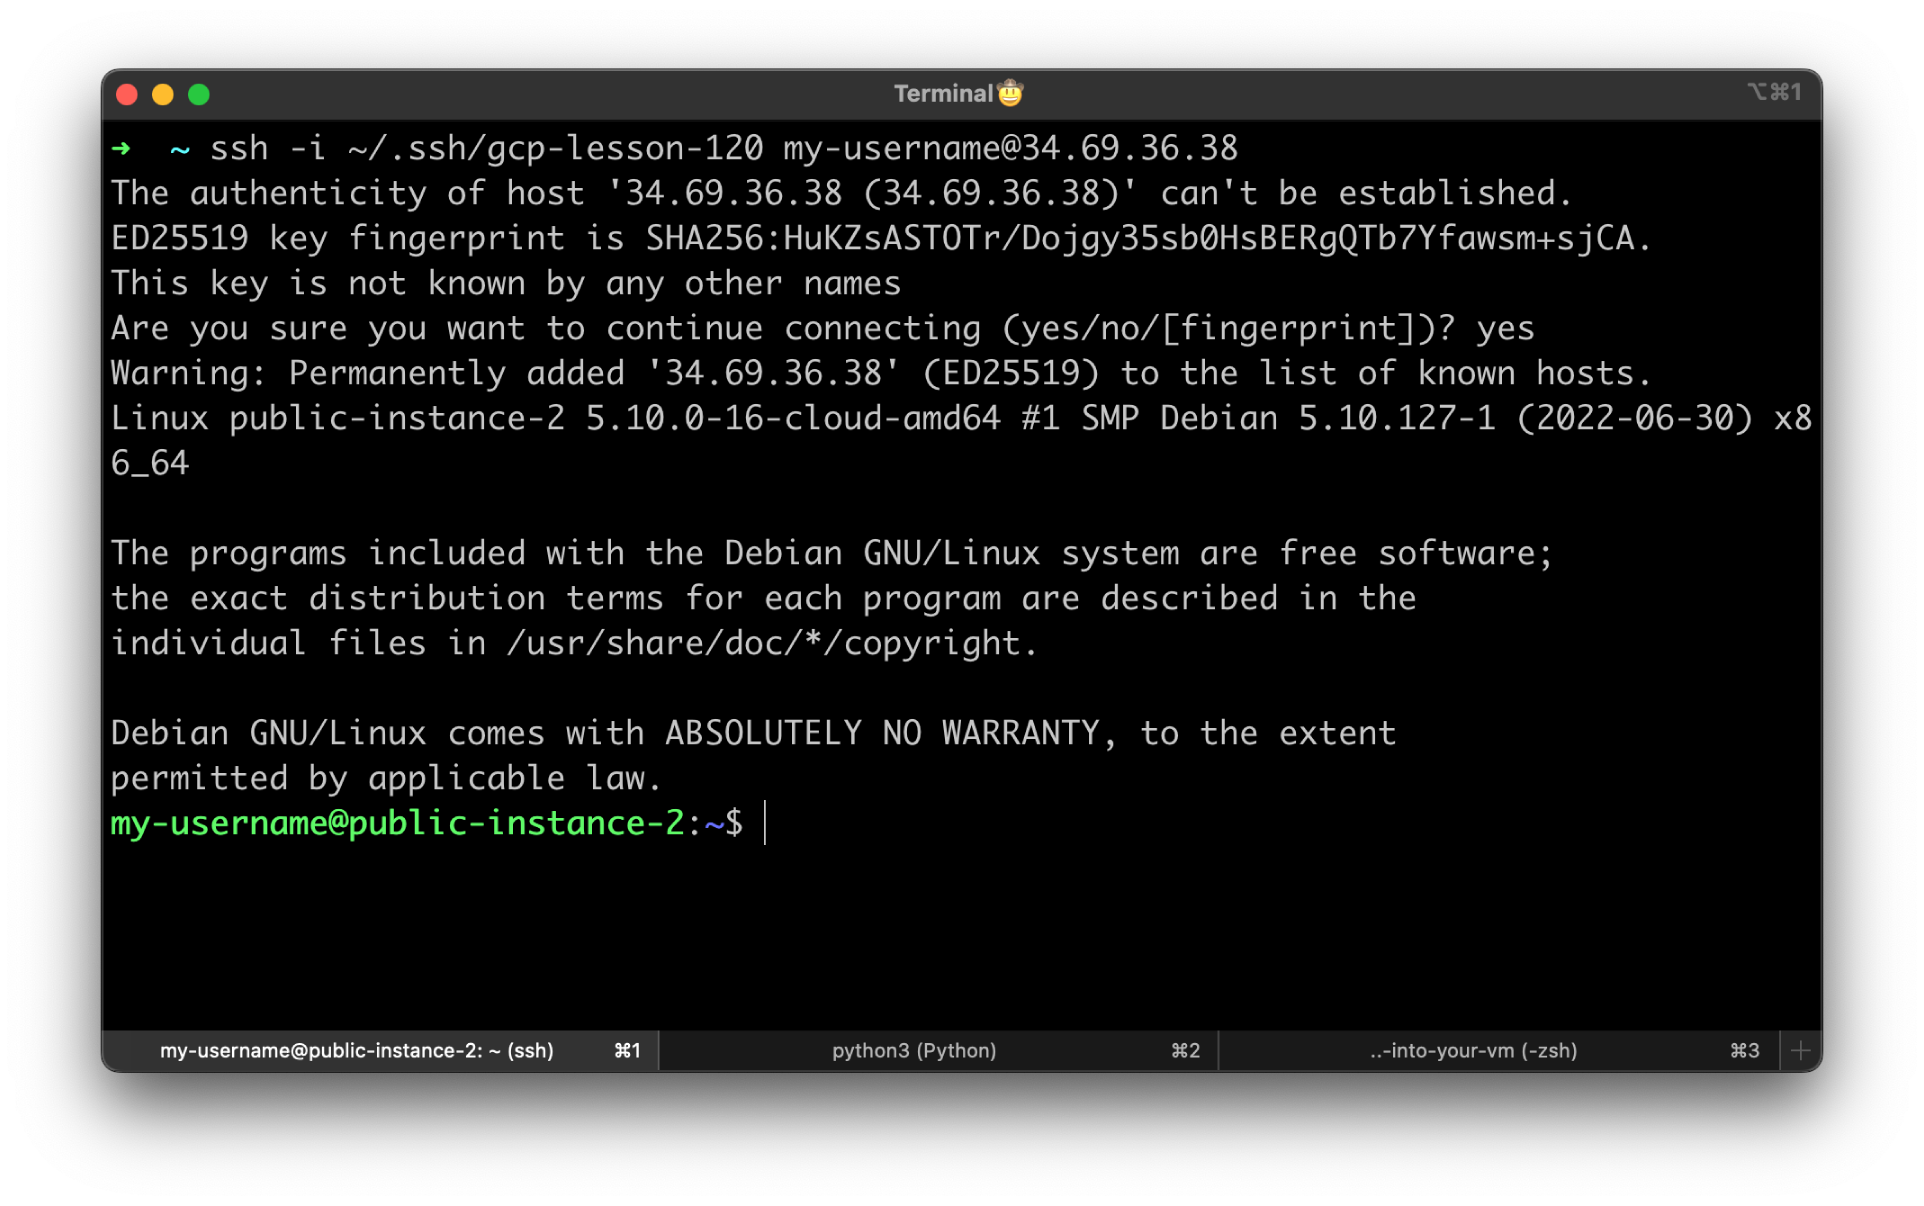
Specify the private key that we generated earlier with the username. Replace the public IP address with yours from the GCP console.
By now, you should be able to SSH to the instance. If you get a timeout, check the firewall rule or that you're using the public IP instead of private.

Add SSH Key to Instance
You can also add SSH keys directly to the instance. Let's create another VM, call it public-instance-2, with the same parameters as the previous one. You can upload your SSH key under the Security section.
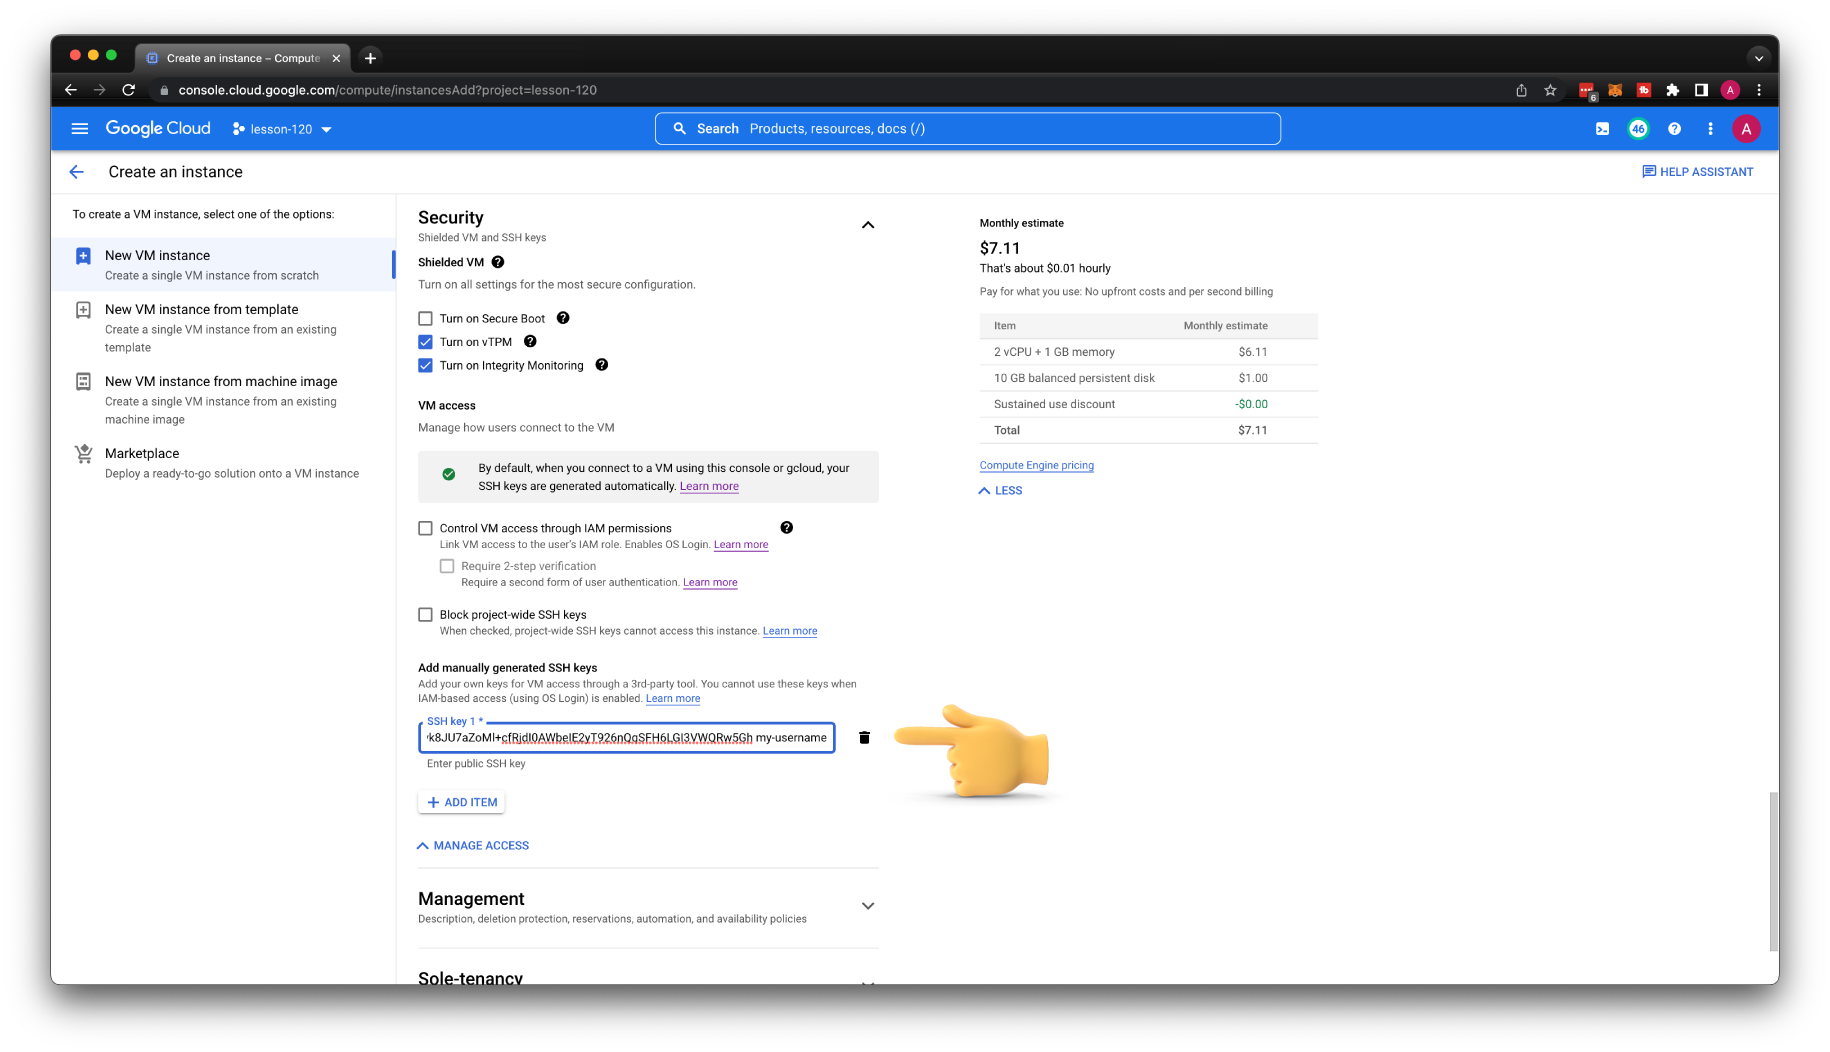
You can also upload the SSH key to the existing VM. Click Edit and add another key.
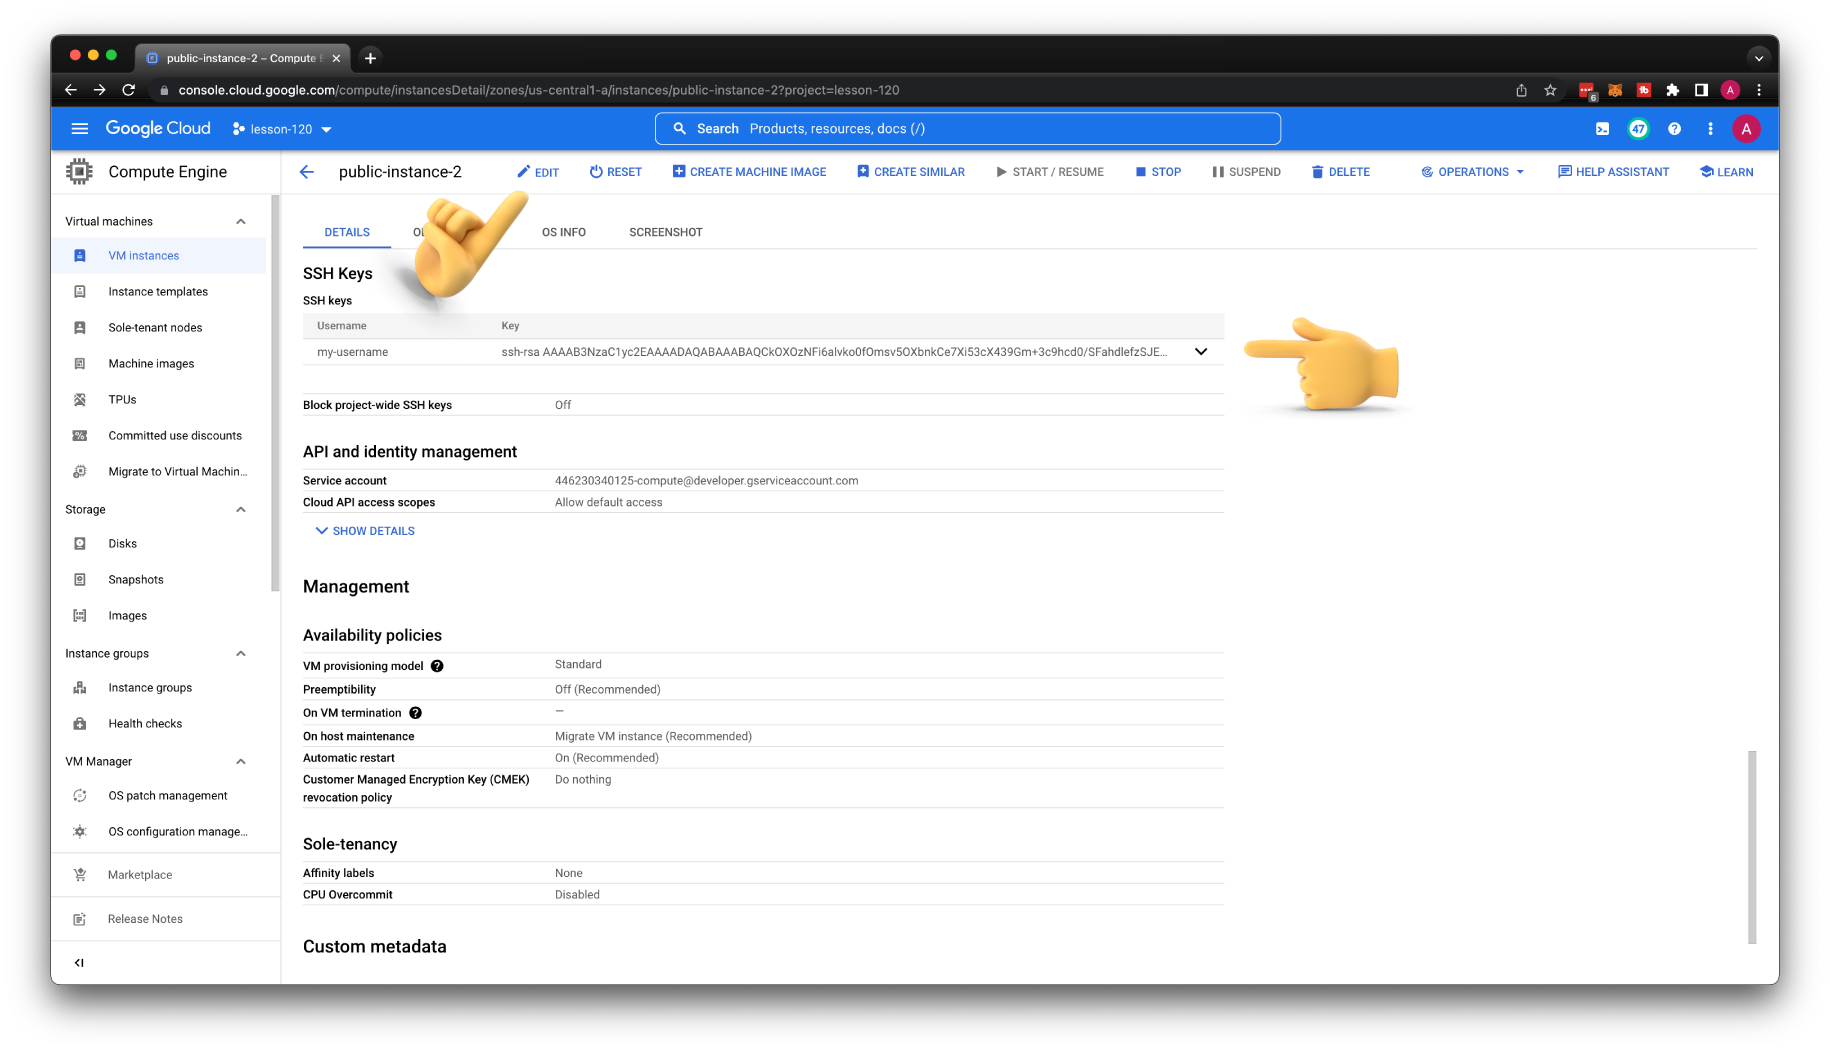
Let's get a public IP and try to SSH to the second VM.
It works; we can use project-wide SSH keys and upload individual keys directly to the specific VM.
Using gcloud cli to SSH
The next more secure approach to SSH to the instance is to use gcloud cli or use a similar browser feature to open the SSH tunnel. You can use it just to manage SSH keys on your behave or with Identity-Aware Proxy (IAP) if you need to SSH to the instance with the only private IP address.
With public IP
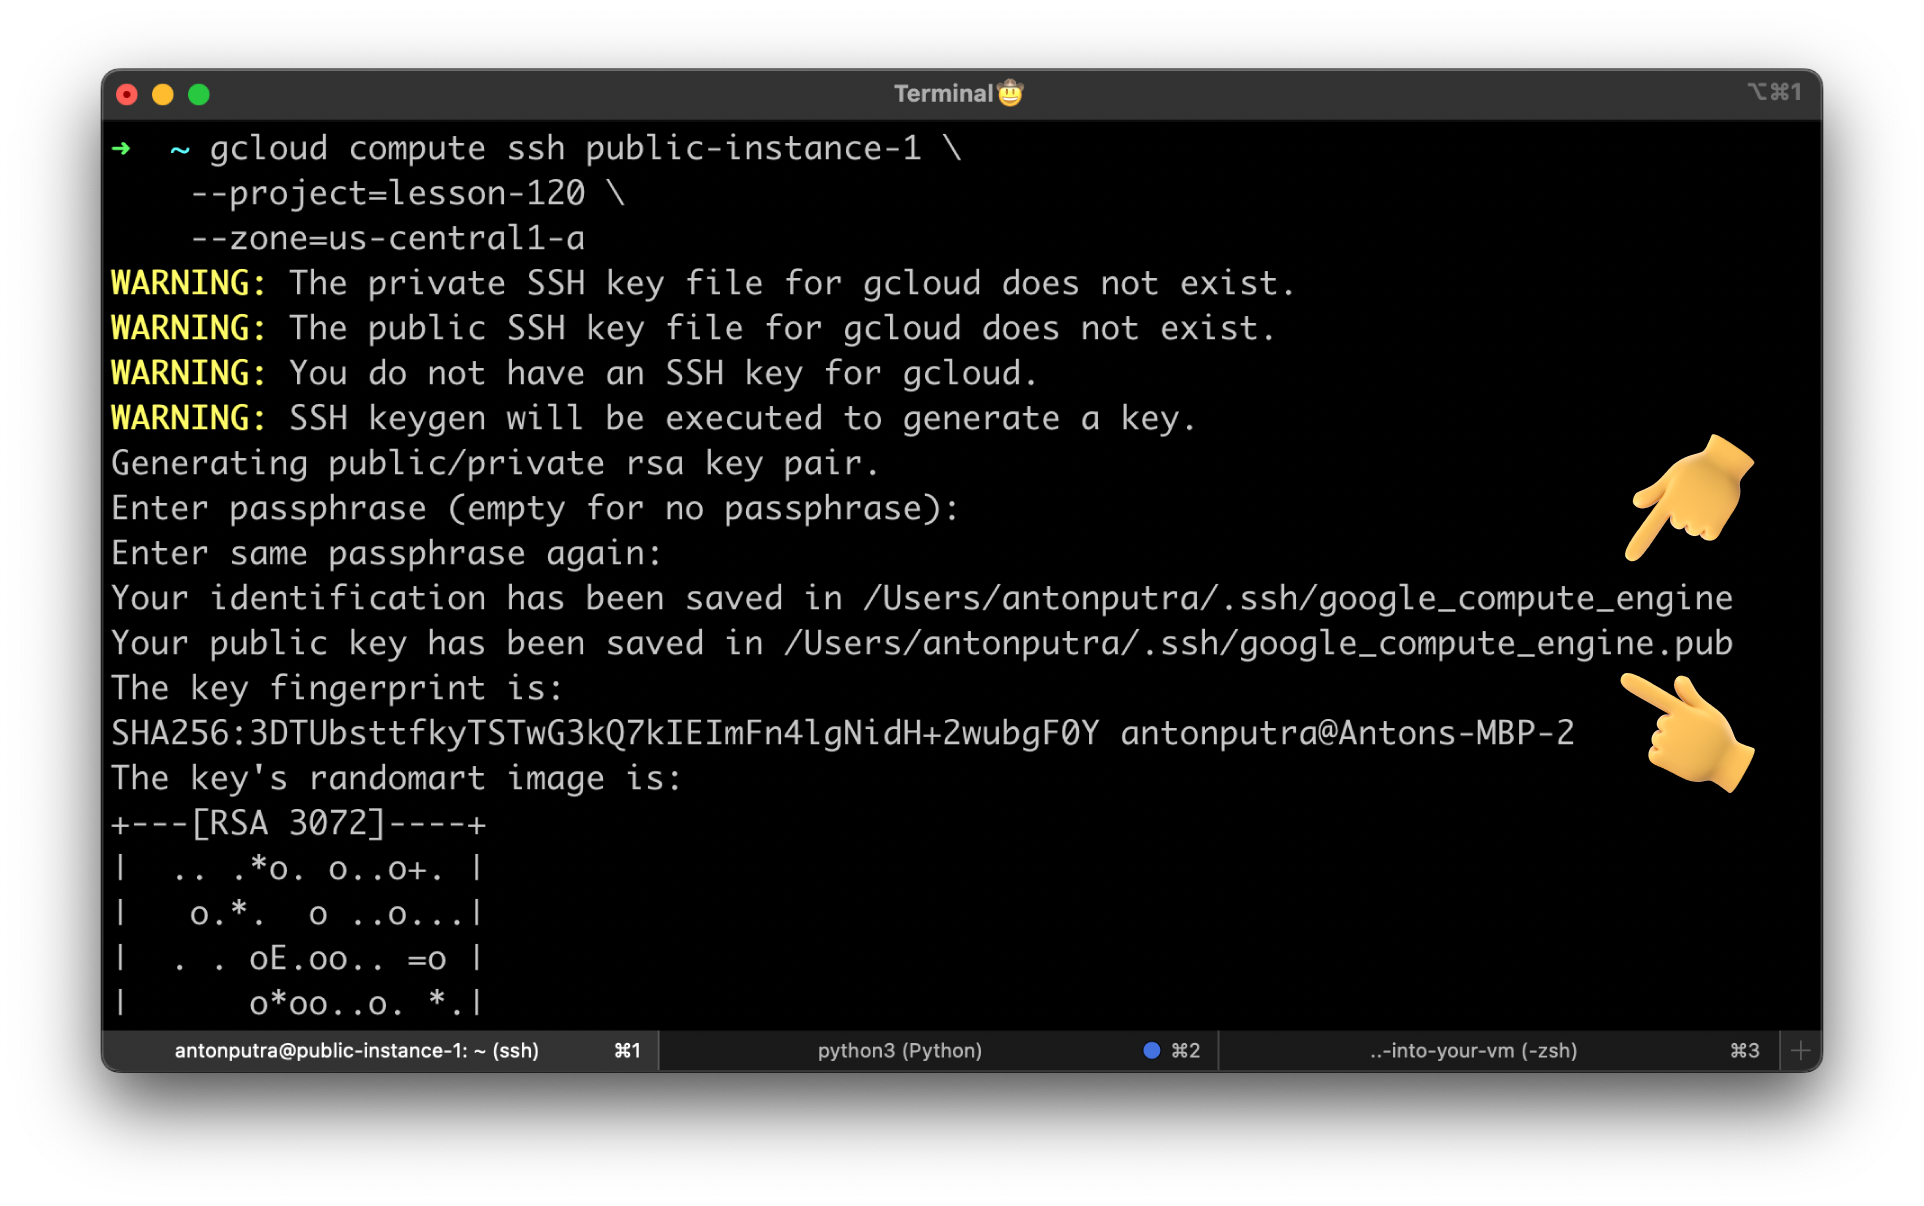
First of all, let's try to SSH to the instance with the public IP address using the gcloud cli command. We would need the same firewall rule to allow SSH access from all IP addresses.
If you have never used it, gcloud will generate a new SSH key pair and also upload the public key to project metadata. If you have disabled project-wide SSH keys on the specific VM and try to use gcloud to SSH. It will upload that key directly to the VM.
Sometimes that's a reason for terraform drift unless you explicitly ignore SSH keys in terraform code using the life cycle method.
You can find a newly generated SSH key in project metadata.
With private IP
Most virtual machines won't have a public IP address, and probably no one will allow you to open port 22 to everyone.
Before we begin, let's remove the firewall rule that allows default SSH access.

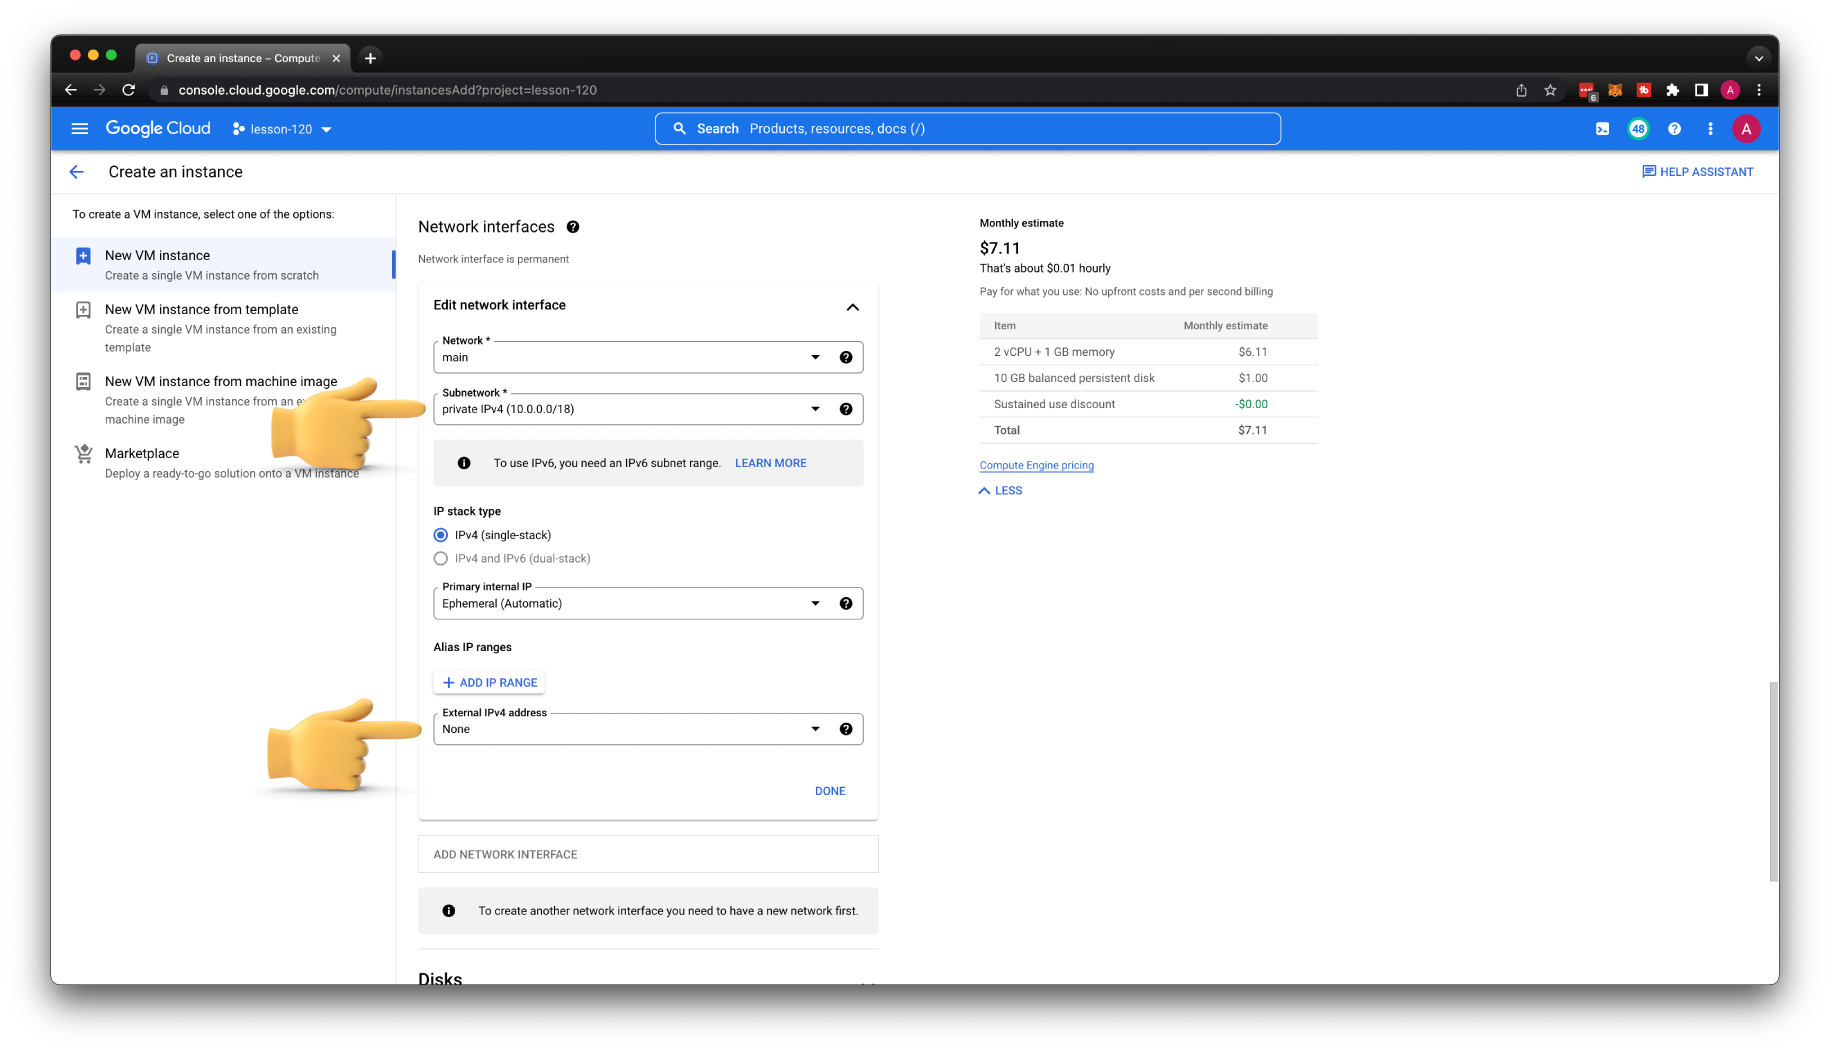
Create another virtual machine and call it private-instance-3. Place it in a private subnet and disable external IP address.
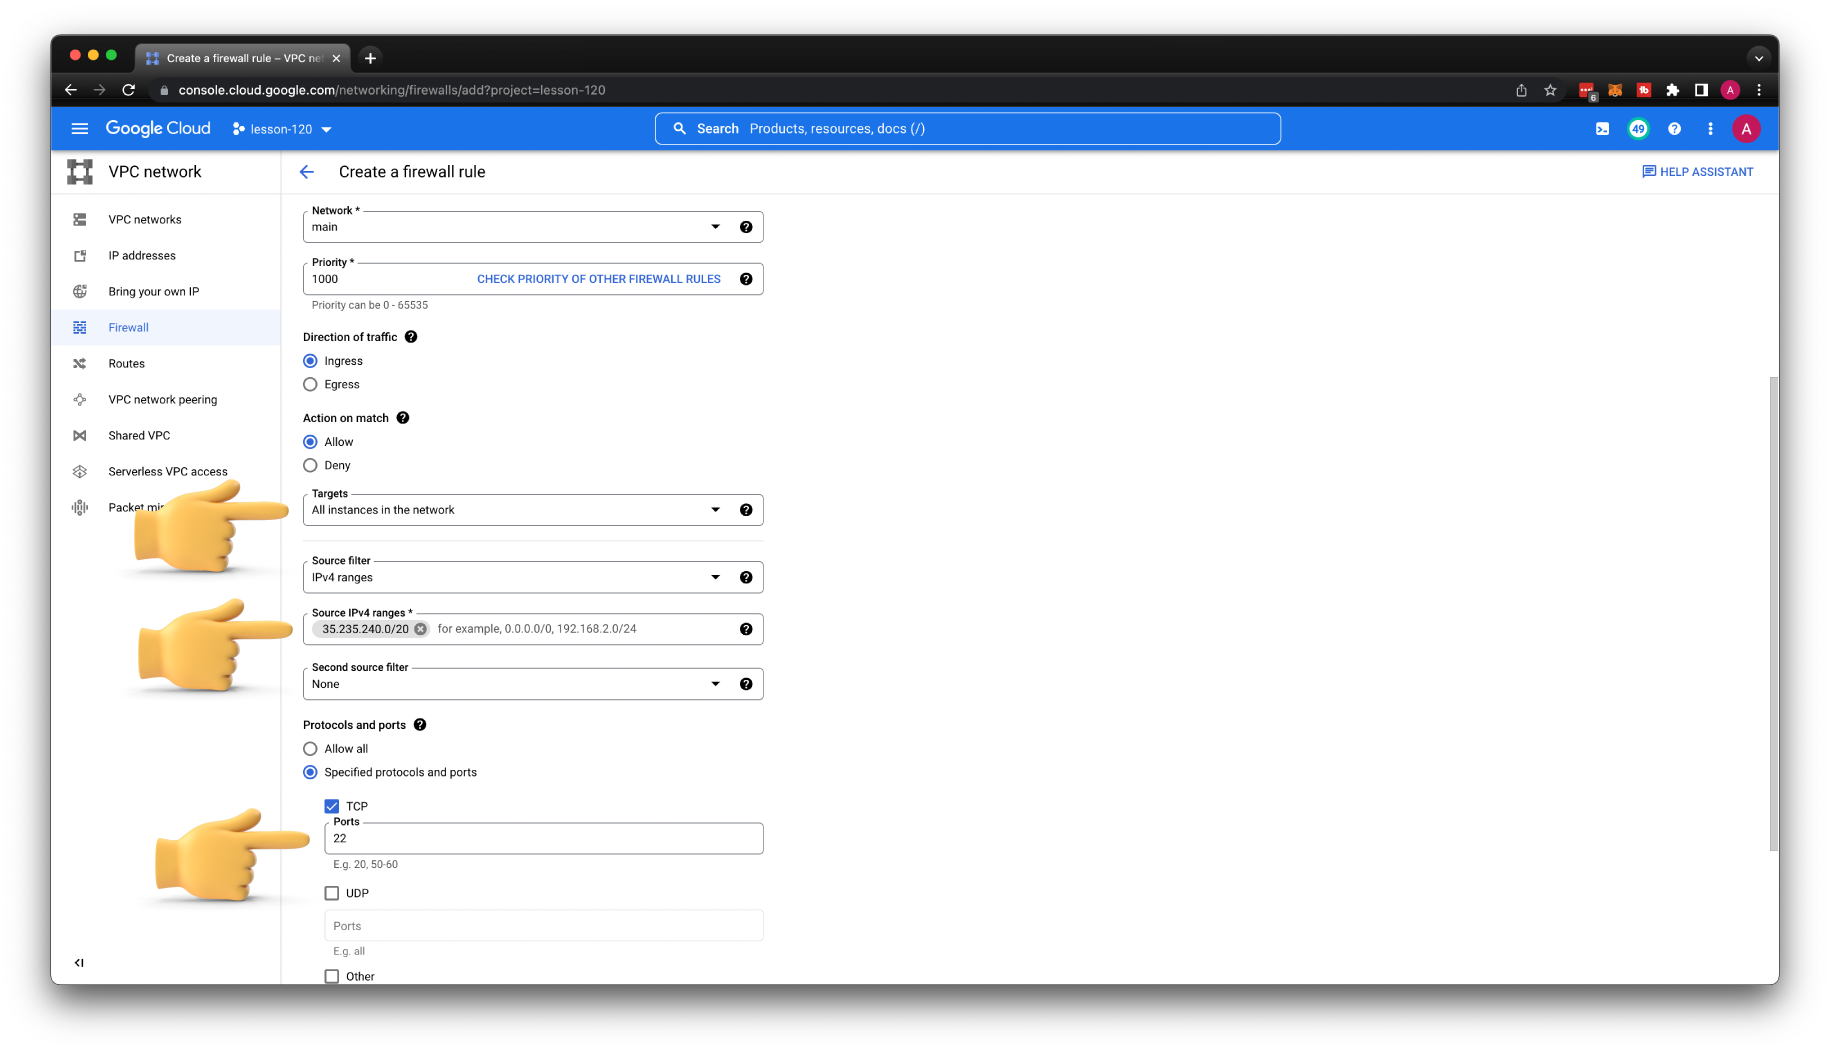
We also need to create a firewall rule that would allow to SSH to the VM using Identity-Aware Proxy.
Let's call it allow-iap, and for the source, use a static CIDR range (35.235.240.0/20). You can add multiple ports, for example, 3389 for RDP.
Now, it's important; if the instance only has a private IP address, you can omit --tunnel-through-iap flag. It will give you a warning: External IP address was not found; defaulting to using IAP tunneling.
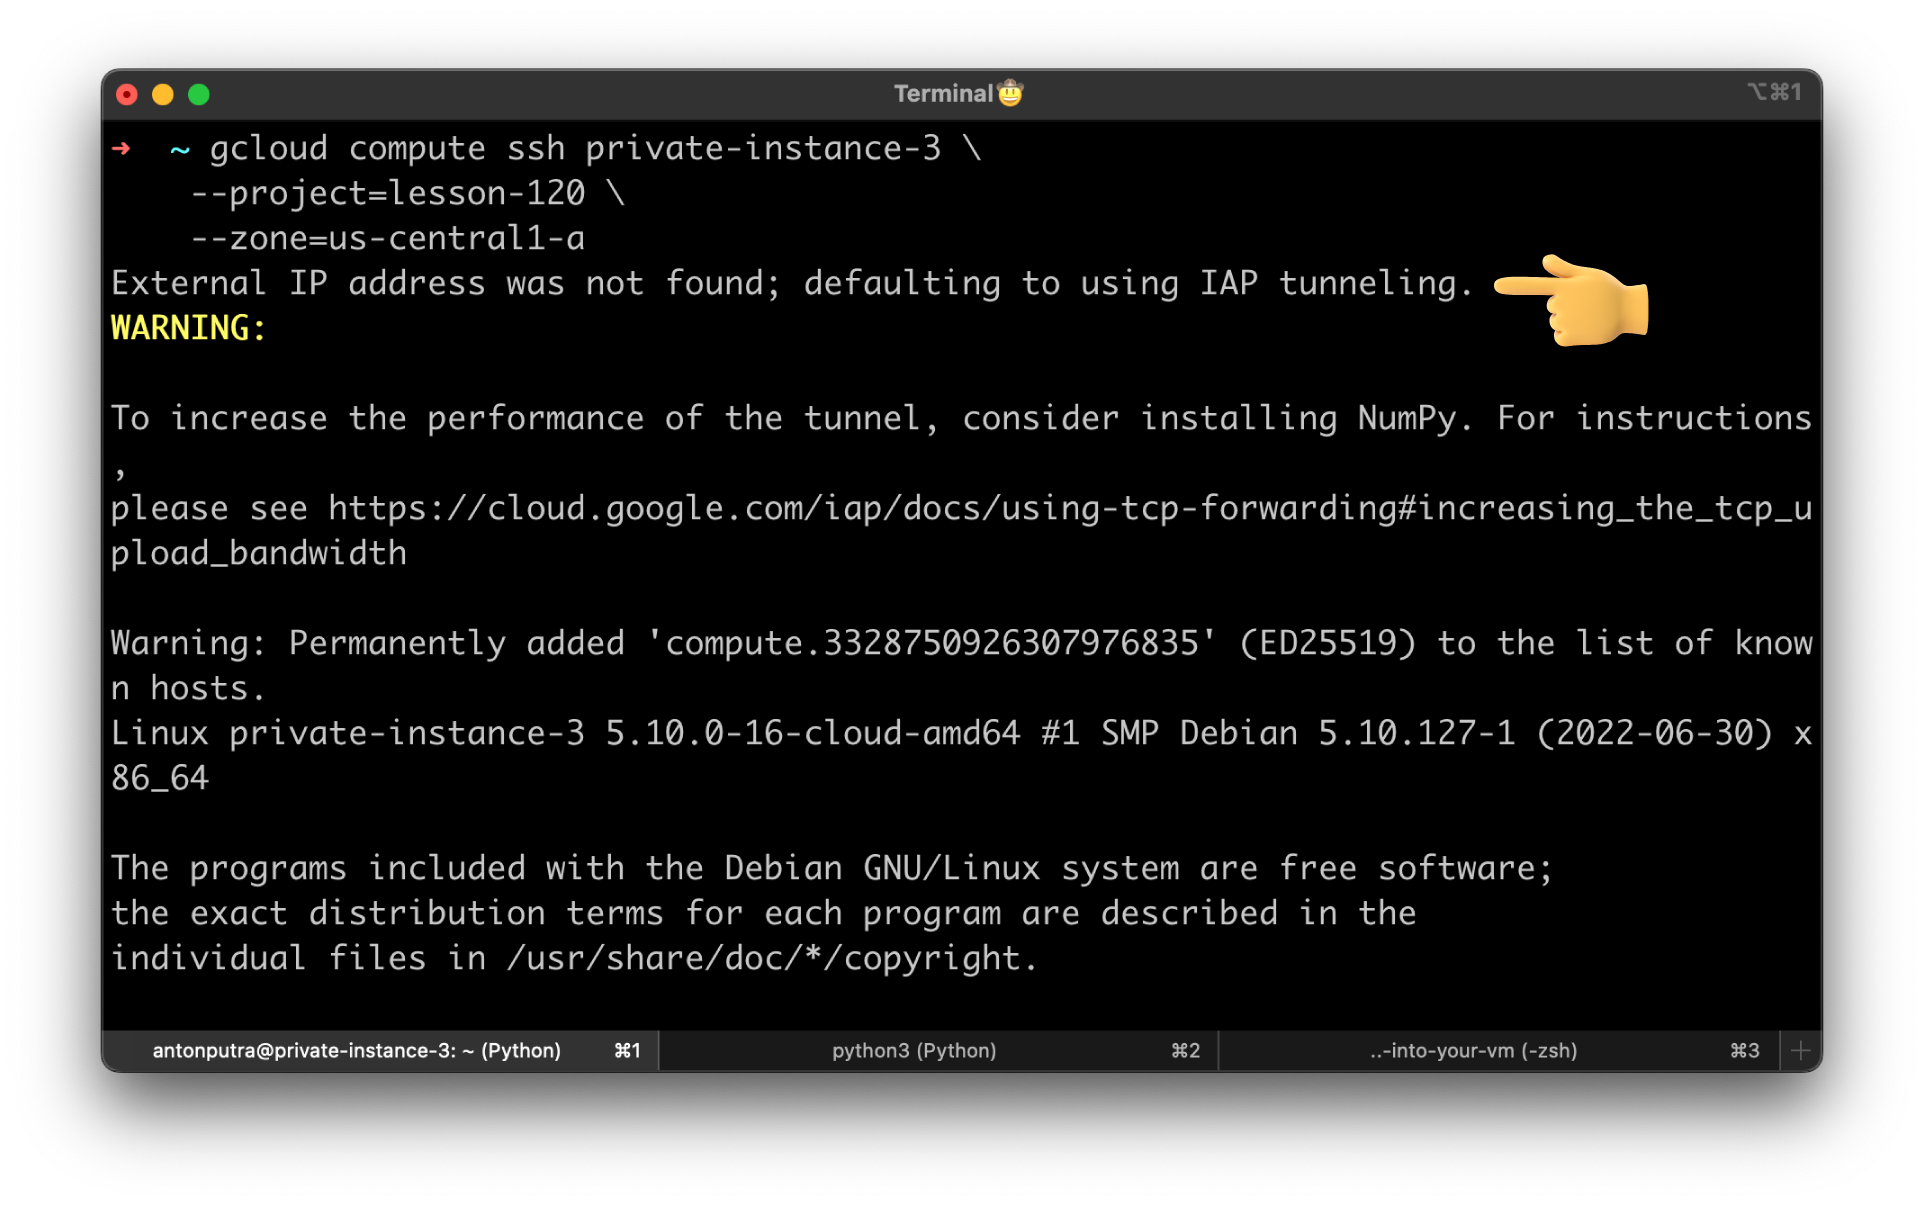
You can also force gcloud to use IAP with the following command:
gcloud compute ssh private-instance-3 \
    --project=lesson-120 \
--zone=us-central1-a \
--tunnel-through-iap
Grant IAM permissions to SSH
Since I'm the owner of this project, it is expected that I would have enough permissions to SSH to any VM. Let's explore what IAM role I need to grant to onboard a new user.
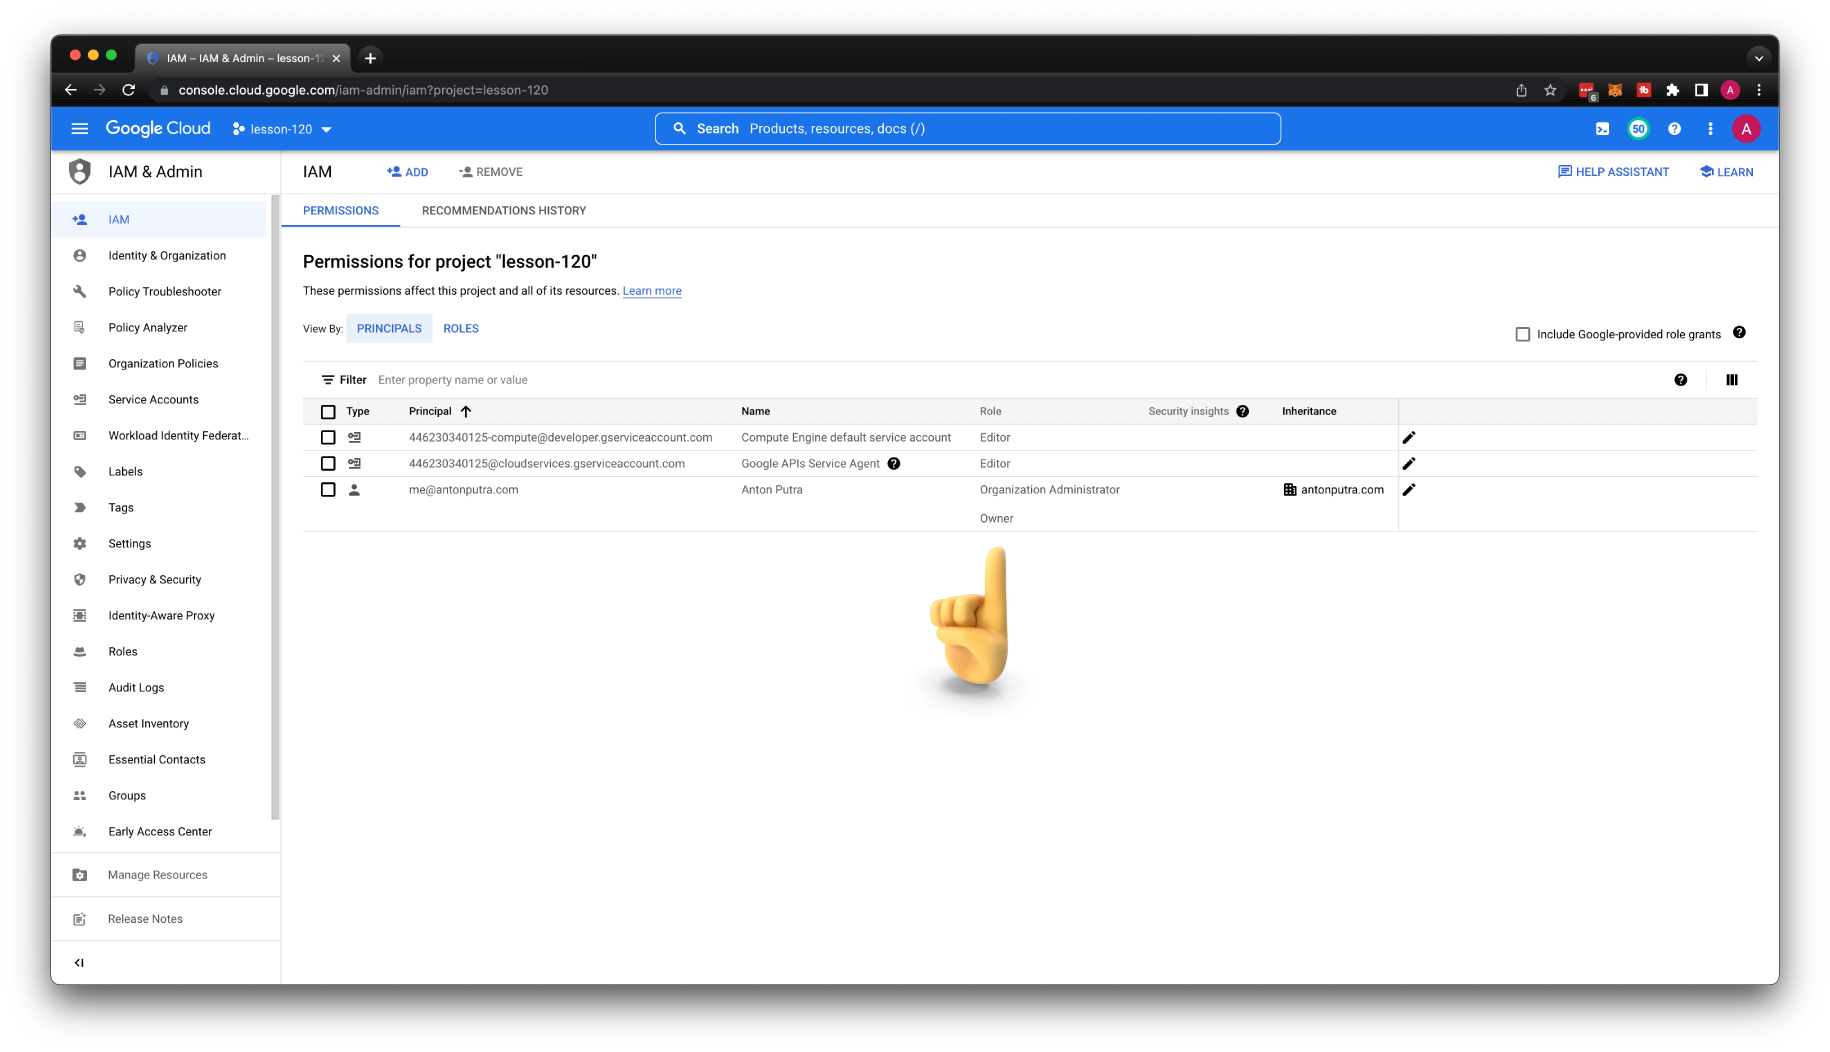
It's not so simple to add a new user as in AWS; let me simulate a new user with a service account. The effect is exactly the same; you just need to add permissions to the user instead of a service account.
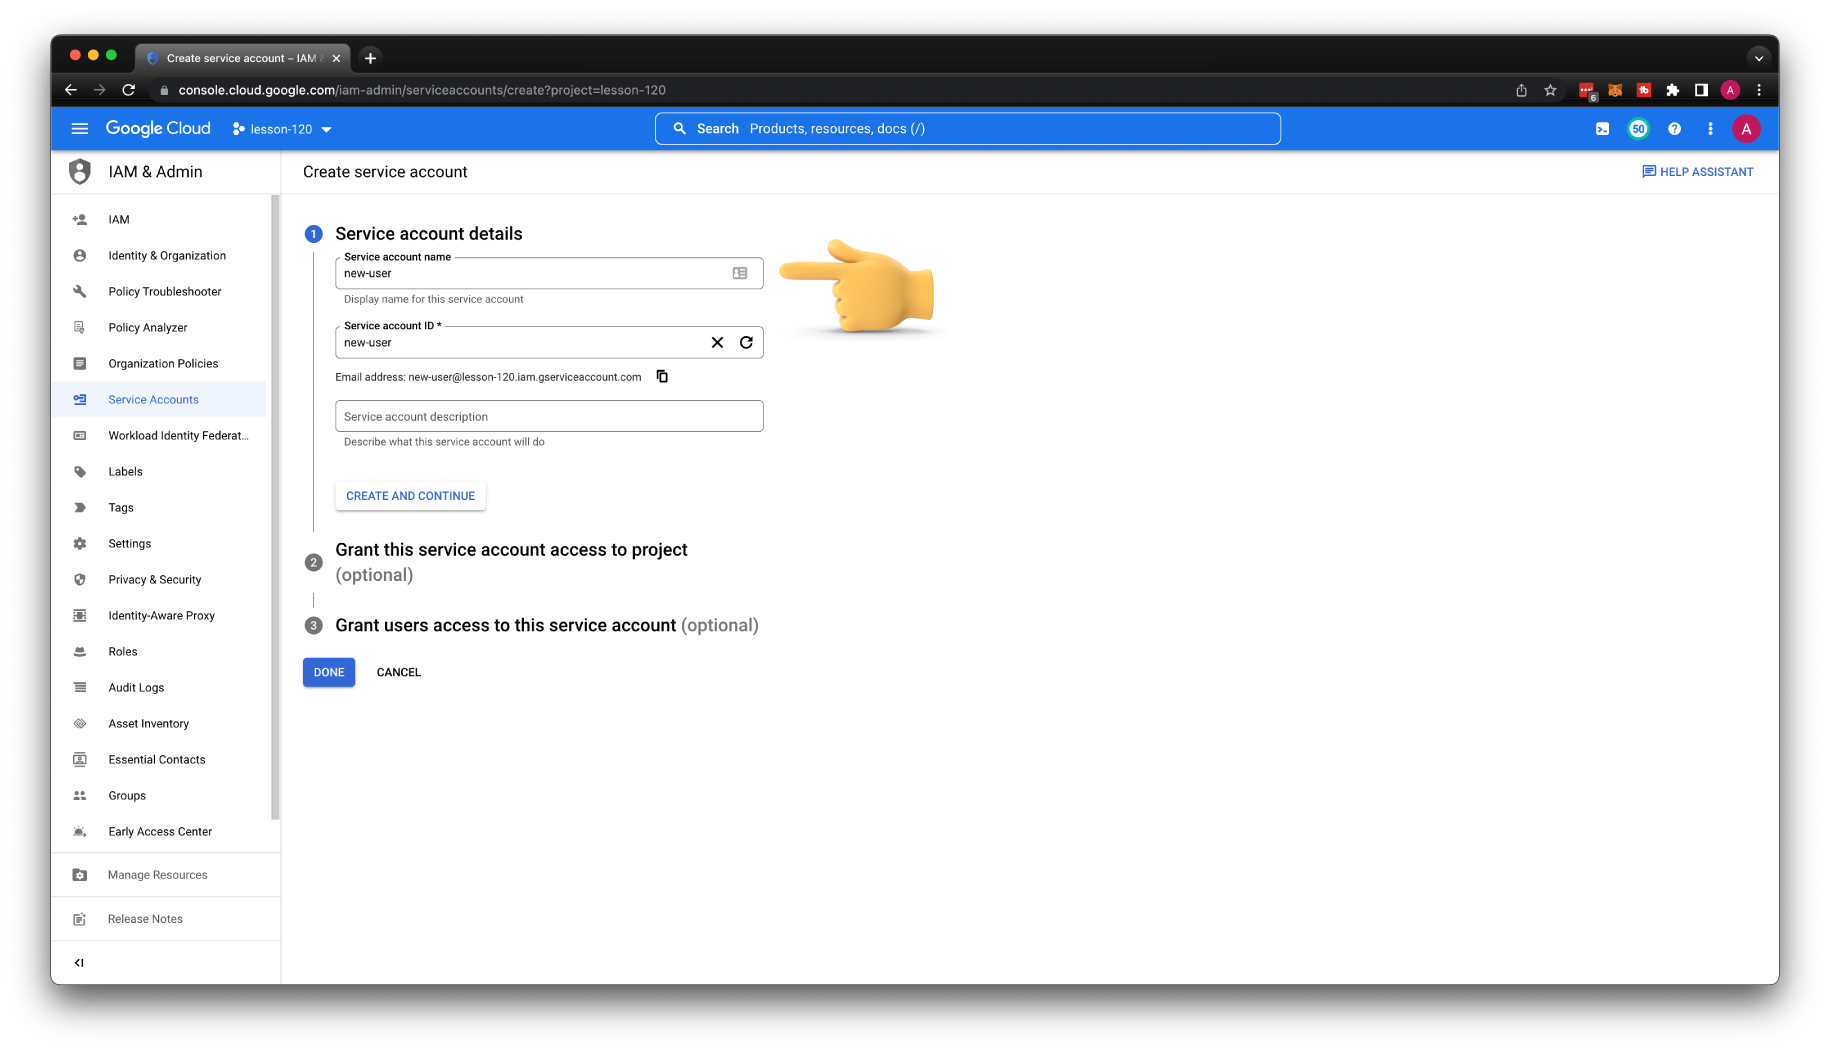
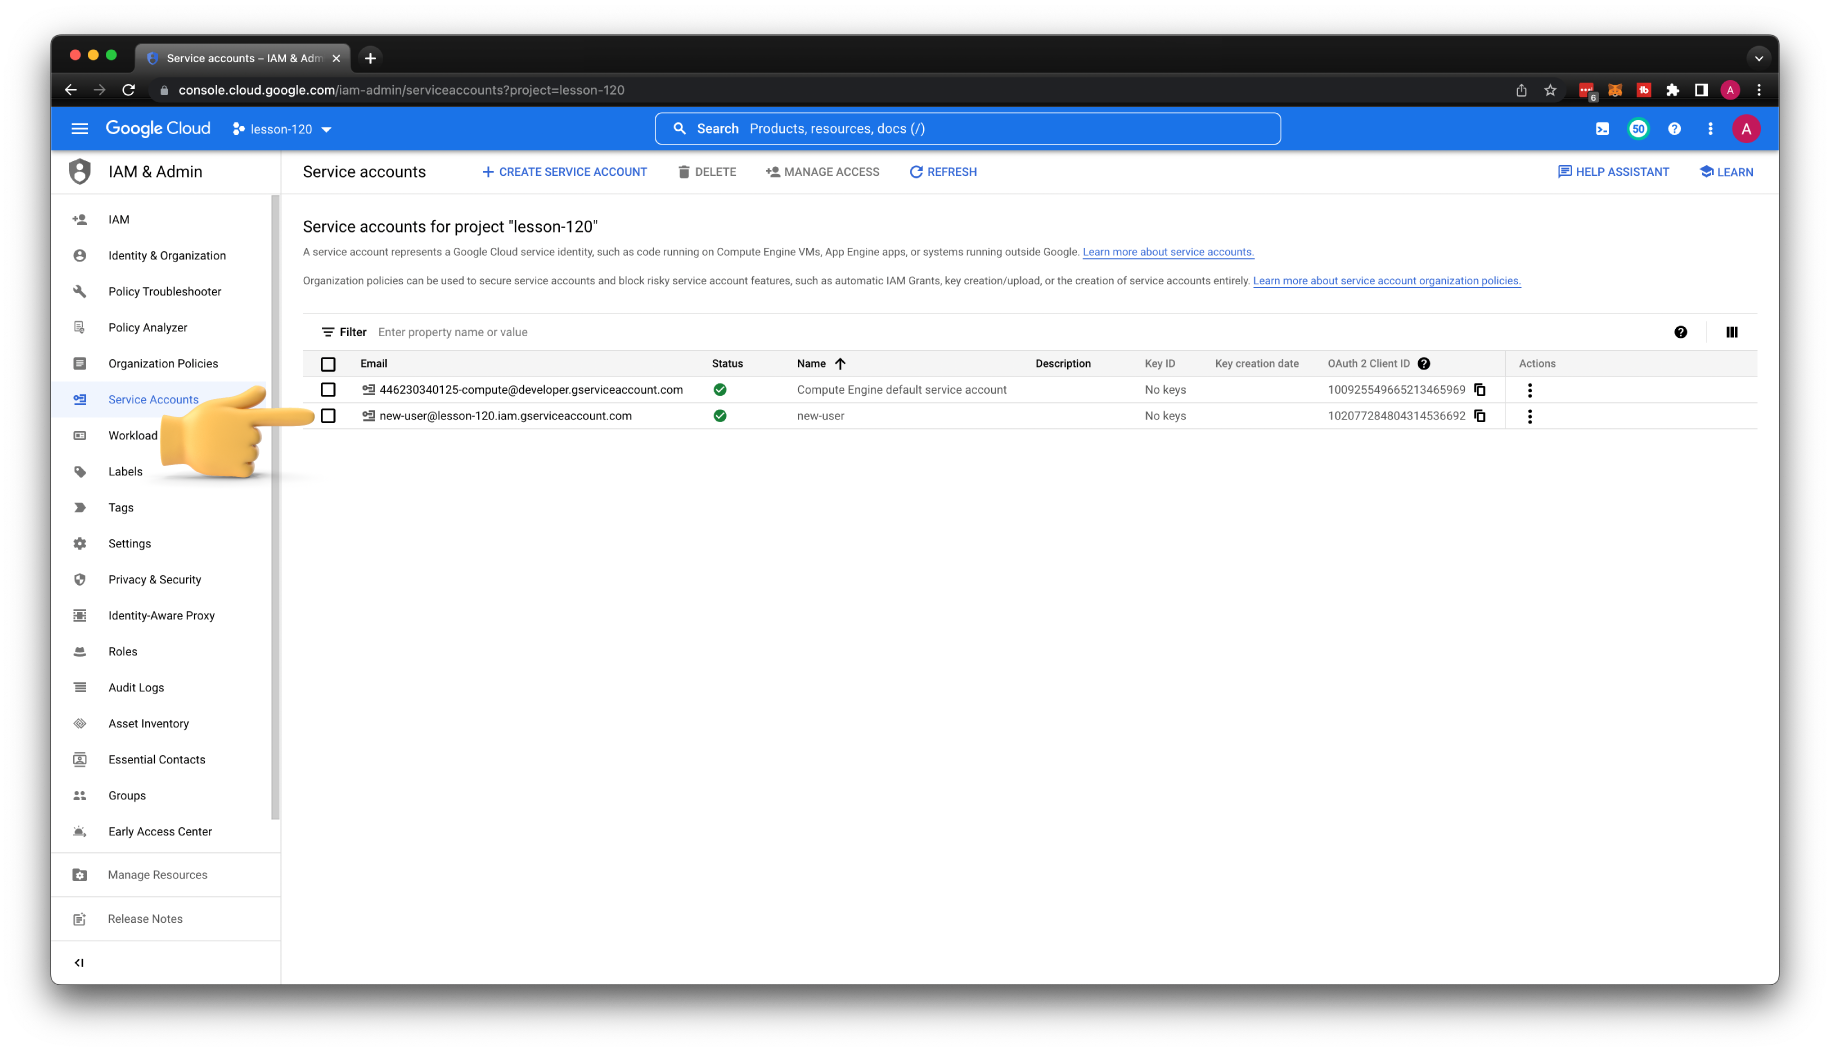
Let's create a new service account and call it a new-user. Also, skip all other steps and click done.
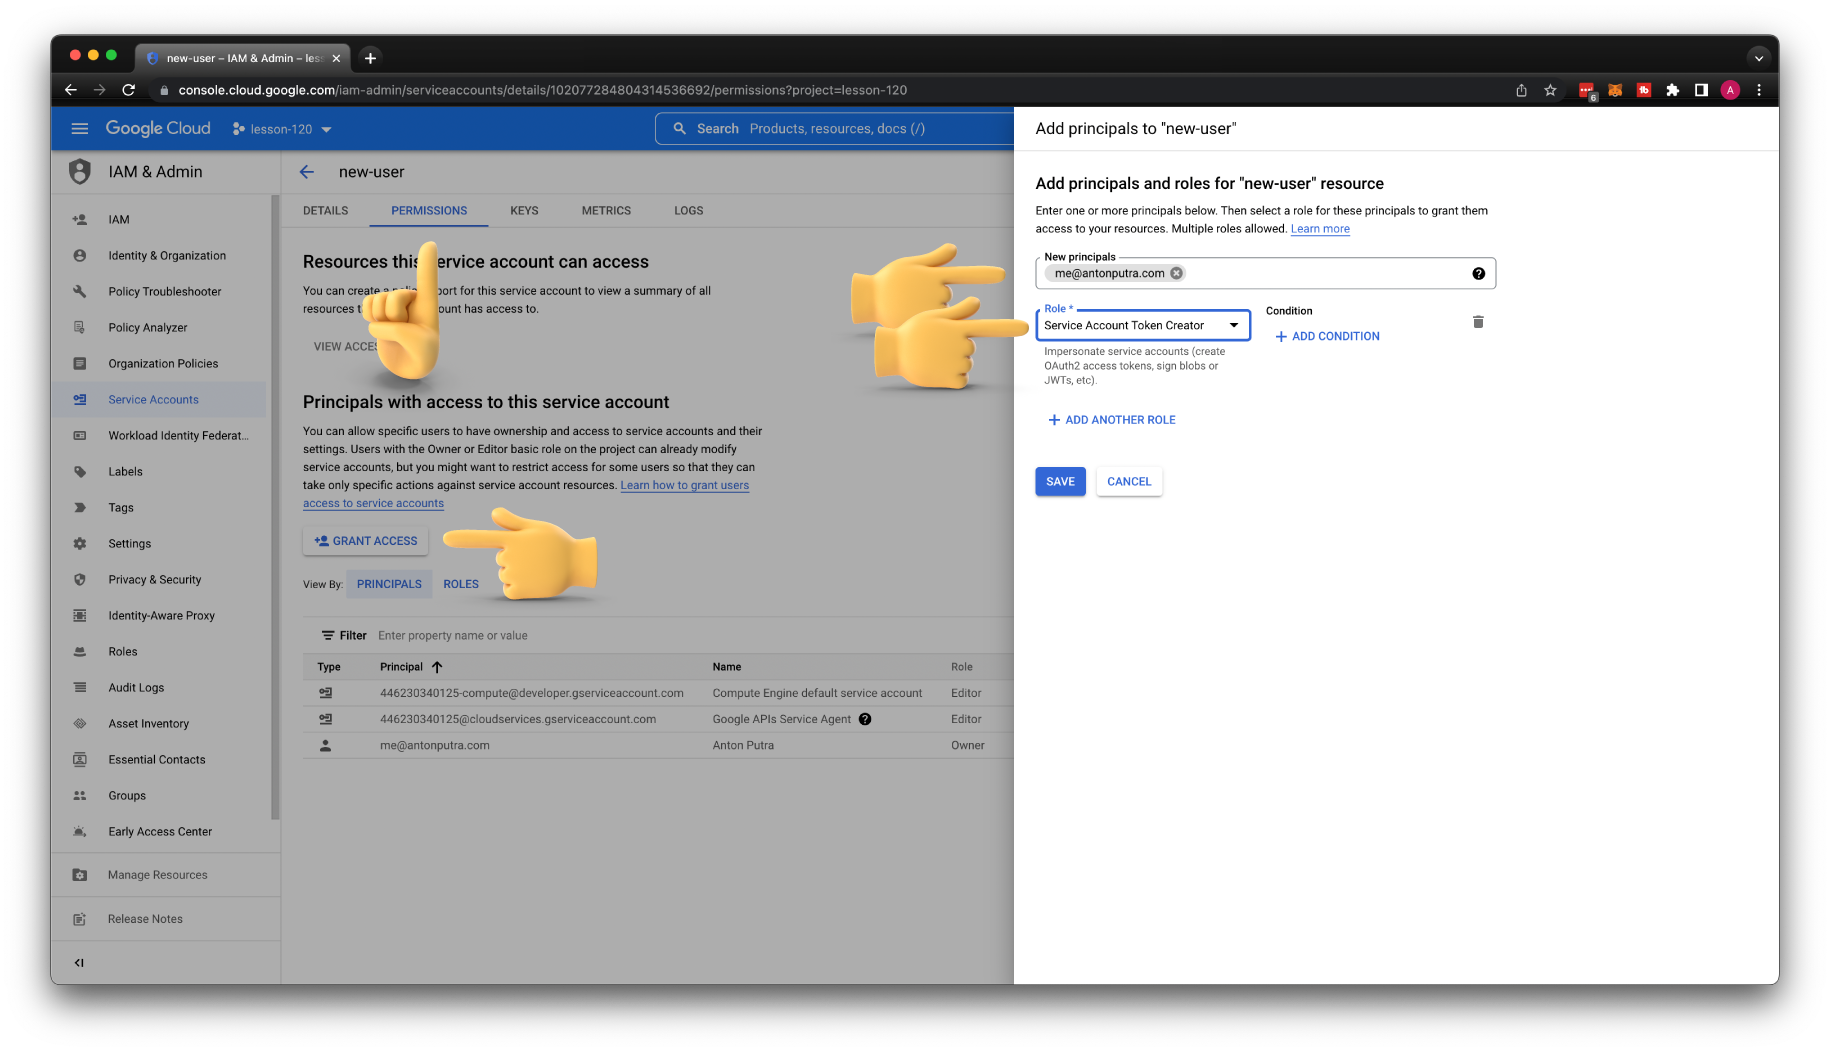
The next step is to grant my personal user permissions to use this service account. You need to click permissions and grant access. Then enter your email and select Service Account Token Creator role.
Now, we need to add a new-user service account ability to SSH to the instances in our GCP project. Go to the IAM section and add a new principal for this project. Enter the email address of the service account and choose IAP-secured Tunnel User and Compute Instance Admin (v1) roles.

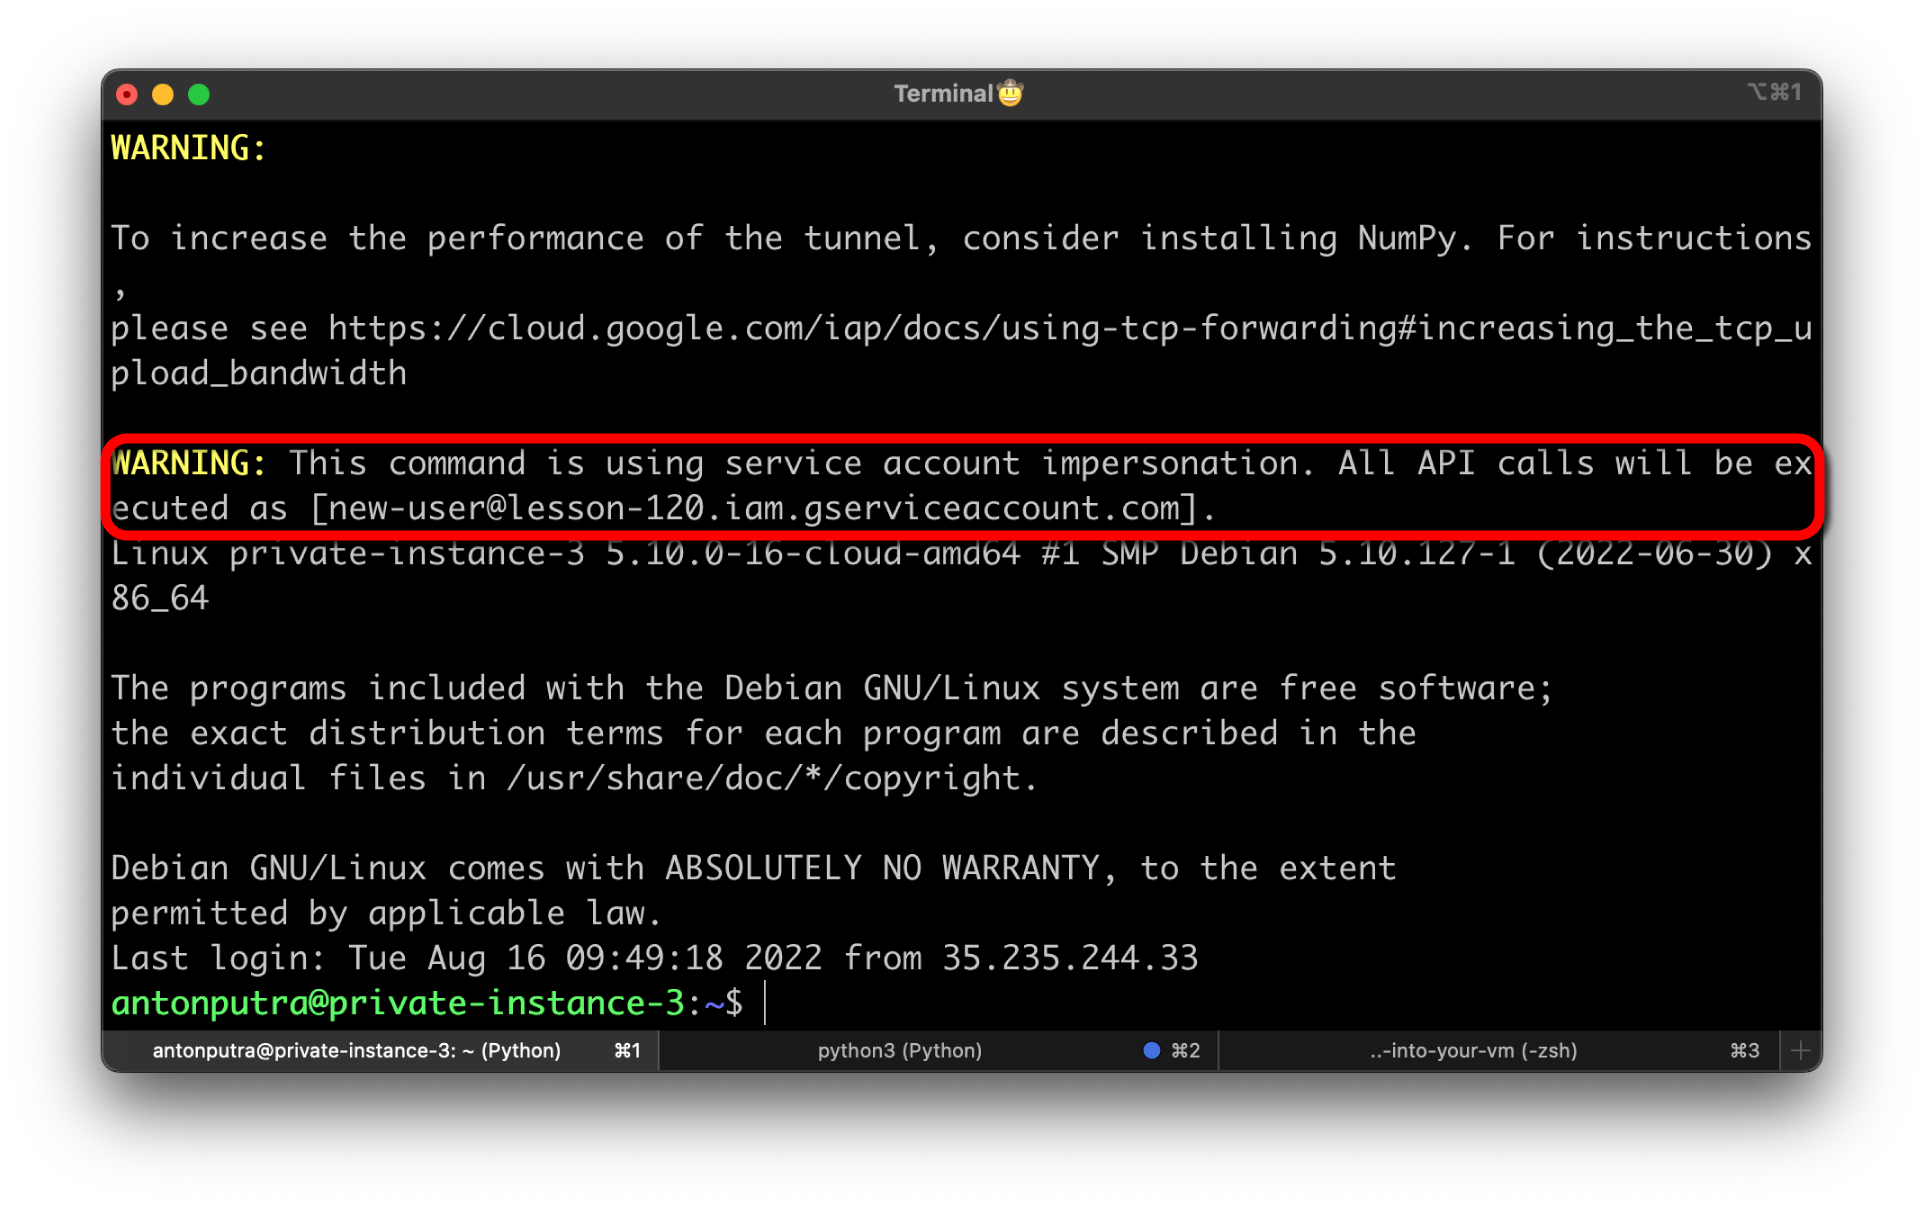
To try to SSH to the same VM using new service account use the following command:
gcloud compute ssh private-instance-3 \
    --project=lesson-120 \
    --zone=us-central1-a \
--tunnel-through-iap \
--impersonate-service-account=new-user@lesson-120.iam.gserviceaccount.com
In a few seconds, you should get a shell in the virtual machine.
Use OS Login to SSH
OS Login allows you to link Google Identities such as your user or a service account to a Linux user in the virtual machine. You can enable it on the project level or on individual instances.
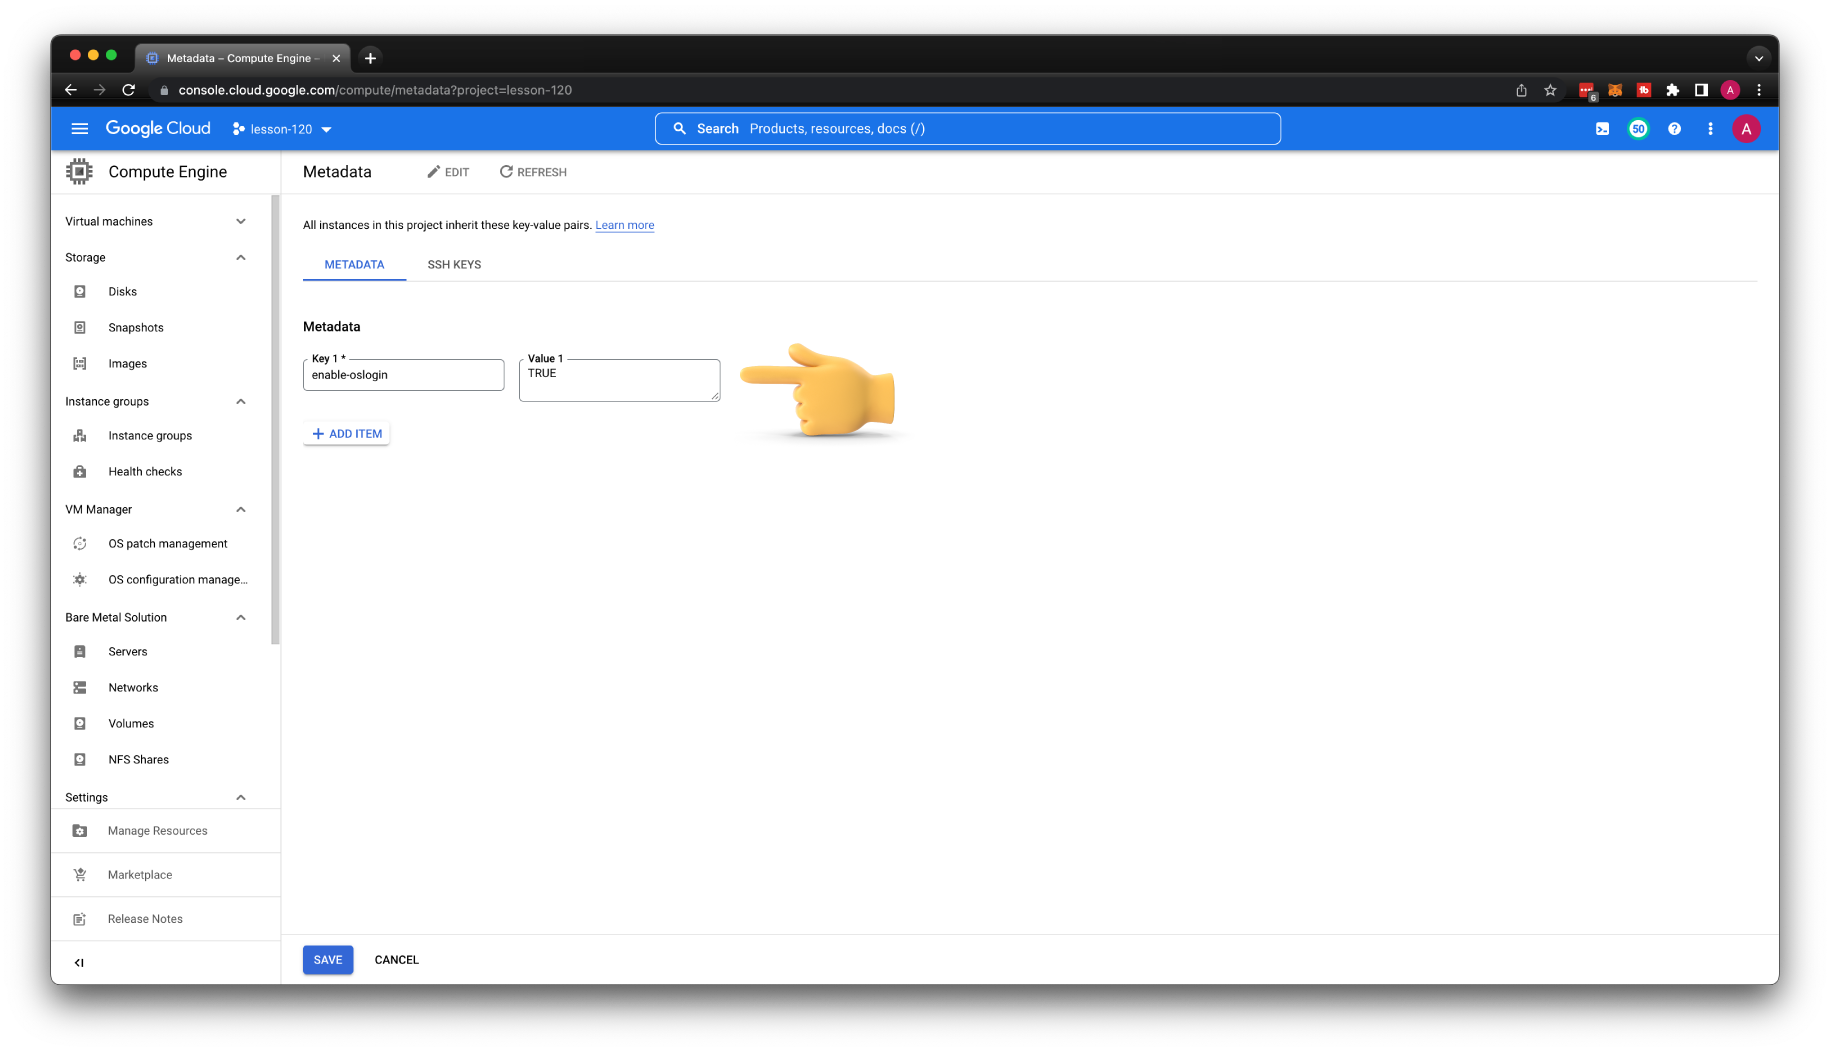
Let's enable it on the project level. Go to Compute Engine, then Metadata, and add a new key pair. For the Key, use enable-oslogin and for value TRUE.
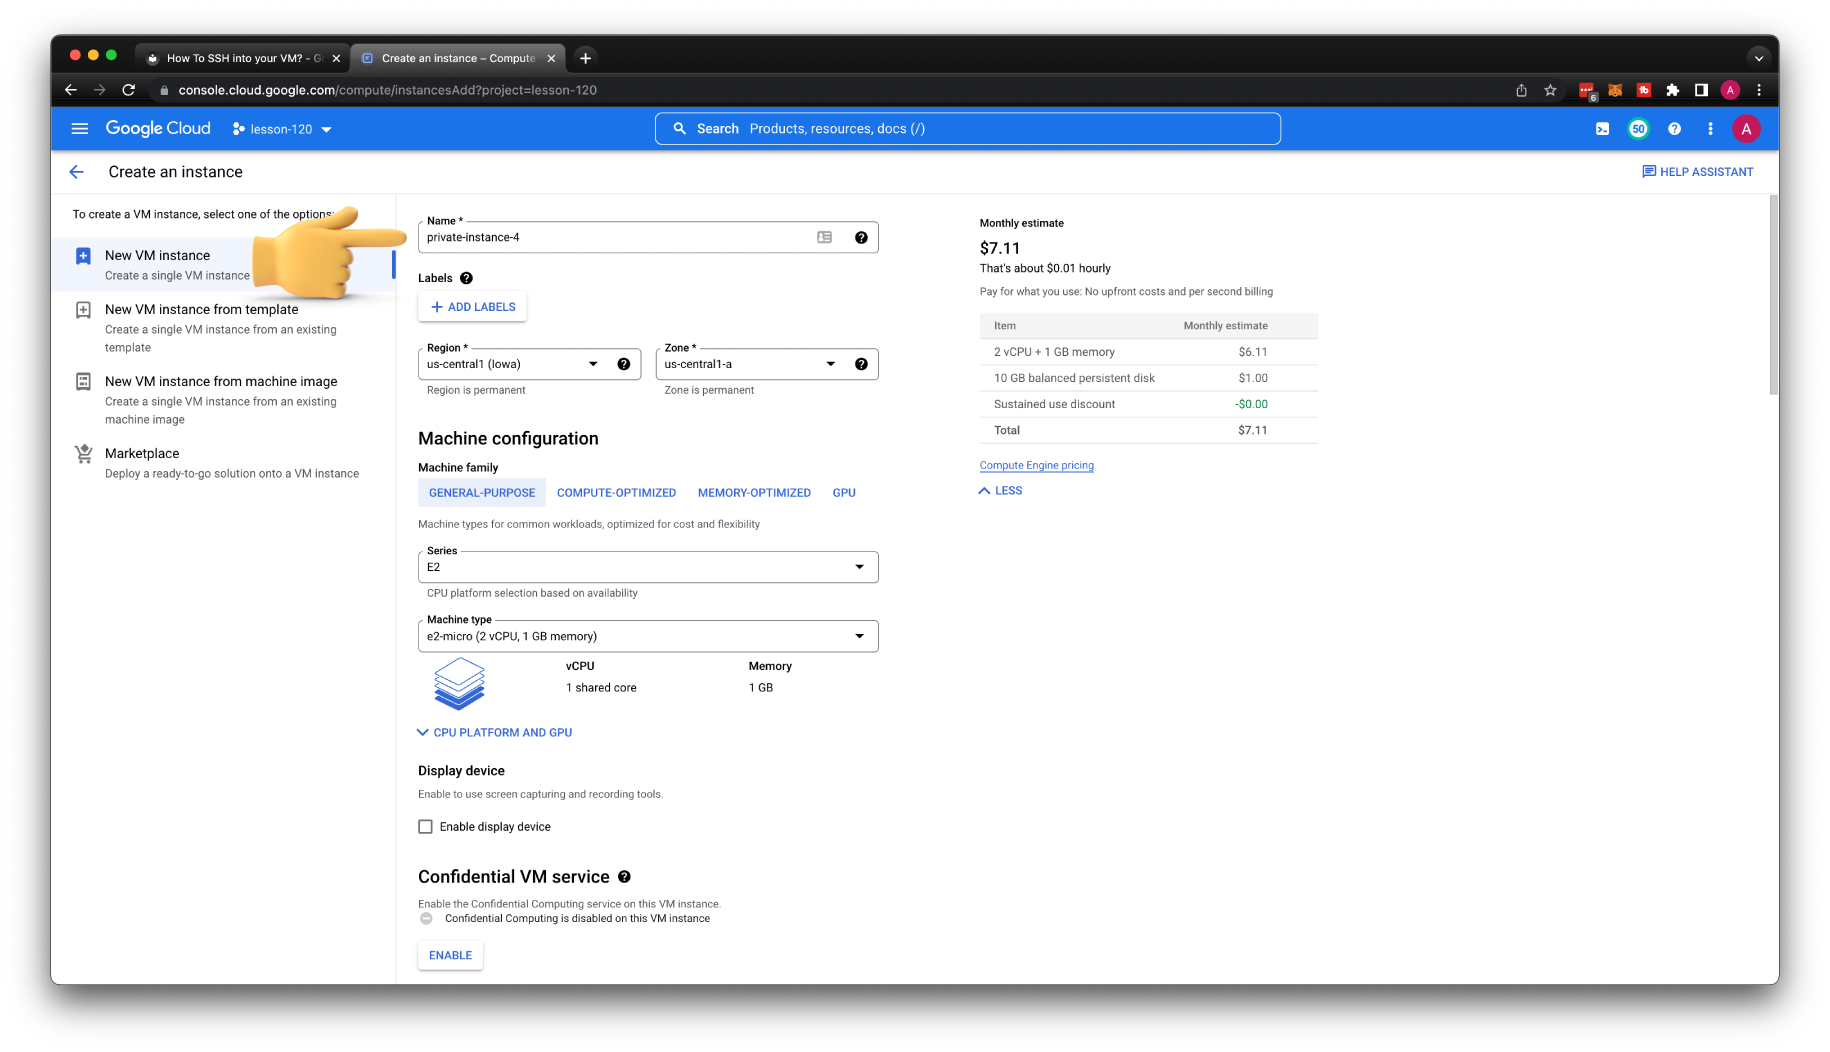
Let's create our last VM for this tutorial. Give it a name private-instance-4. Place it in the private subnet and disable external IP address.
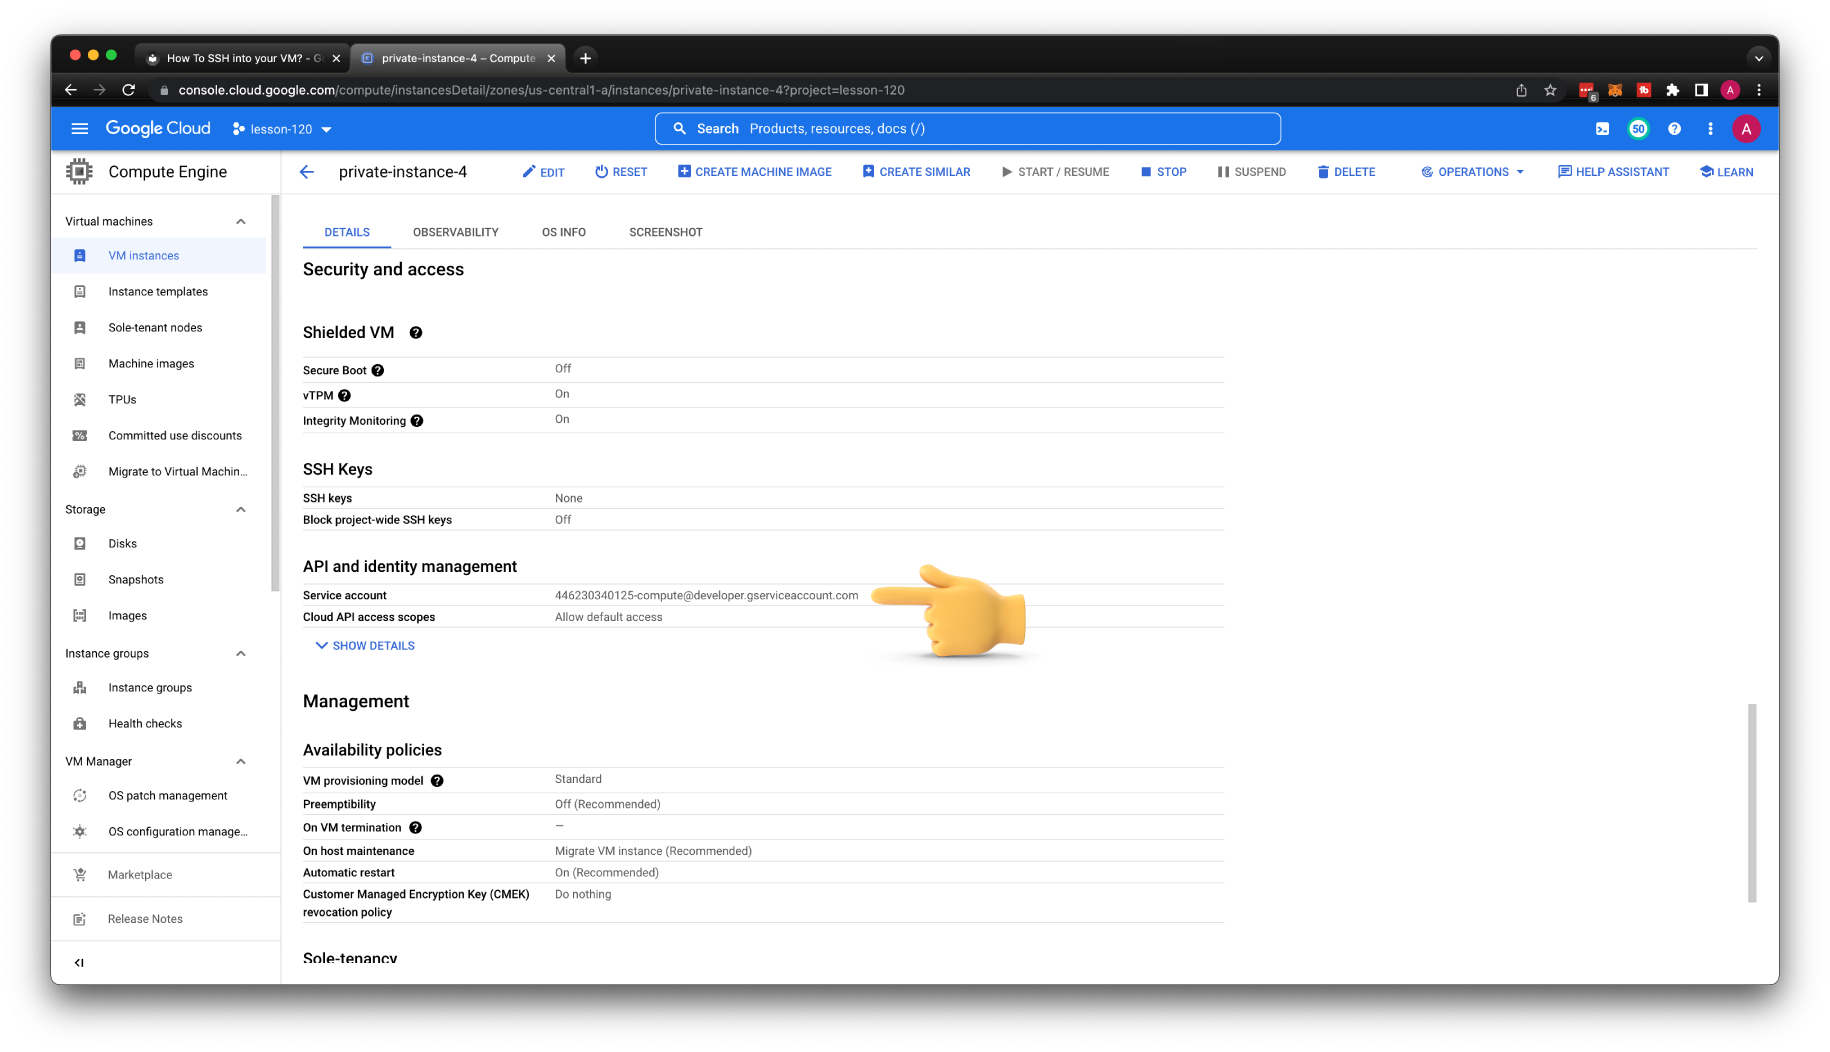
Unless you create a dedicated service account for your virtual machine, which is a common use case to configure firewalls, as an example. You need to find the default service account that GCP assigned to your instance. We will need it to allow SSH access for other users or service accounts.
Grant User Access With Sudo
As in the previous example, I will simulate a new user with a service account. The same IAM permissions apply to the regular user. First, let's create a new service account that will simulate a admin user.
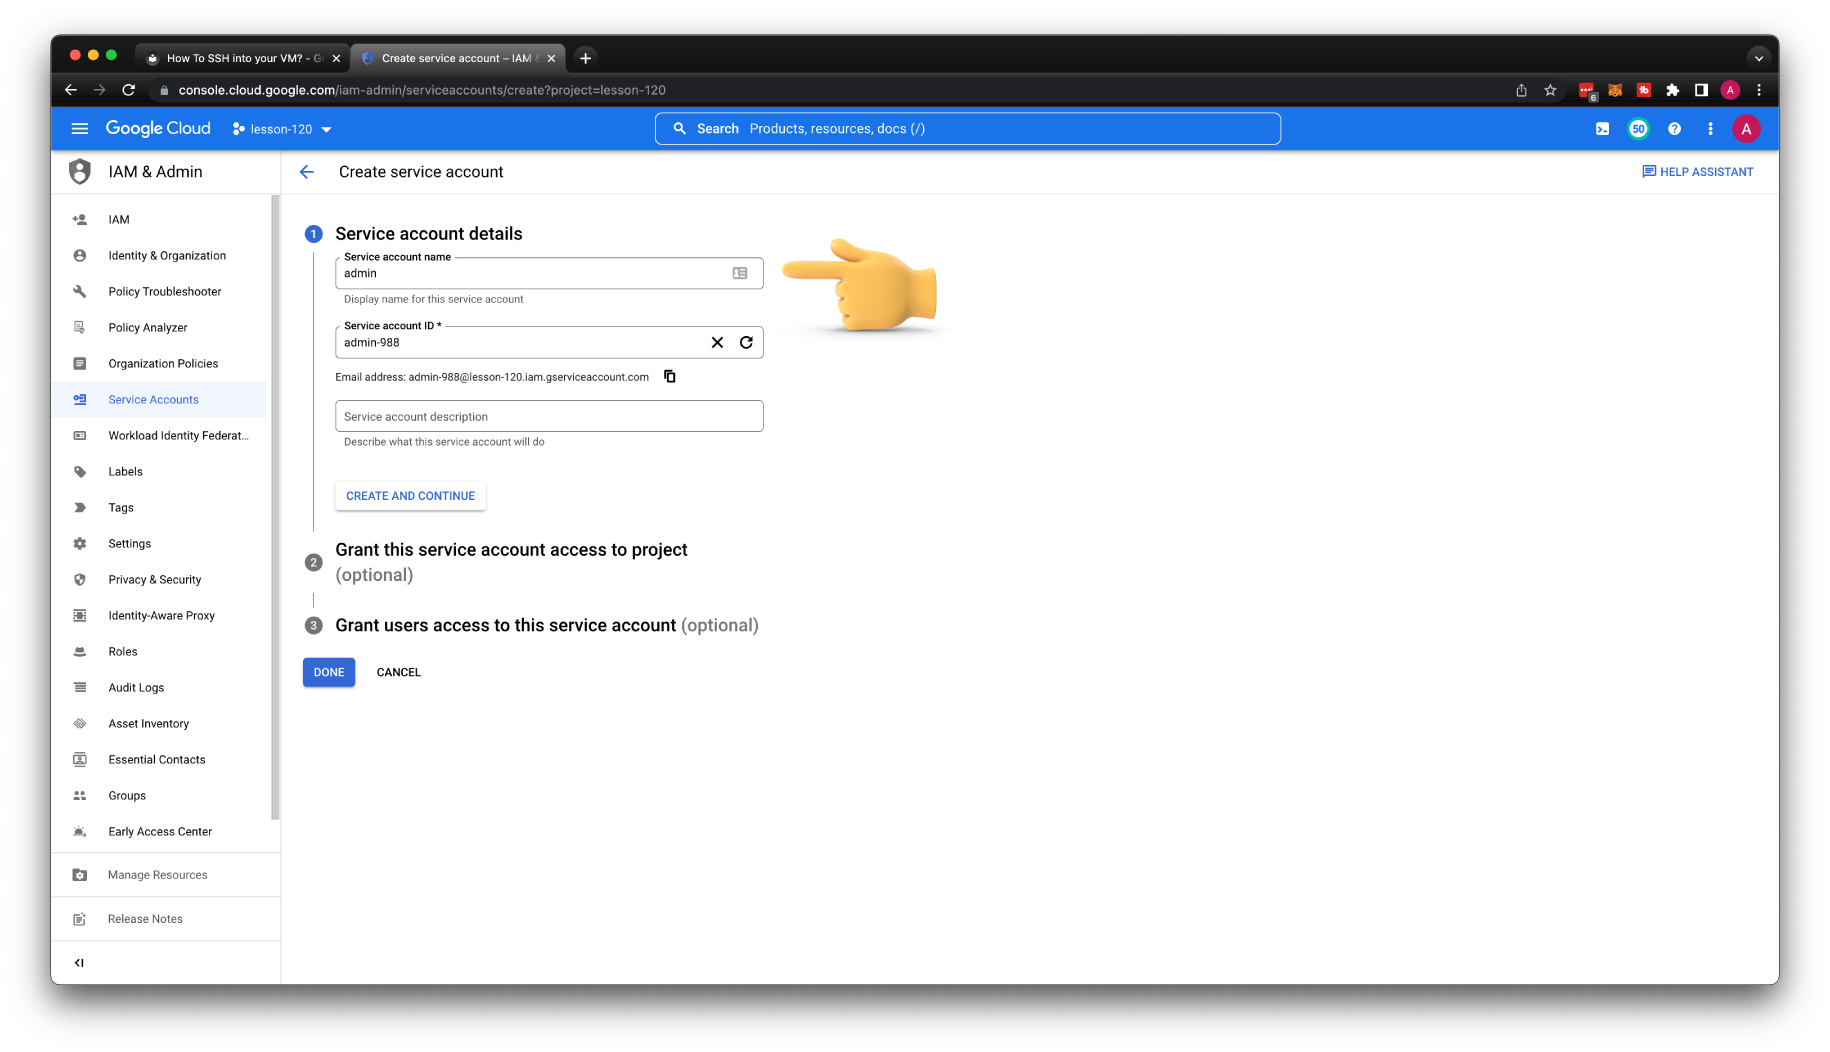
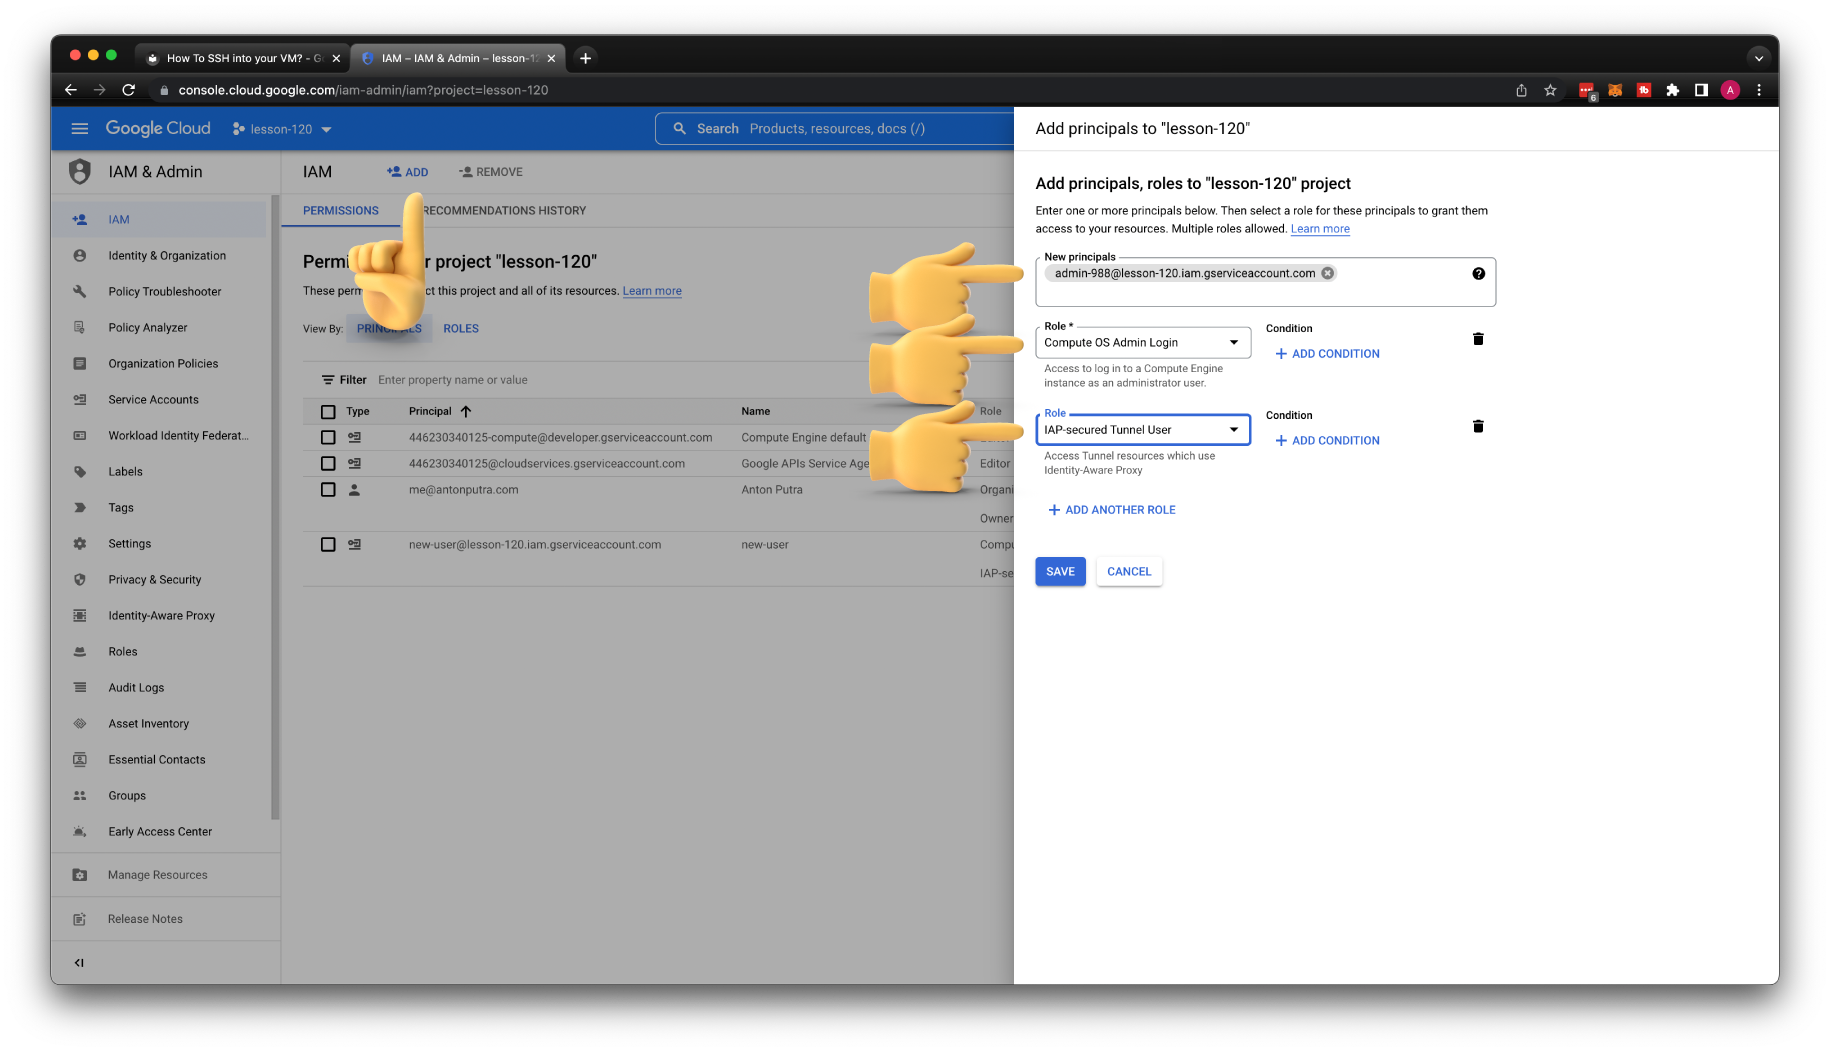
Let's give this admin service account a couple of roles.
First is a Compute OS Admin login role, and optionally if you plan to use Identity Aware Proxy to SSH to private instances, you need an IAP-secured Tunnel User role.
We also need to grant the Service Account User role on the default service account that is assigned to our VM.
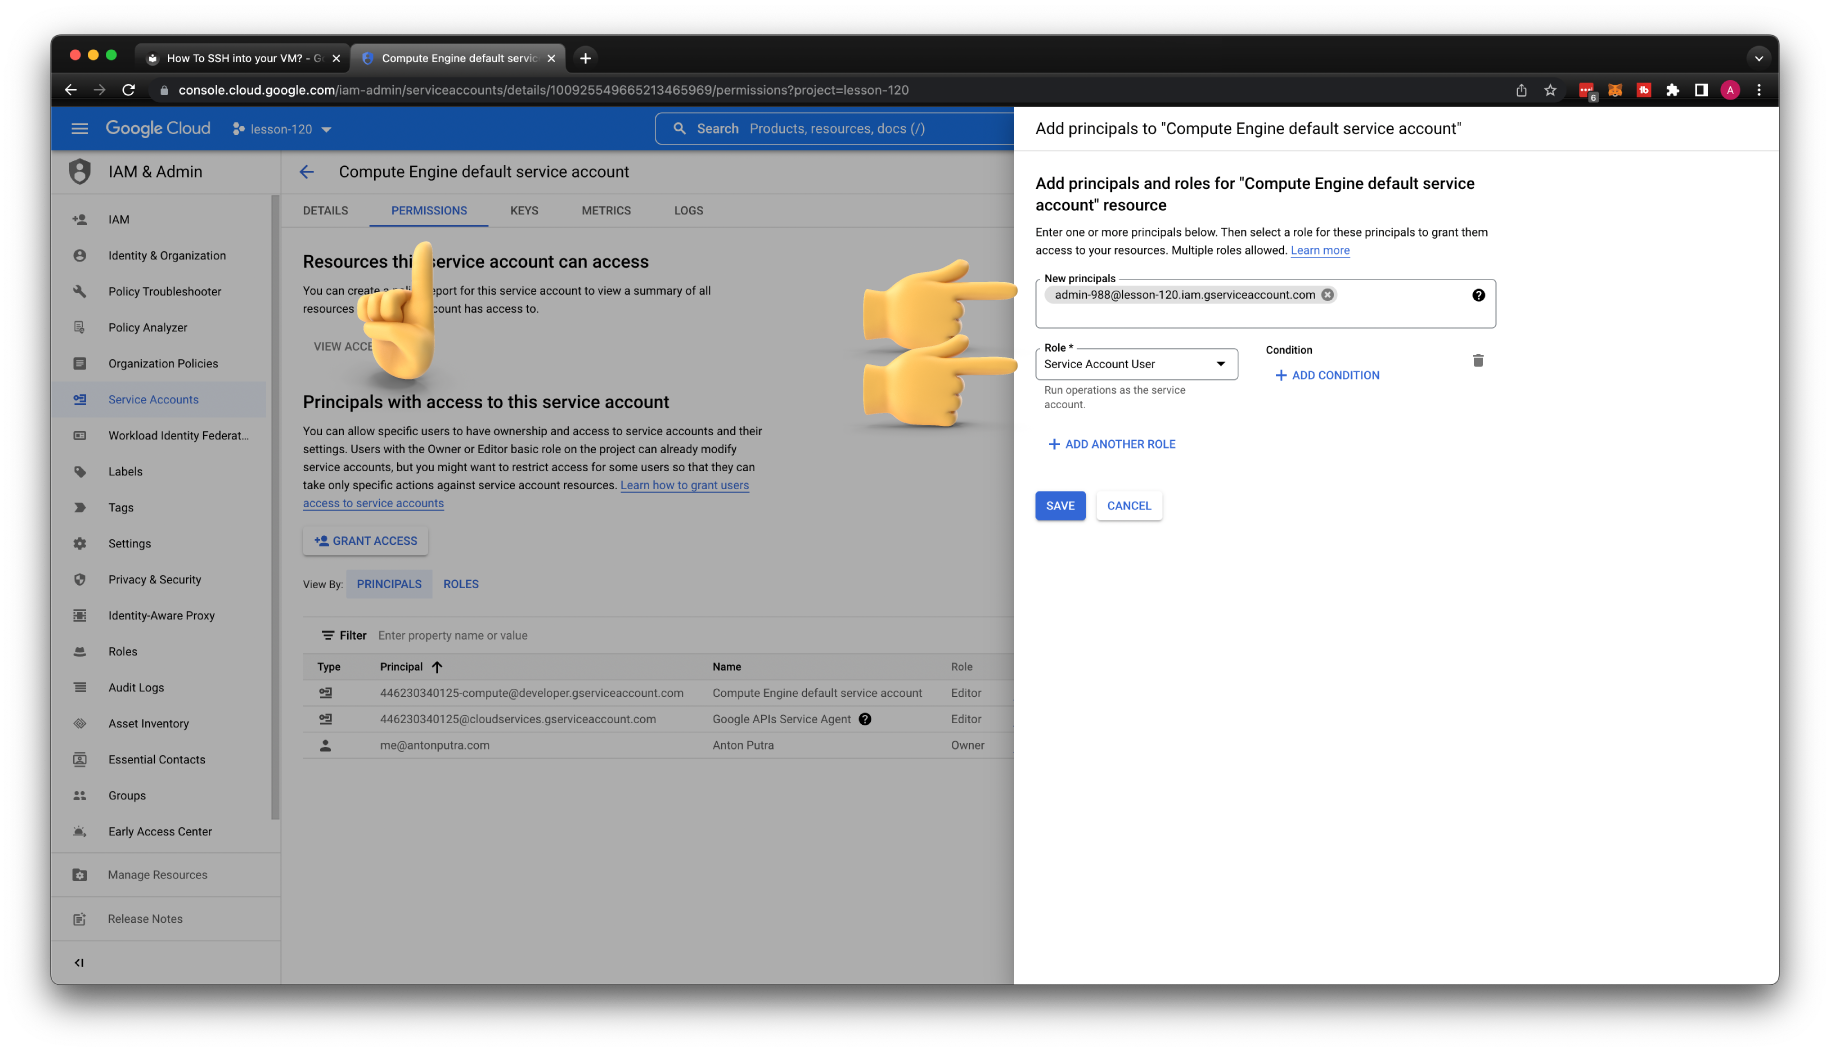
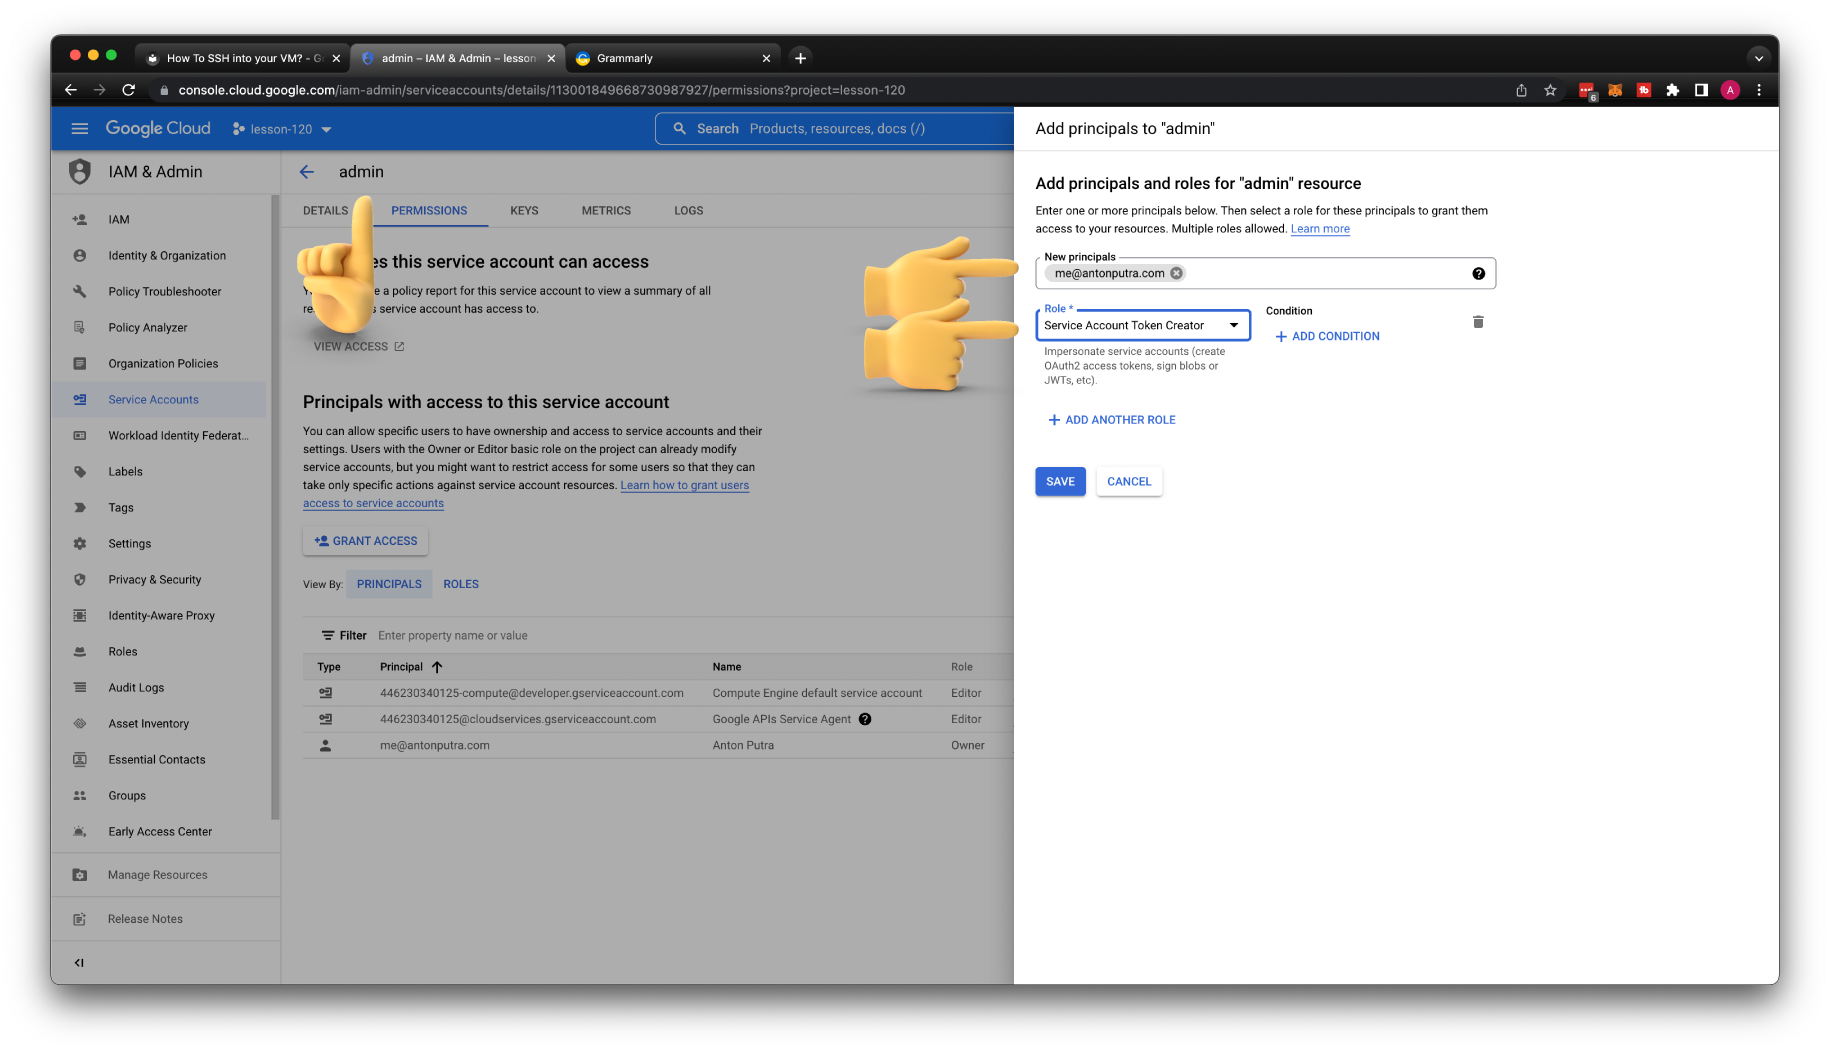
The last step is optional, only if you want to SSH as a service account.
You need to grant Service Account Token Creator role to your current user on the service account that you want to use.
Try to SSH to the private-instance-4 as an admin user.
gcloud compute ssh private-instance-4 \
    --project=lesson-120 \
    --zone=us-central1-a \
    --tunnel-through-iap \
    --impersonate-service-account=admin-988@lesson-120.iam.gserviceaccount.com
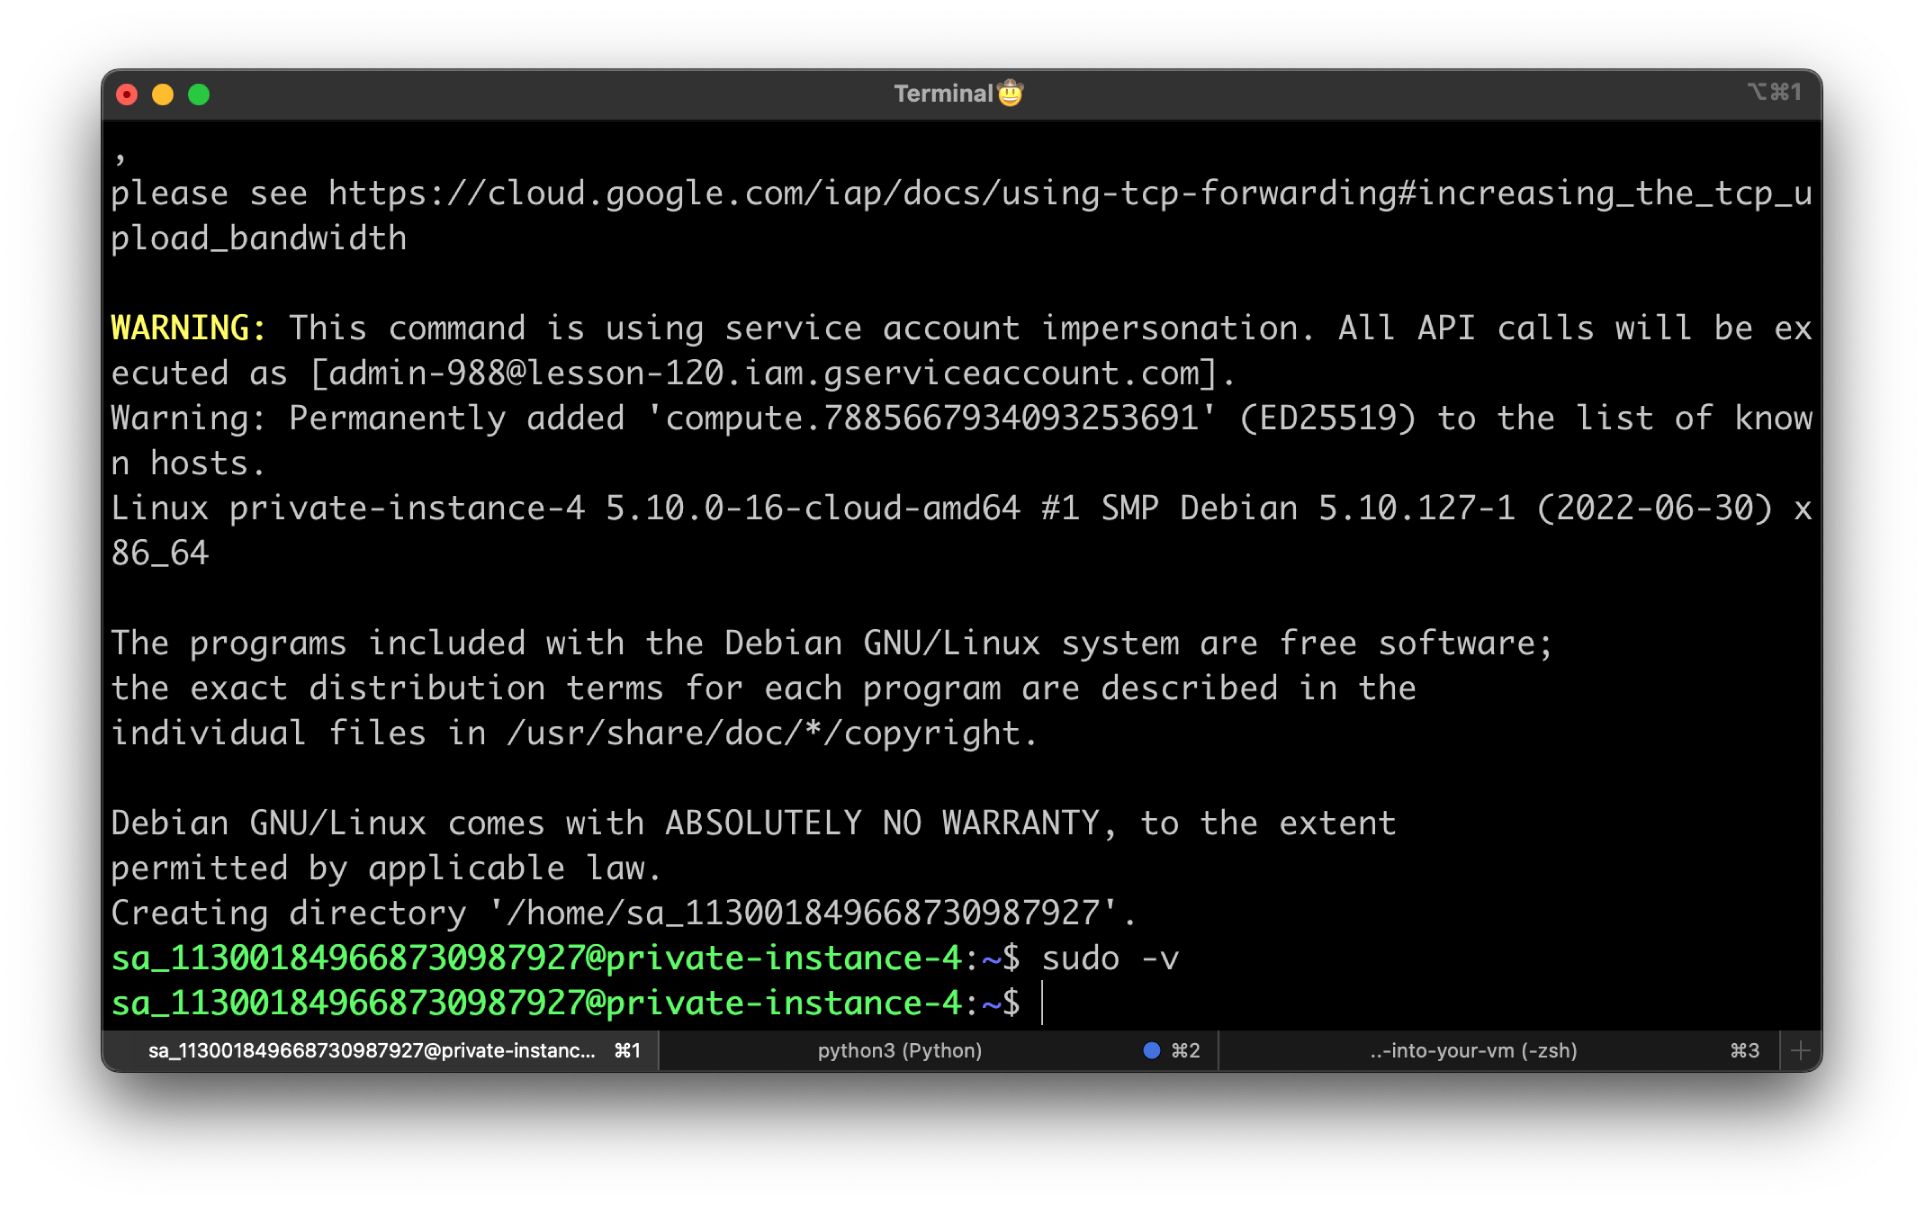
To verify that you have sudo privileges, run sudo -v.
If you didn't get an error, it means you can use sudo to escalate your privileges on that VM.
Grant User Access Without Sudo
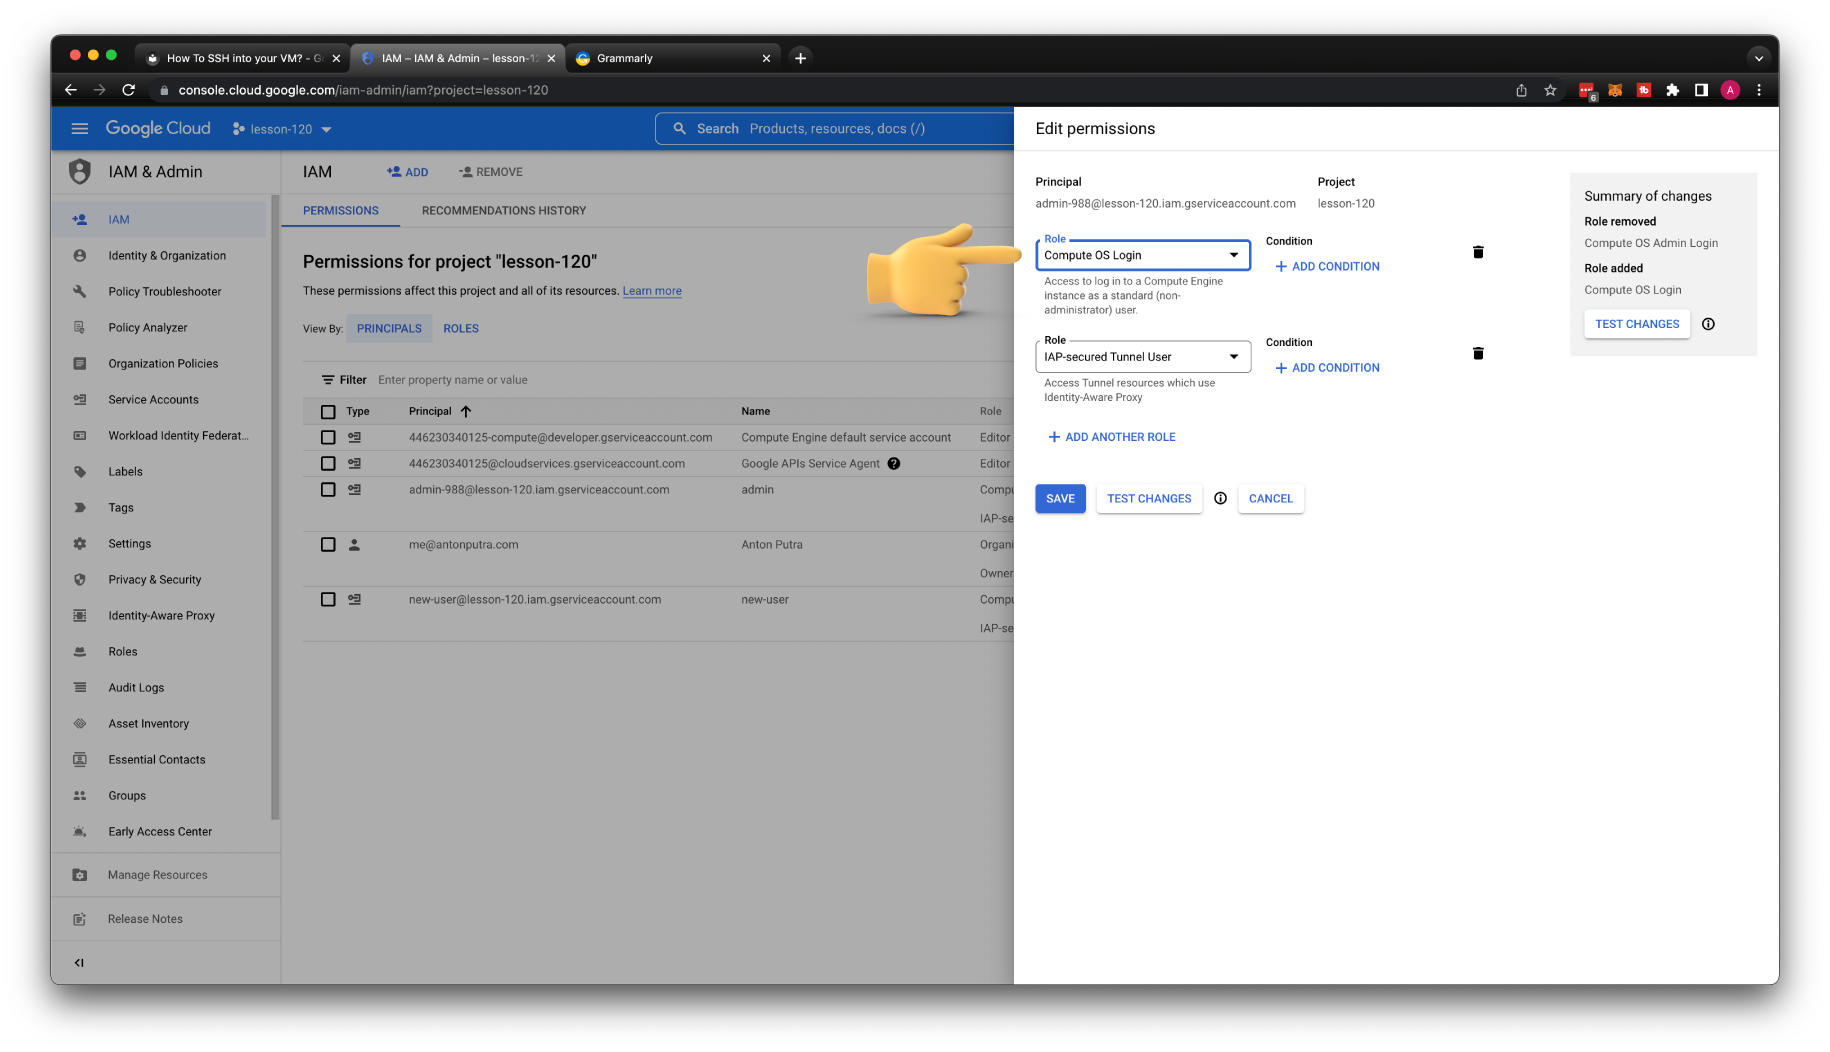
Now, let's remove sudo access from the admin user. It's very simple; just replace Compute OS Admin login with Os Admin Login role.
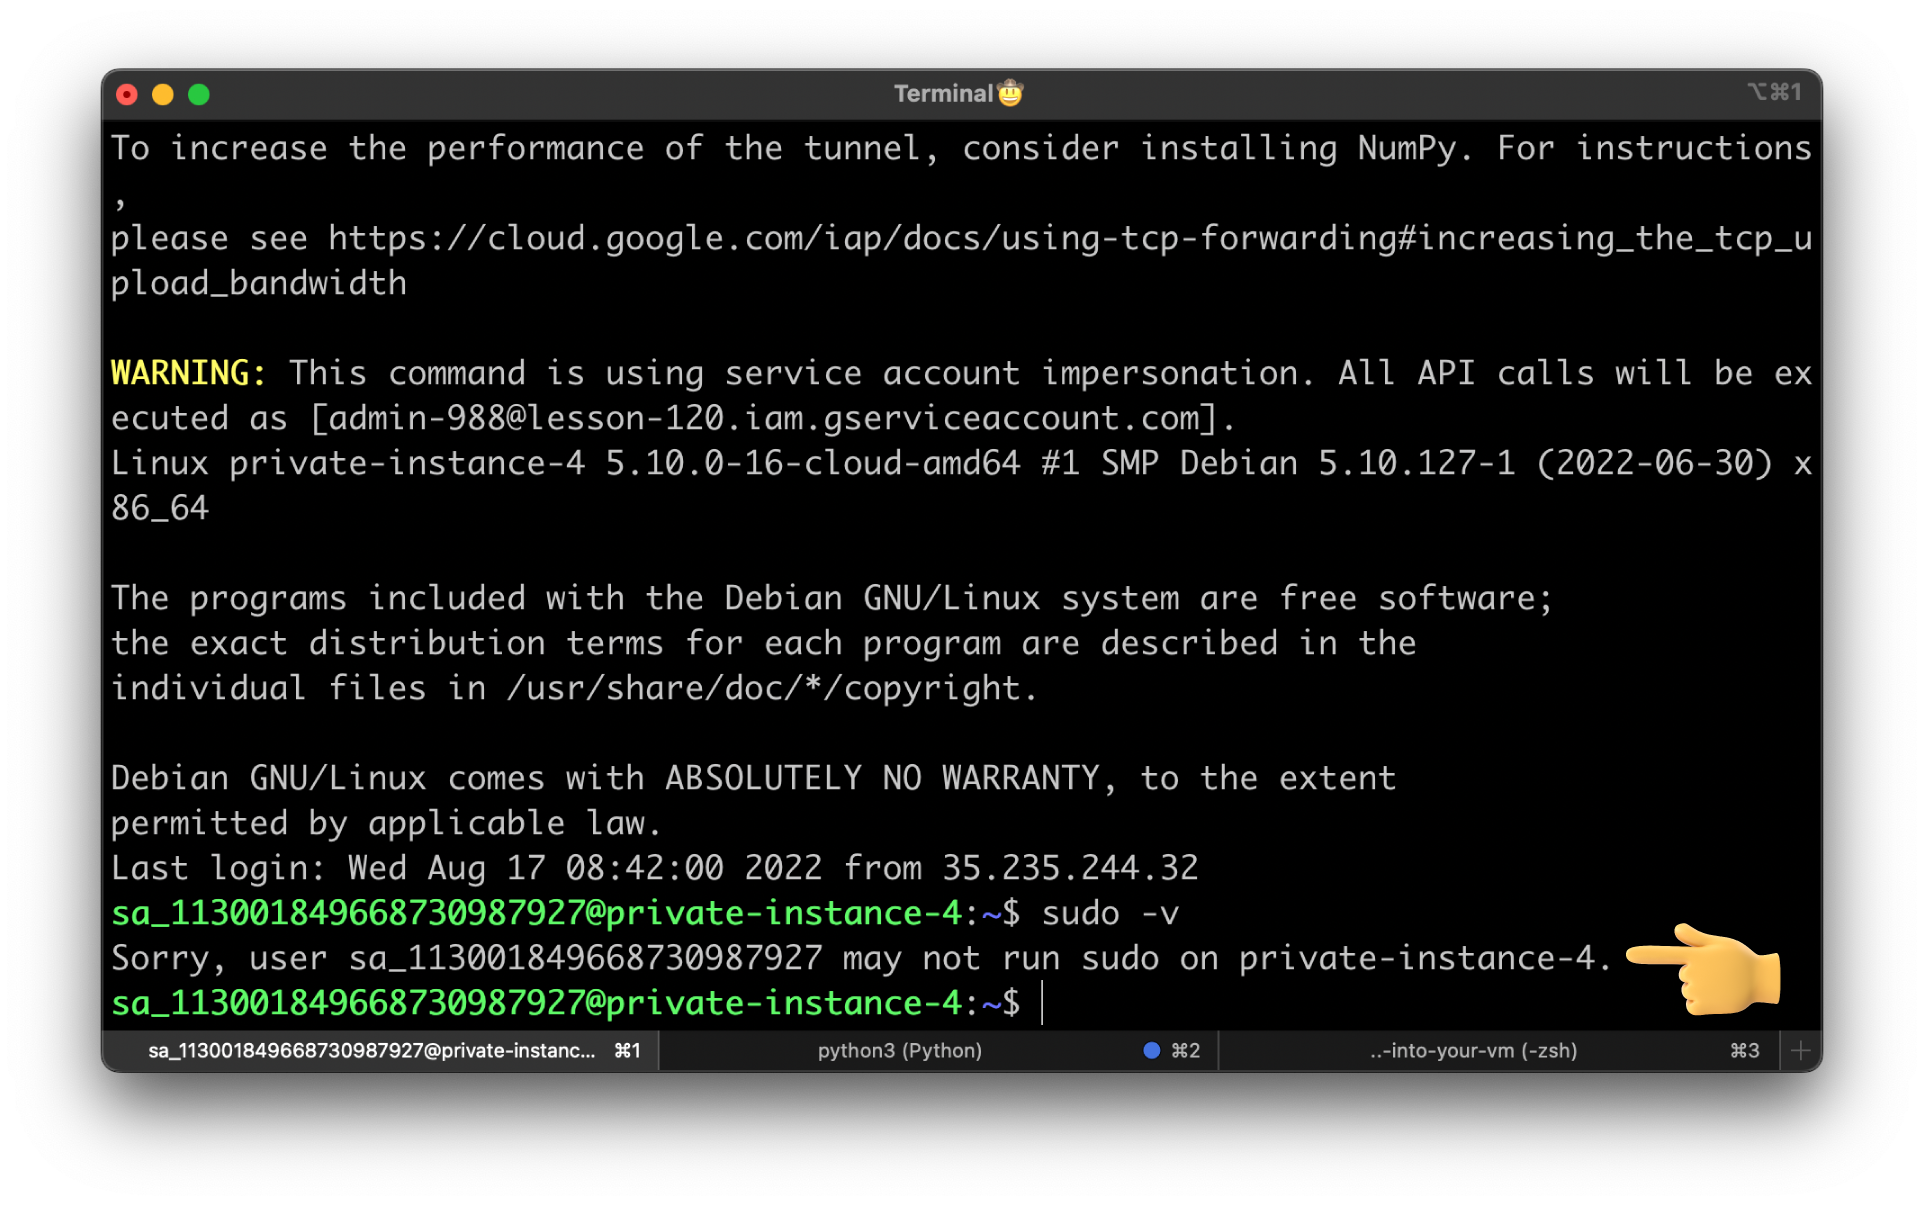
Try to SSH using the previous command and run sudo -v.
gcloud compute ssh private-instance-4 \
    --project=lesson-120 \
    --zone=us-central1-a \
    --tunnel-through-iap \
    --impersonate-service-account=admin-988@lesson-120.iam.gserviceaccount.com
At this time, you should get an error that the user may not run sudo on private-instance-4.
Audit Access Logs
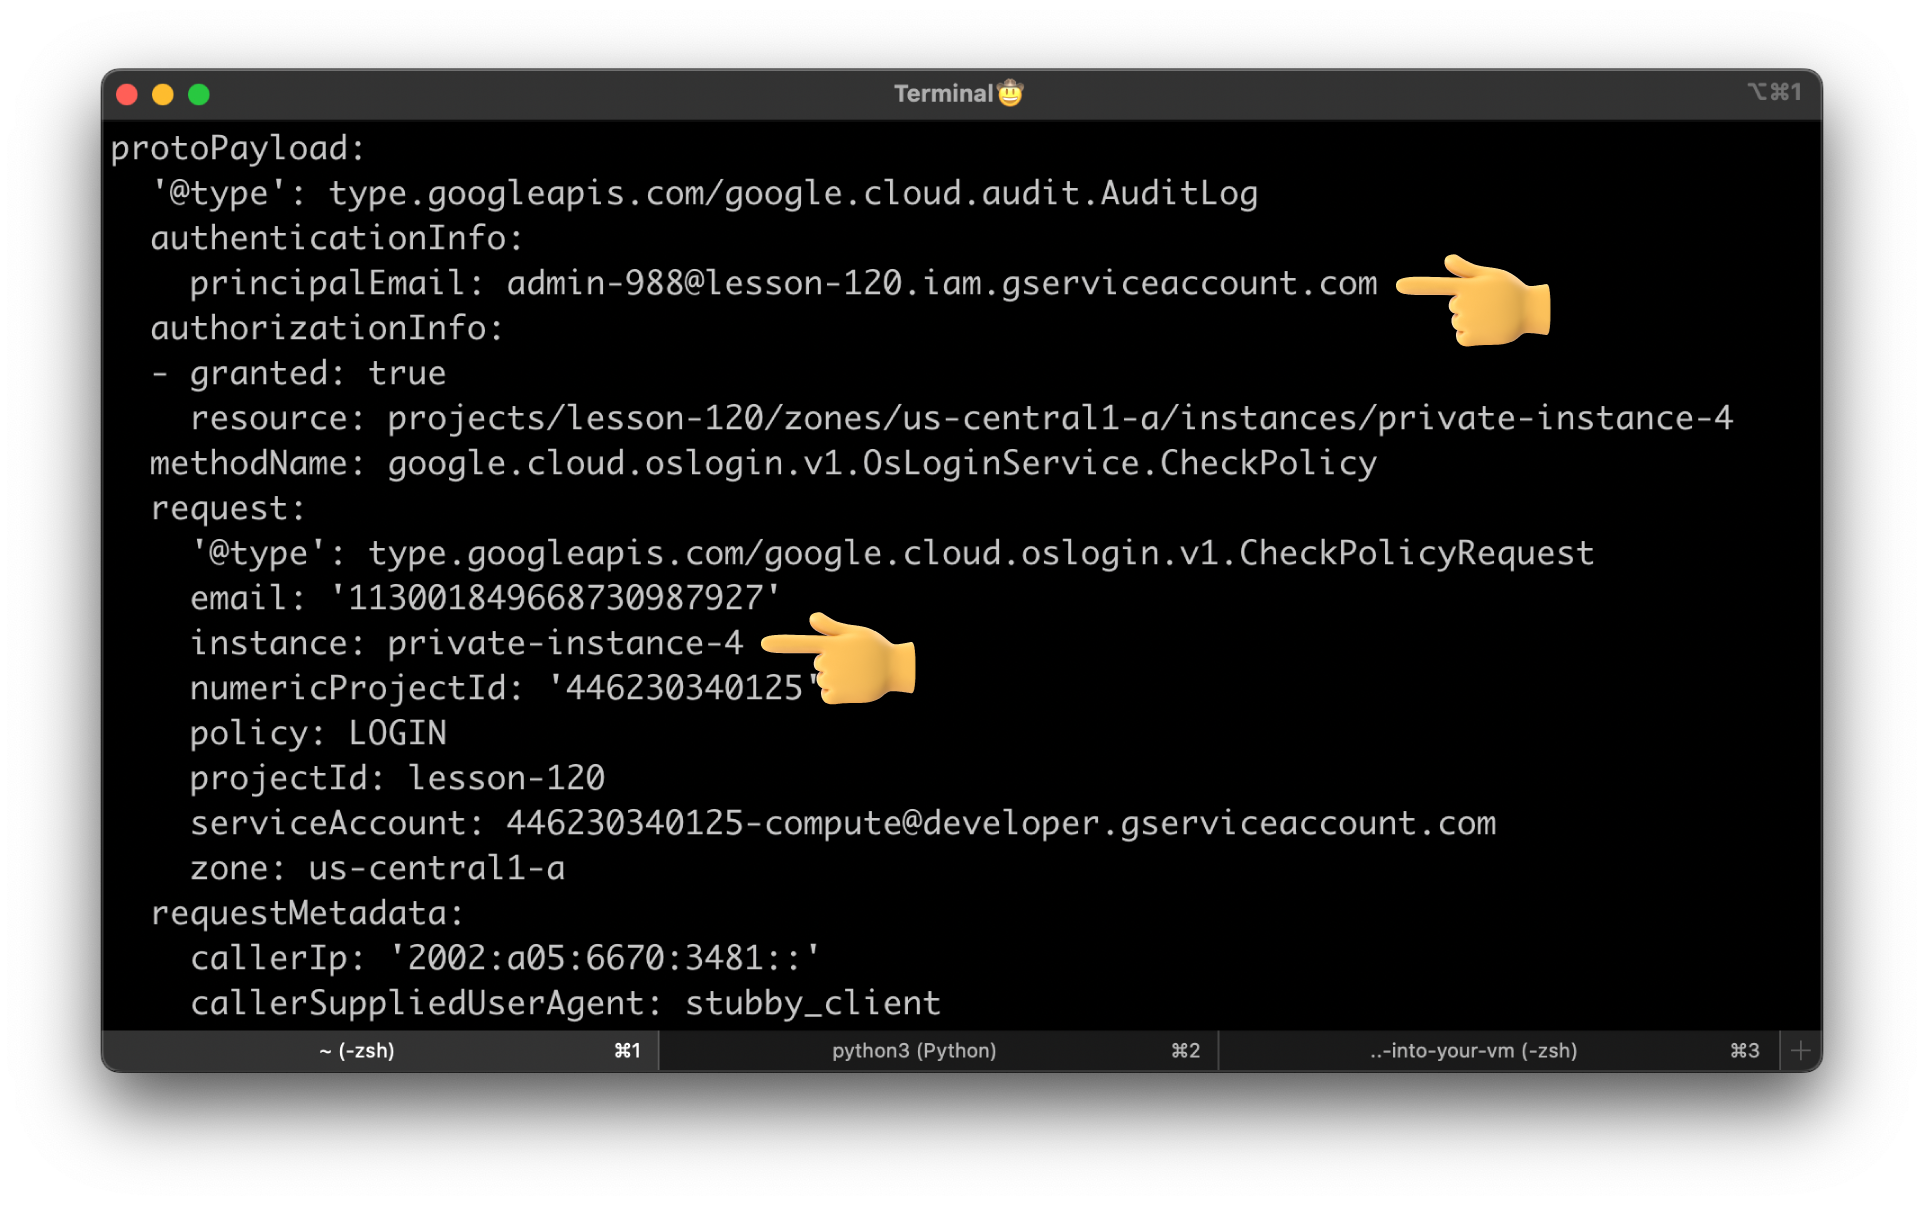
You can monitor connection attempts to virtual machine (VM) instances that have OS Login enabled by viewing OS Login audit logs.
gcloud logging read \
  --project=lesson-120 \
  --freshness=1h \
  'protoPayload.serviceName="oslogin.googleapis.com"'
For example, here is the admin service account connected to private-instance-4.
Without a doubt, OS login is the most secure way to connect to the instances in Google Cloud. If you still manage SSH keys using the traditional methods, you should think about migrating to the GCP OS Login managed service.