I've LOST my private key. How to connect to EC2 instance?? (Amazon Web Services | AWS | SSH | SSM)
- You can find the source code for this video in my GitHub Repo.
Intro
In this video, I'll show you how to recover access to your EC2 instance if you lose your private key.
- In the first example, we will do it the old way, using the second EC2 instance and attaching root volume from the original VM.
- In the second example, we will use AWS Session manager to directly connect to the EC2 and add a new public key.
Recover key using another EC2
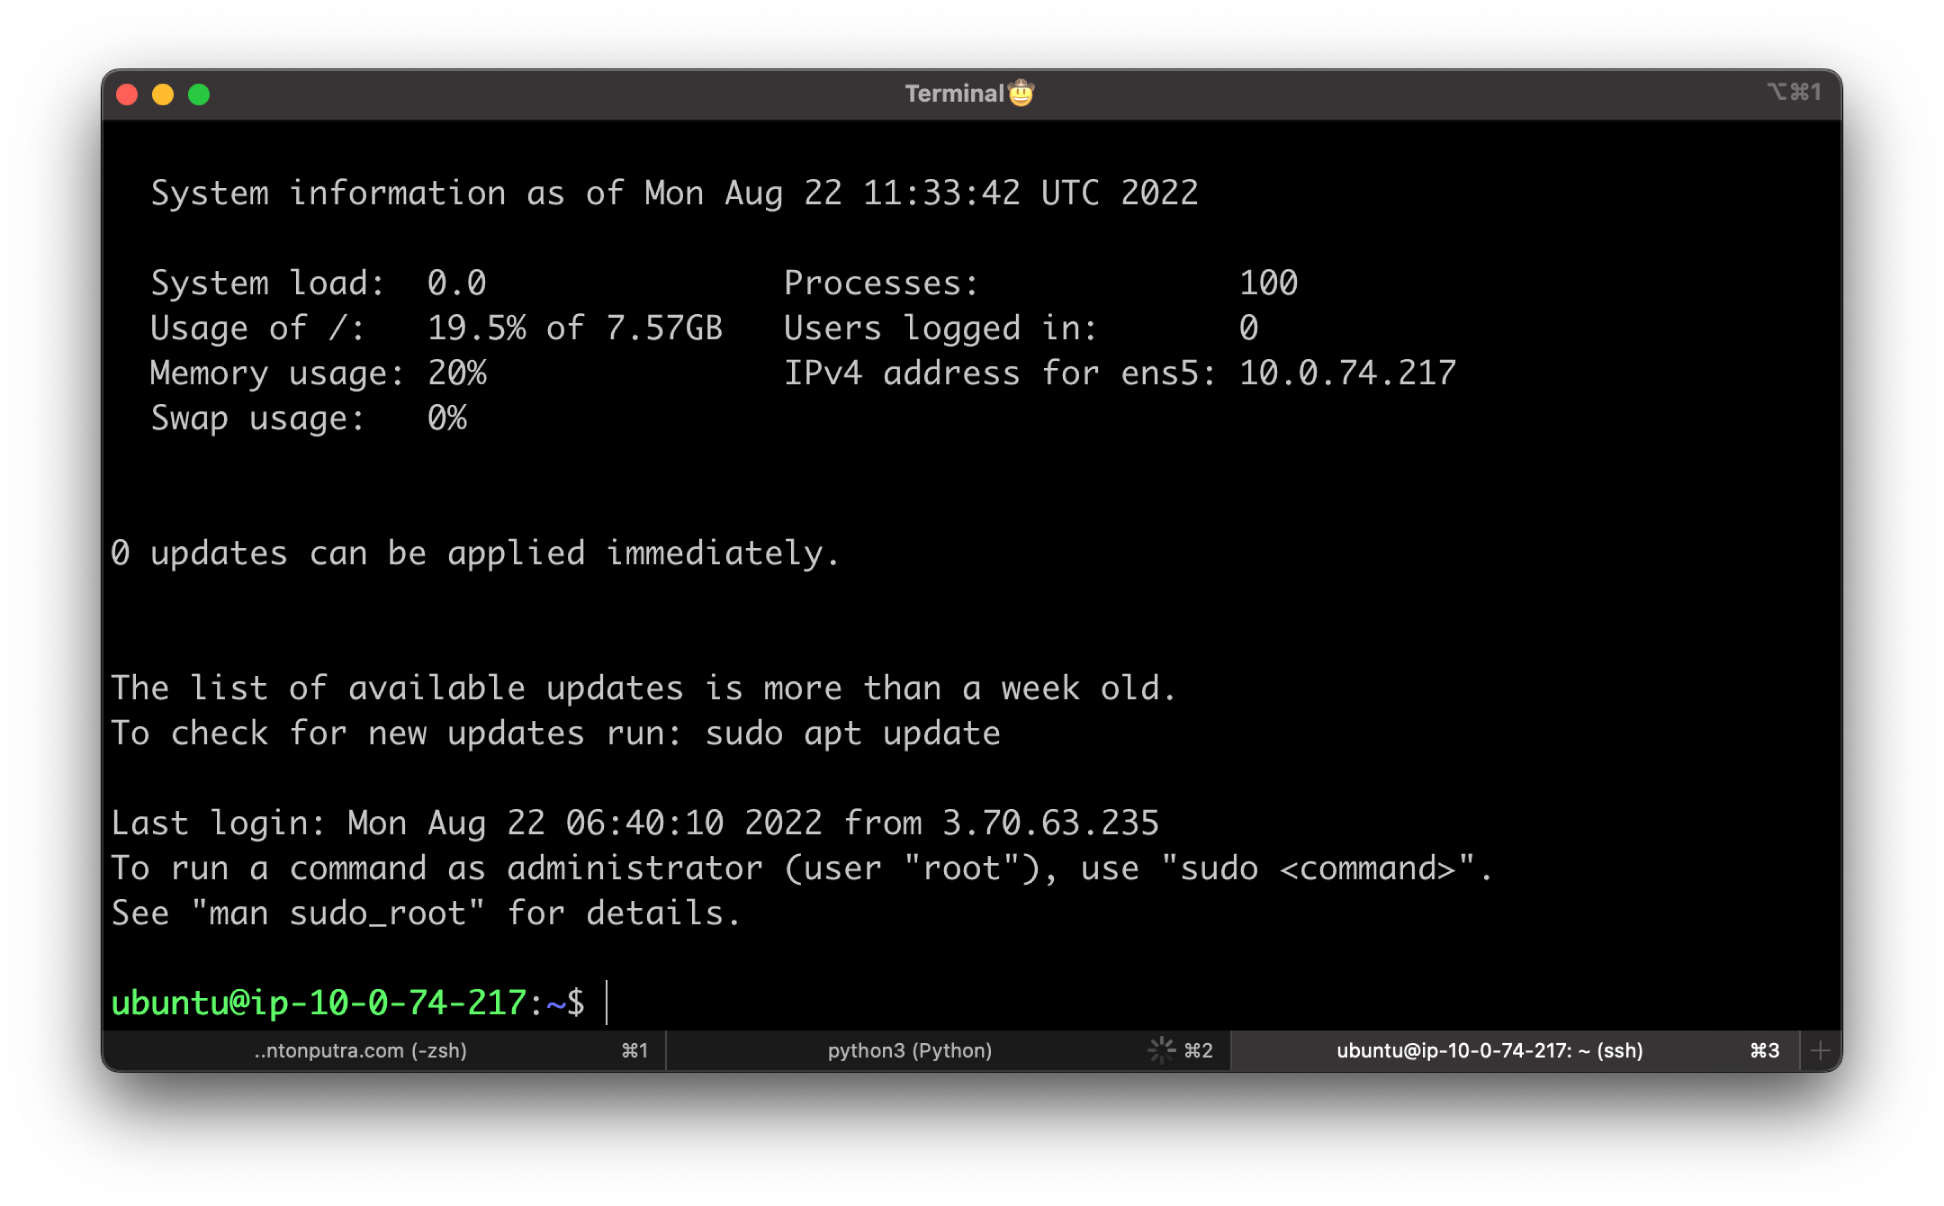
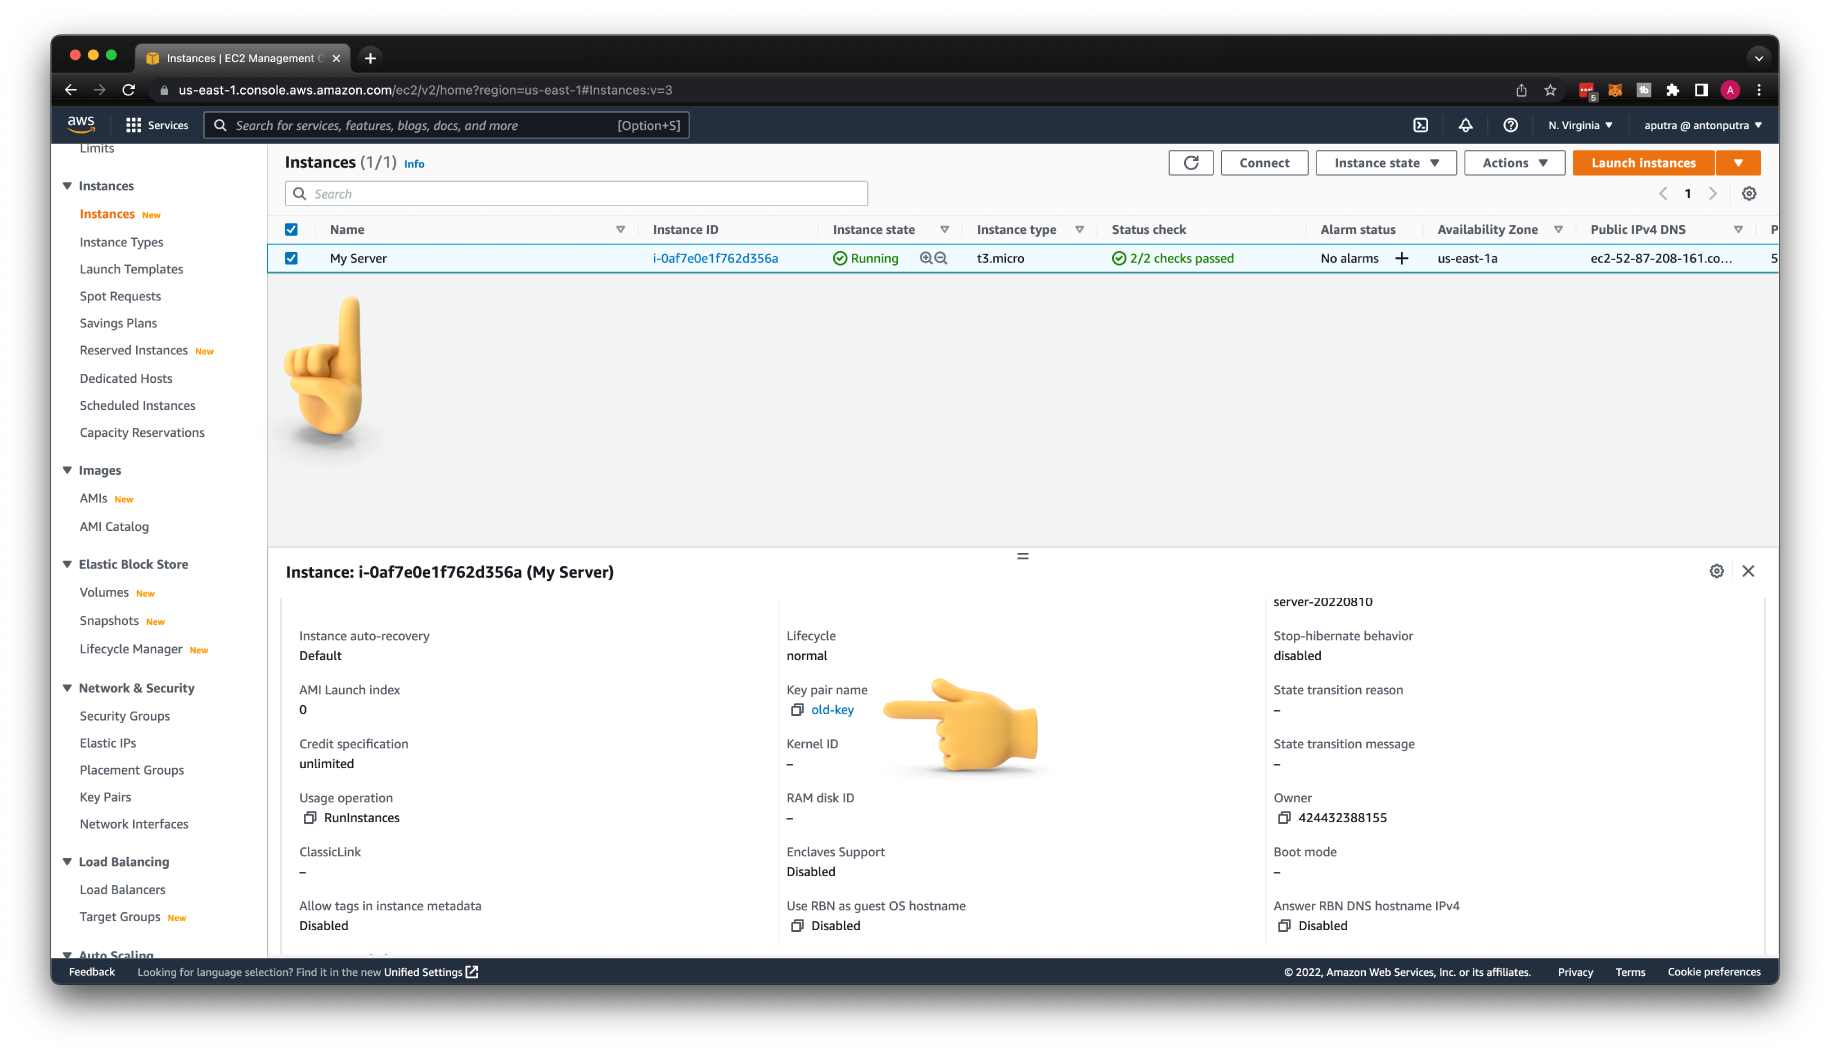
We have a single EC2 instance in this region. You can find the key pair name, which is old-key.
Let's pretend that we somehow lost the private key and are not able to log in to this VM.
The first approach will use a second EC2 instance to recover access.
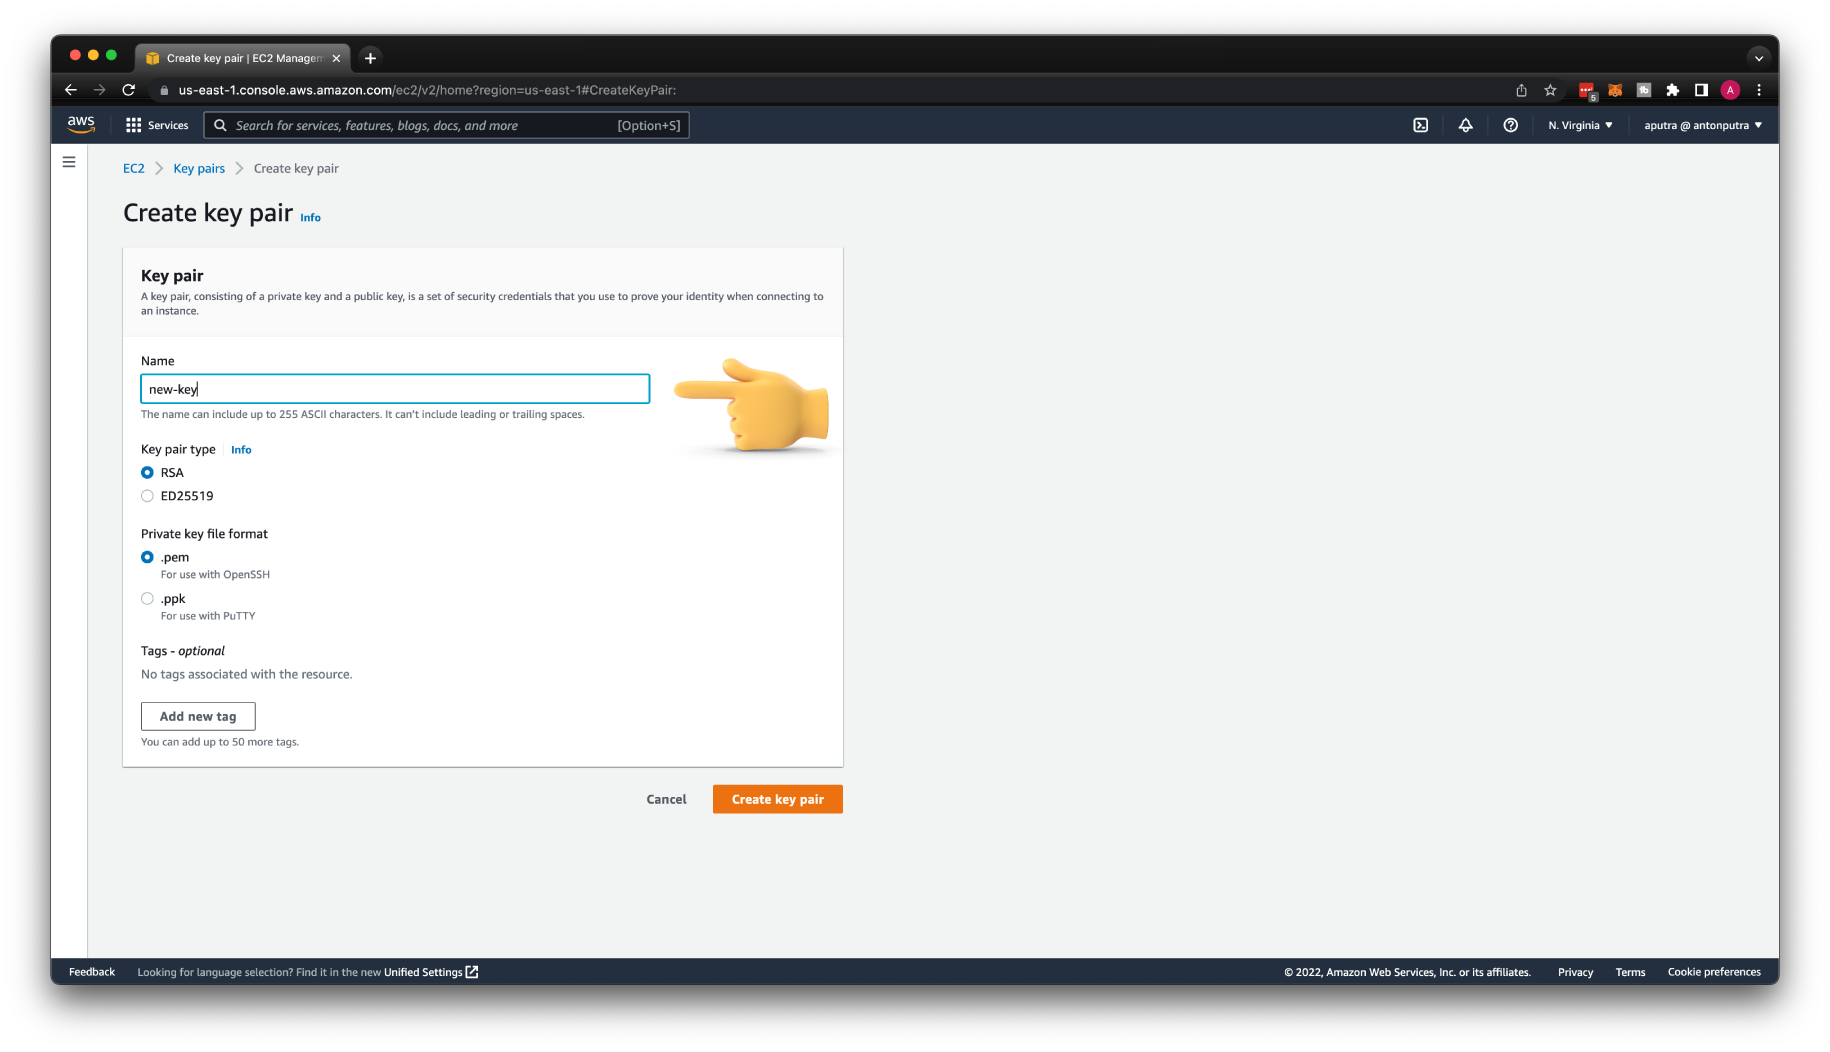
First of all, we need to create another key pair and store its private key in a secure place.
You can keep it in one of the password managers, such as LastPass.
Give it a name, new-key.
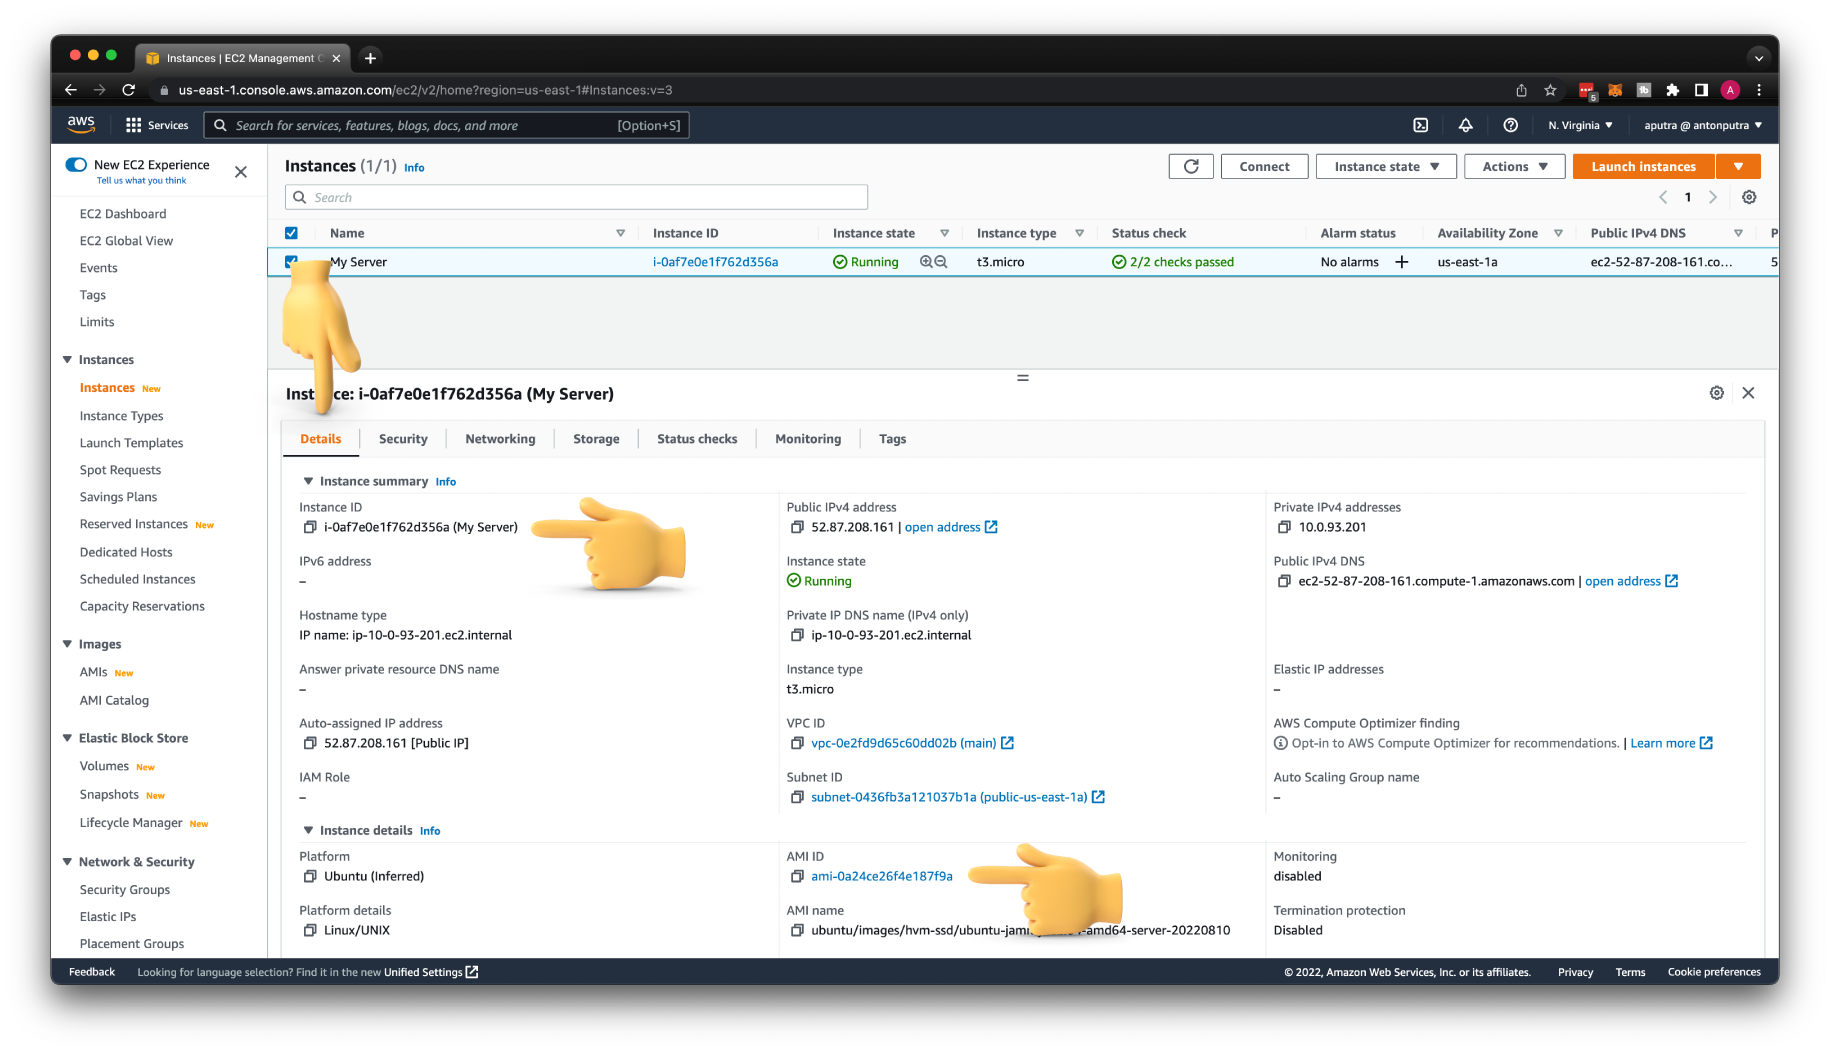
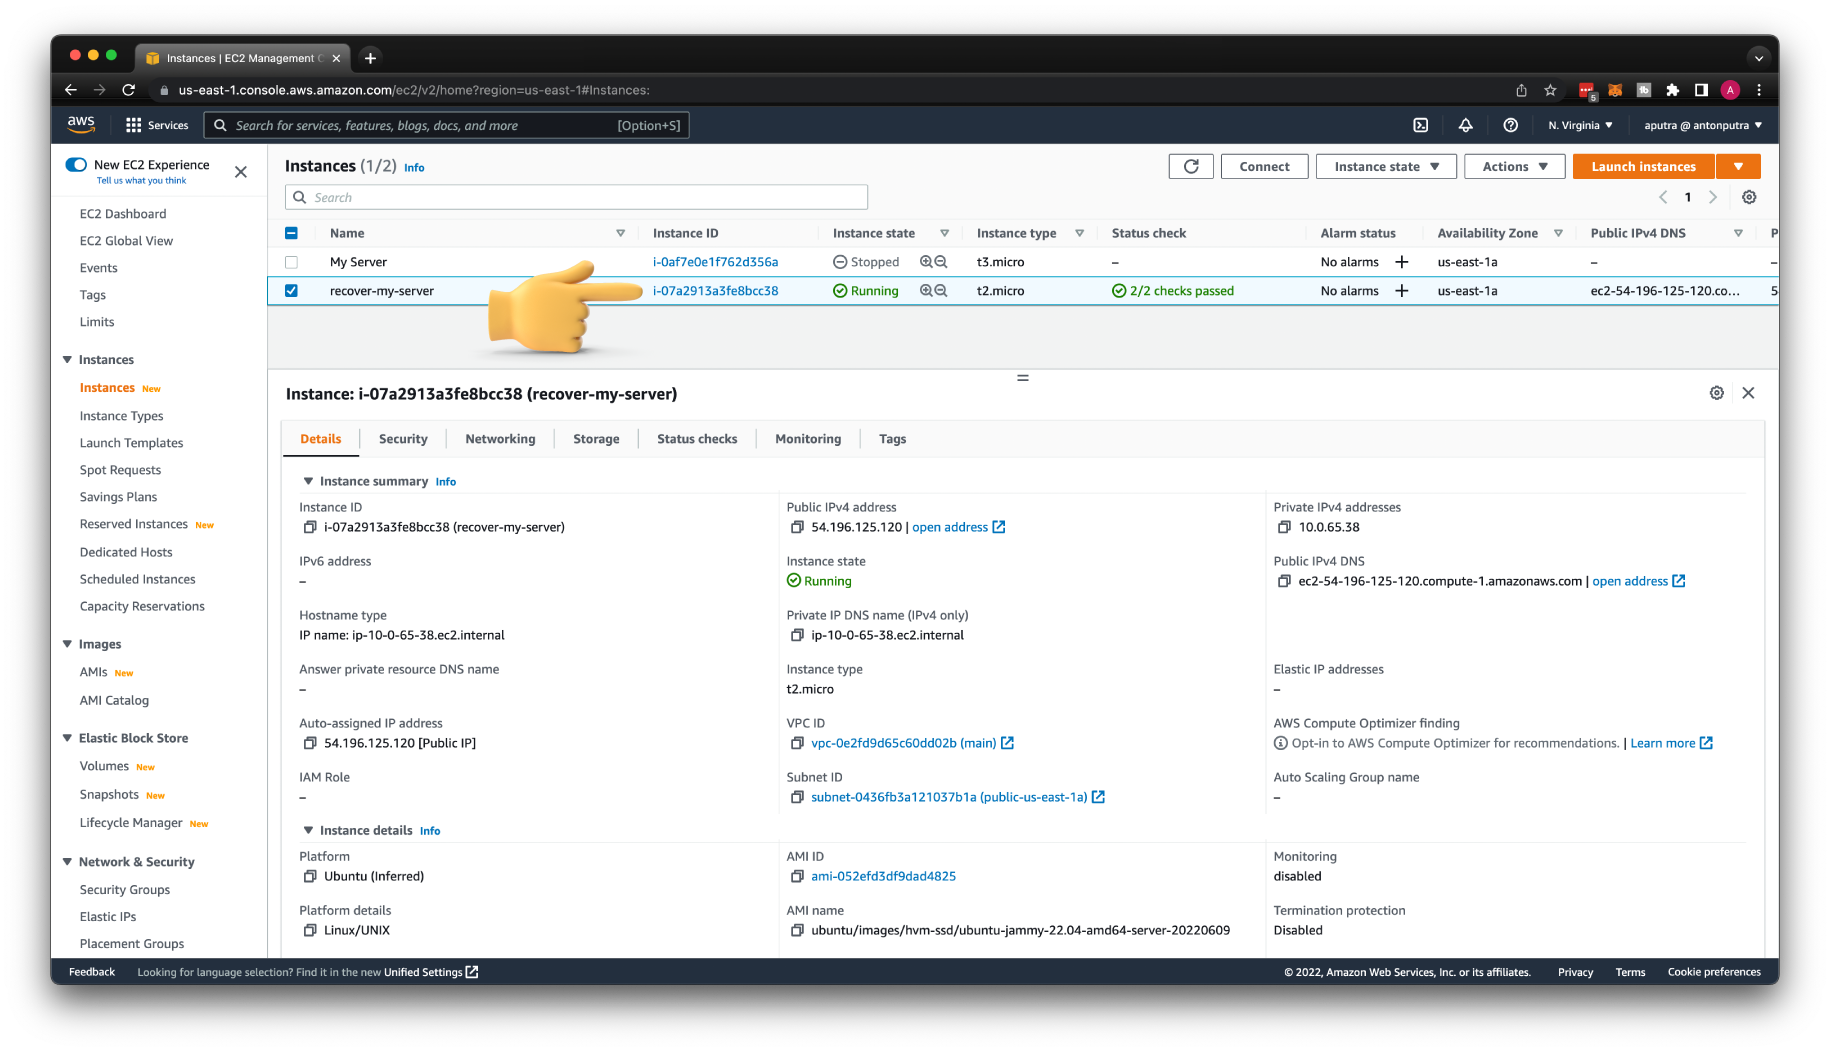
Next, we need to get information about the original instance and its root volume. Write it down somewhere; we would need it later.
From the Details tab, we need to get the instance ID and AMI ID. We are going to use this AMI ID to create an EC2.
In some cases, you would need to create an AMI image yourself. You can do it from the console, click Actions, image and templates and create image.
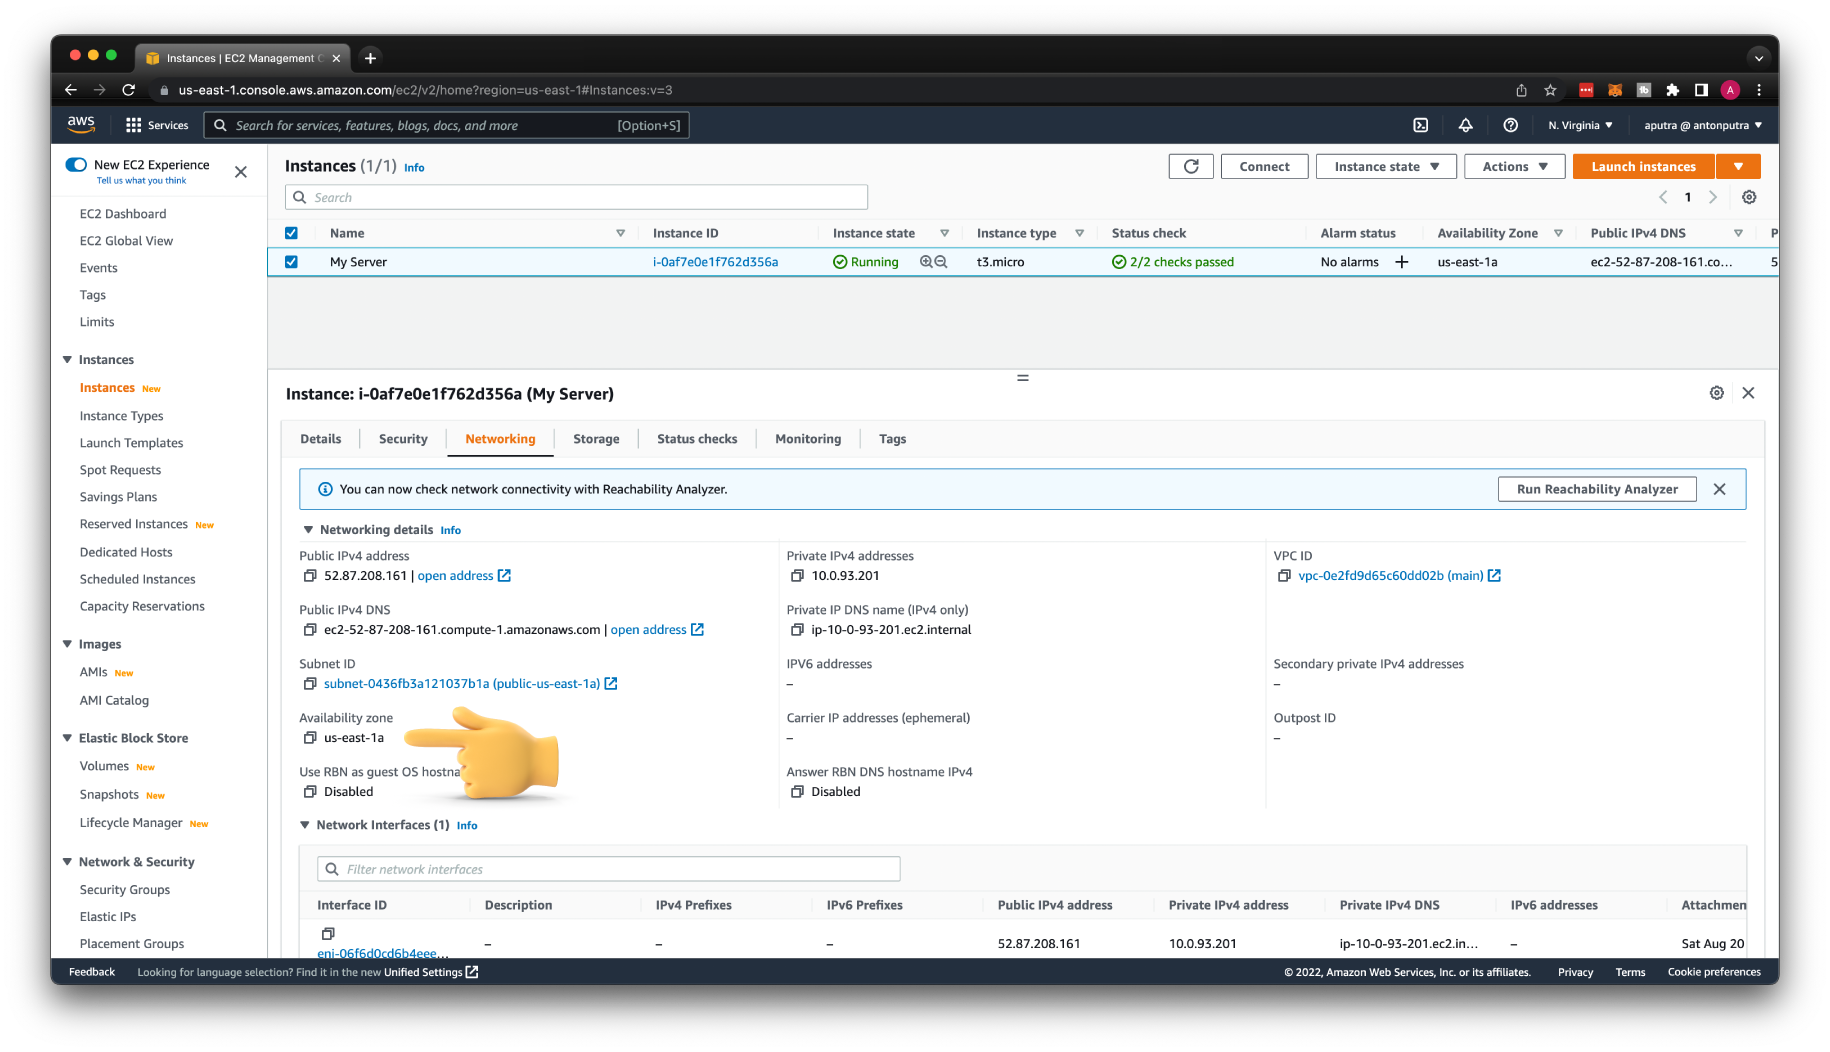
From the Networking tab, you need to find the Availability zone. The new instance that we're going to create has to be placed in the same AZ to attach the volume.
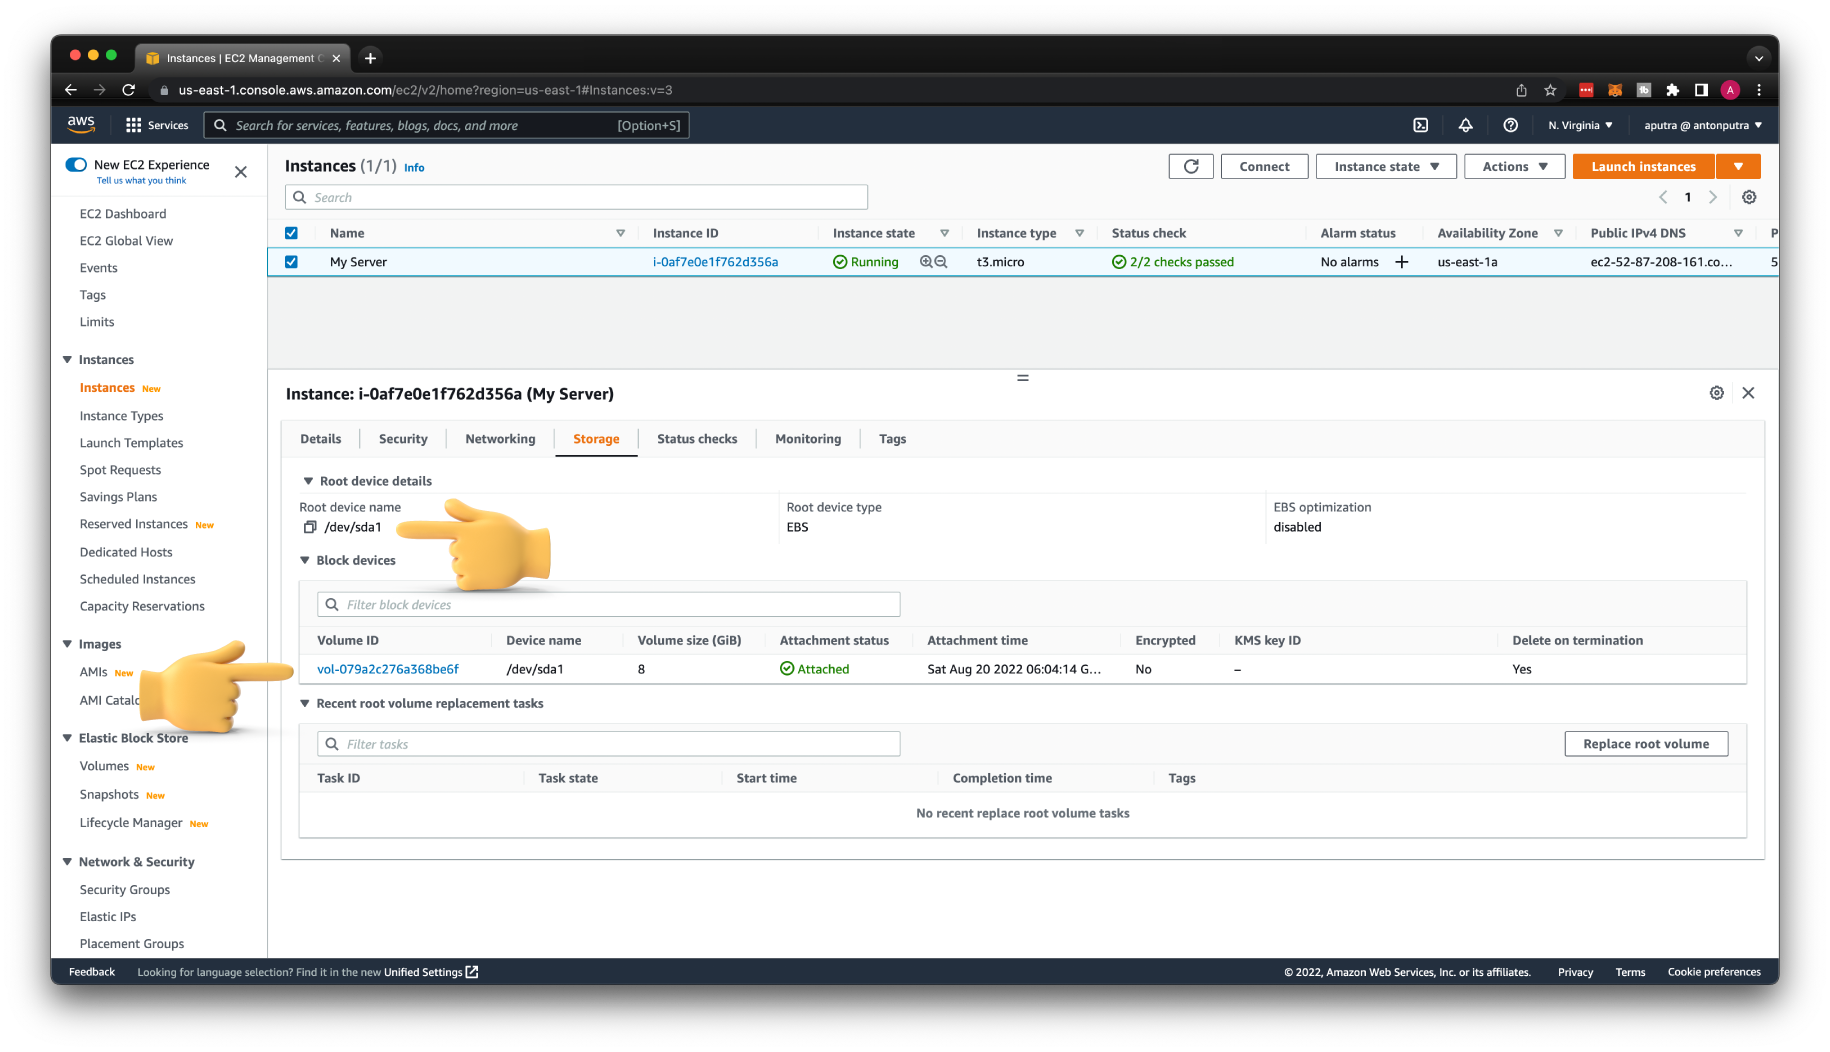
Finally, on the Storage tab, you need to take note of the Root device name and a Volume ID.
We're going to detach this volume from the original instance and connect it to a new one. When we recover the key, we would need to attach this volume back and use exactly the same device name.
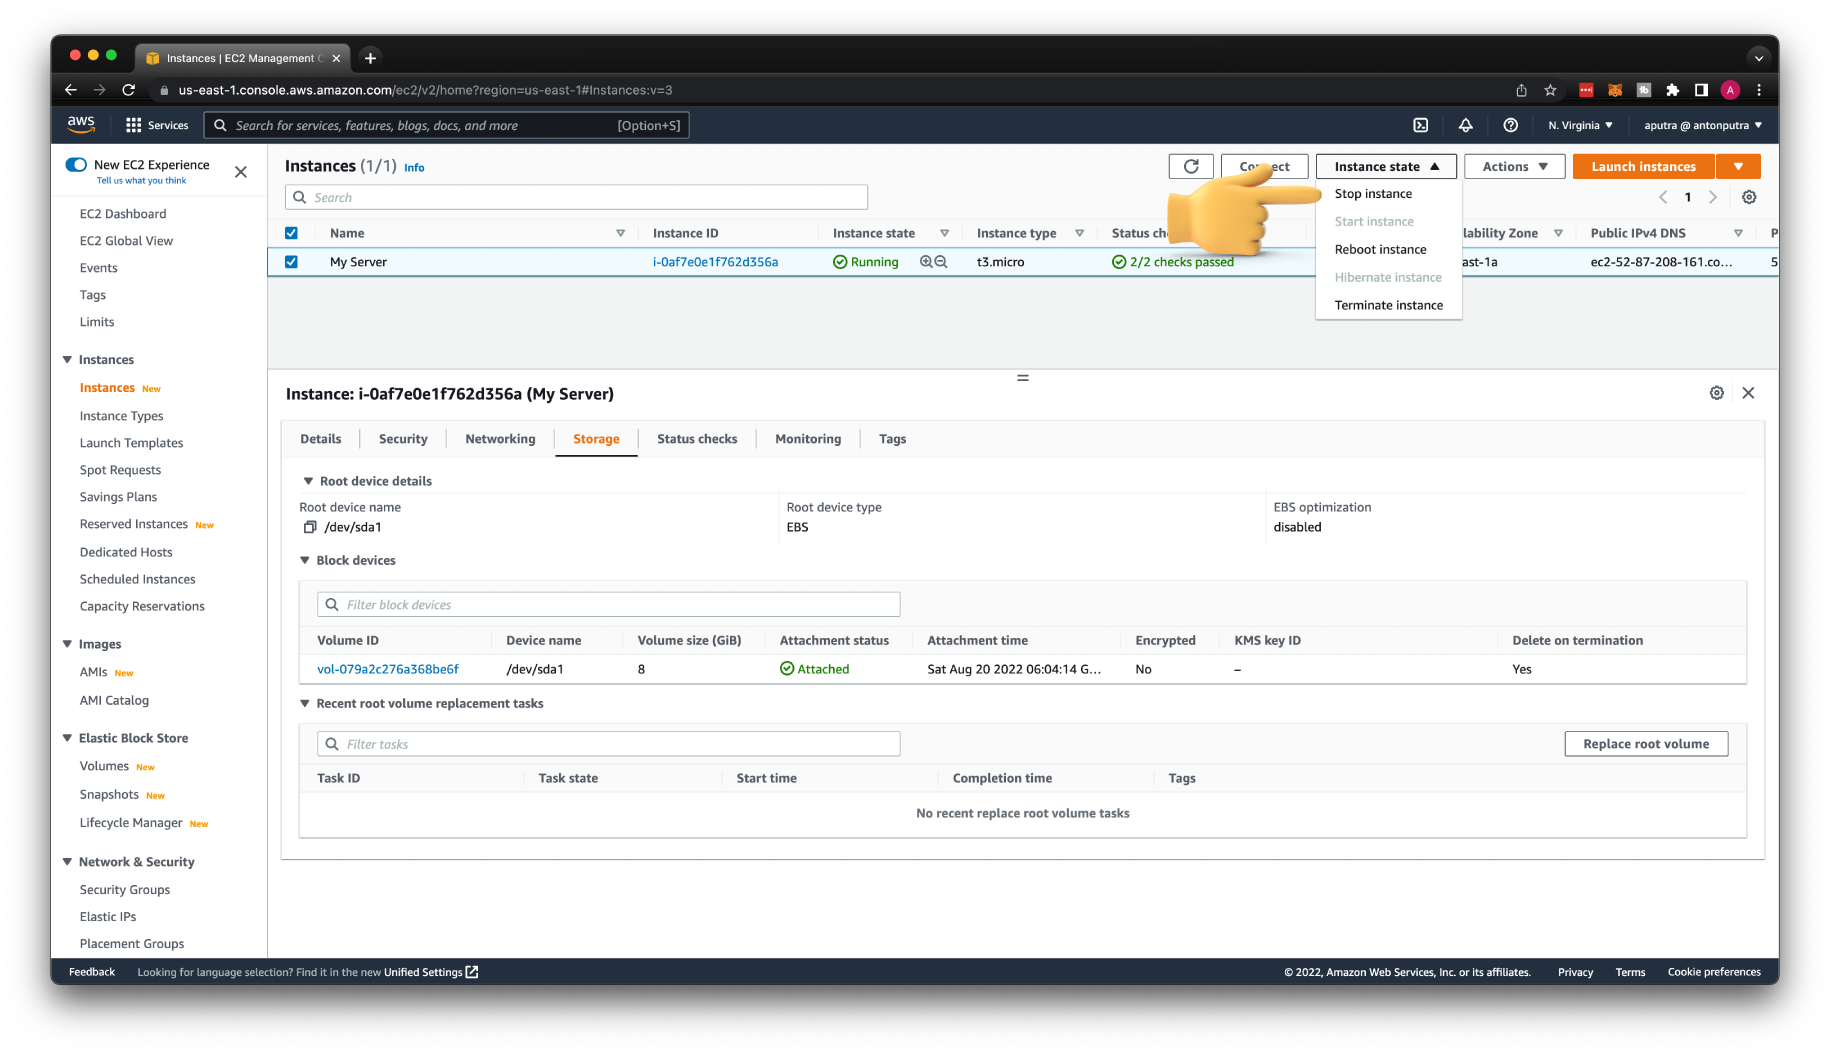
Now, when you have all the information, you can stop the instance.
If you used Auto-assign IP address on launch and not Elastic IP, most likely, it will be released. When you start this instance again, you will get a new public IP address.
The next step is to launch a temporary instance. Let's call it recover-my-server.
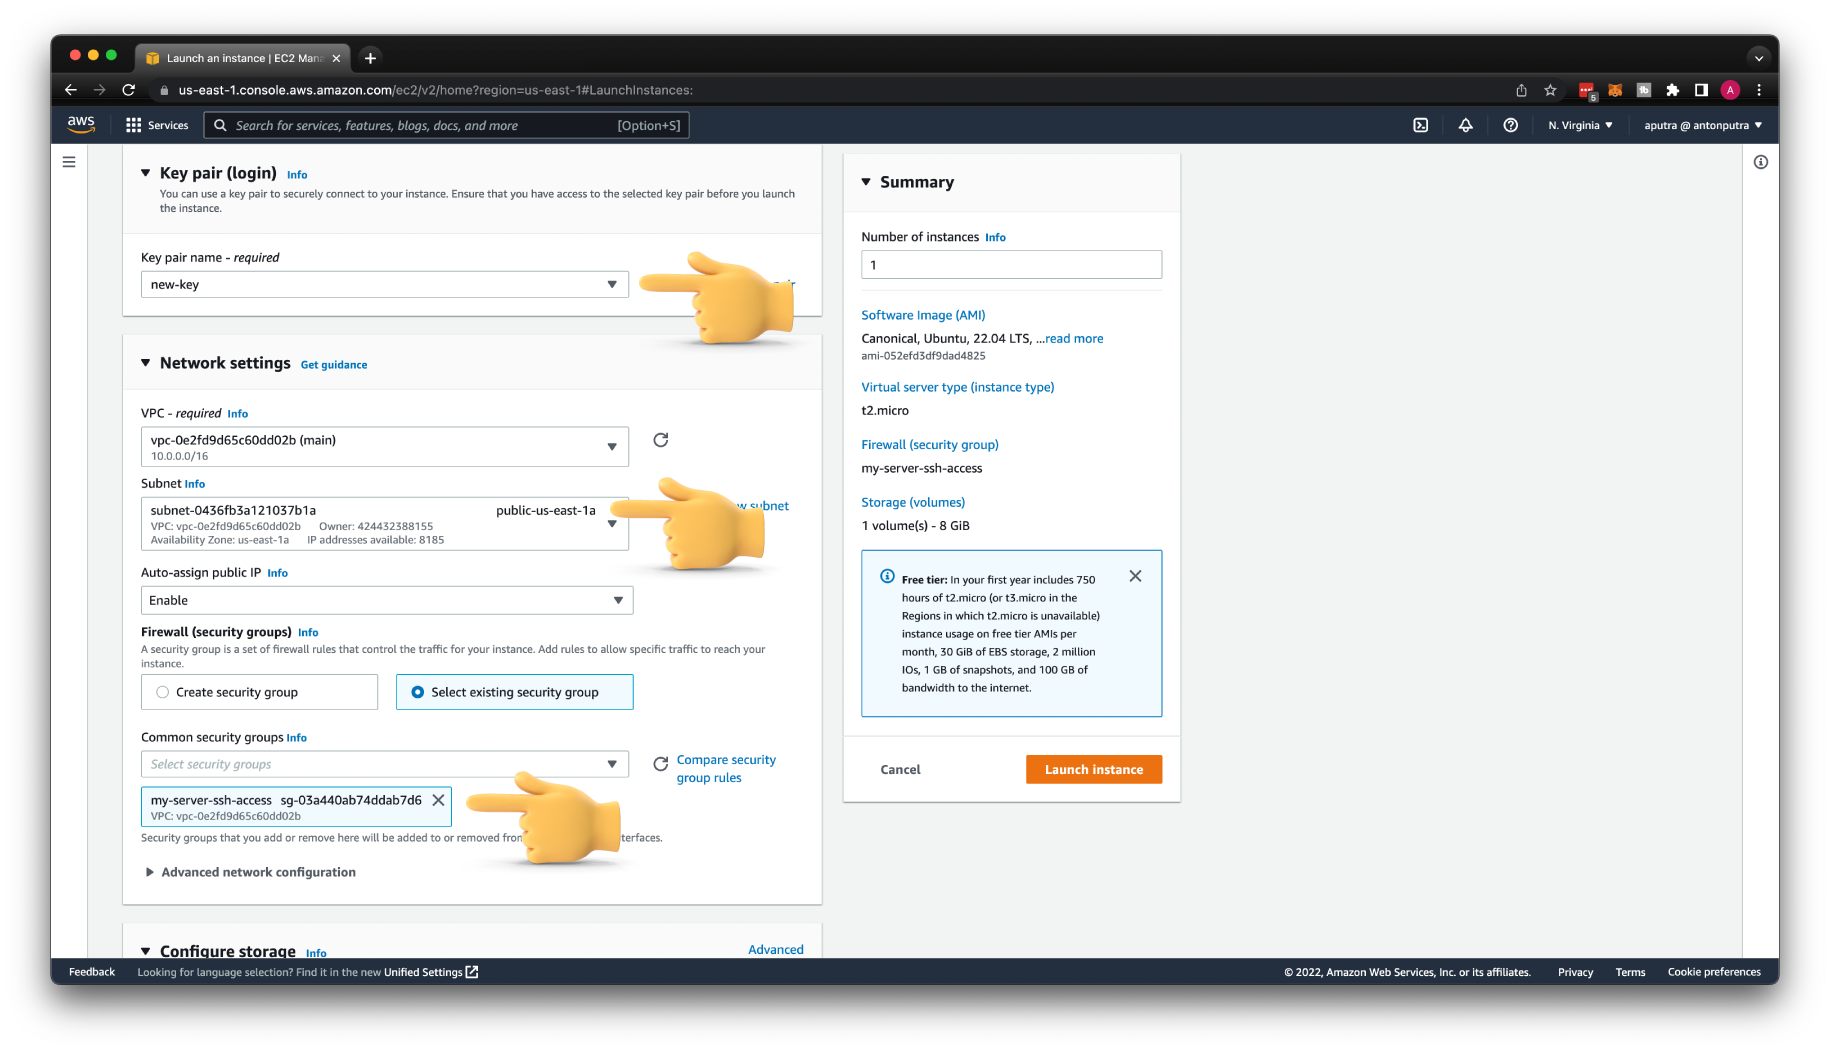
Use the same AMI ID for your image. Select the new-key pair. You also need to place it in the same subnet public-us-east-1a.
Make sure that Auto-assign public IP is enabled and select the same security group that you used for the original instance.
Also, take a note of the new instance ID.
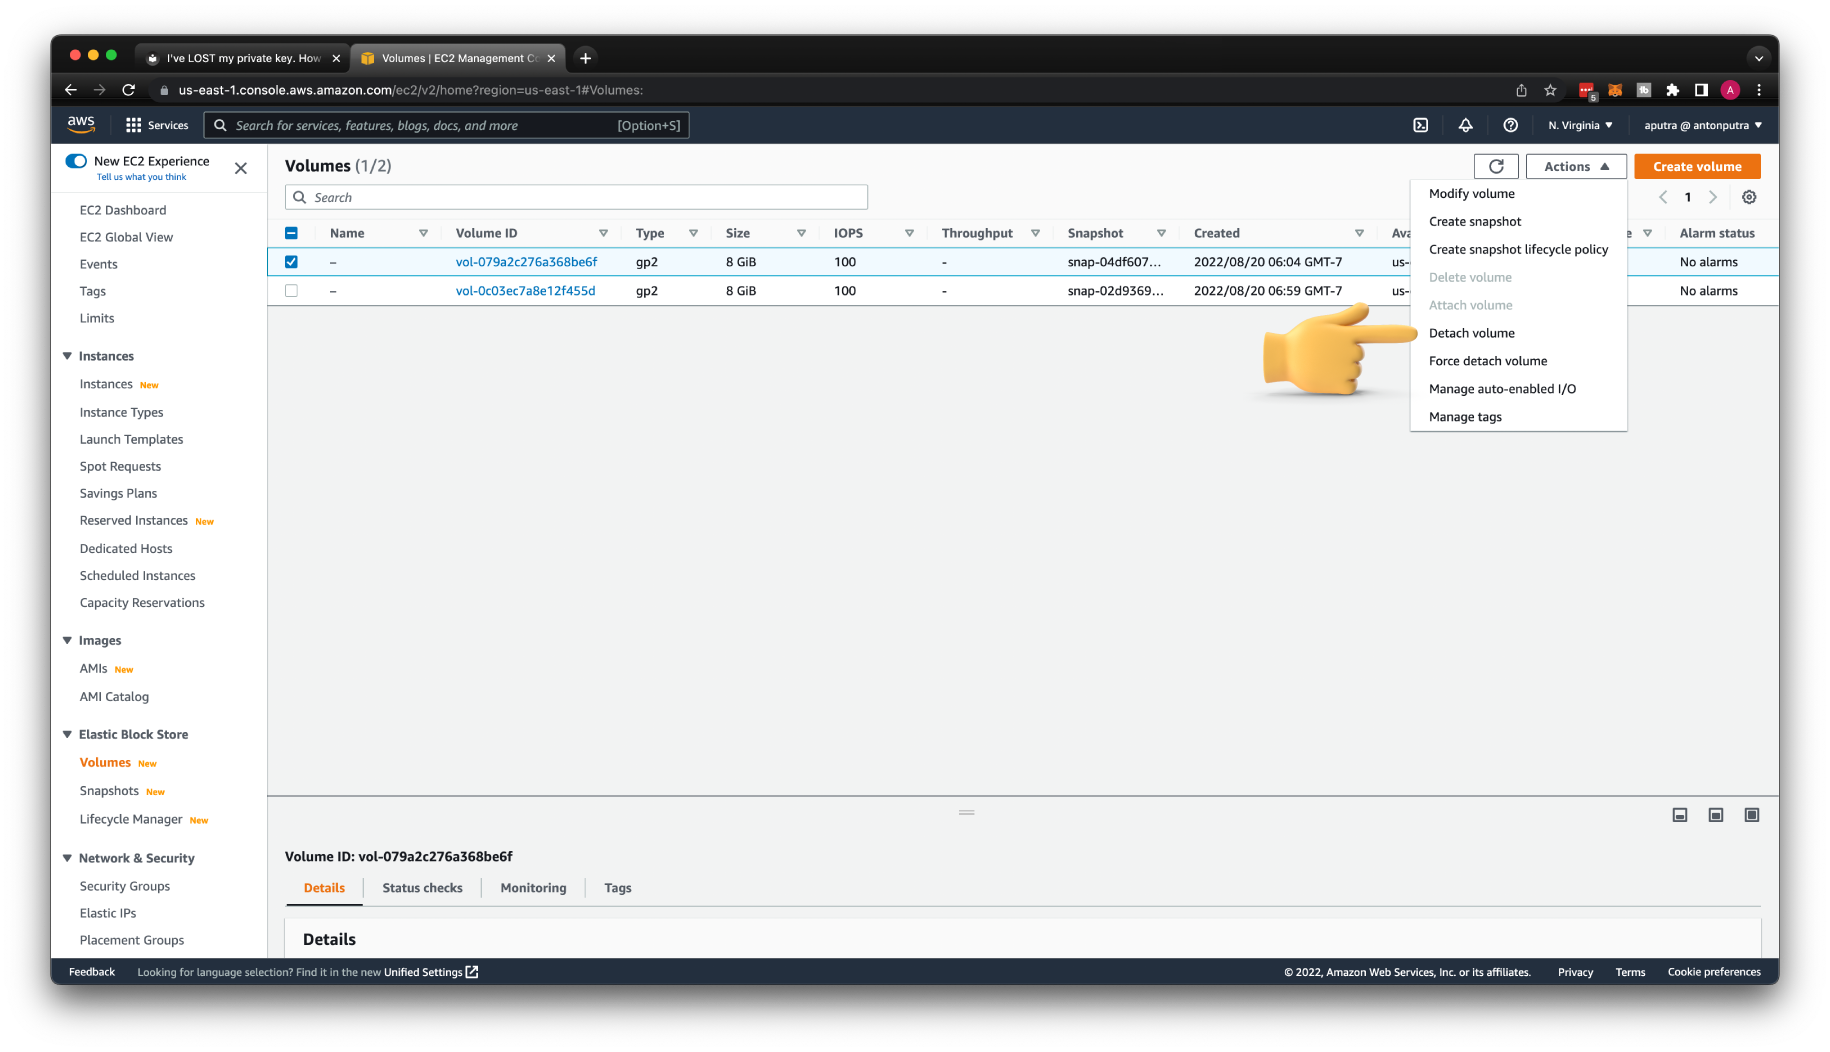
Now, we need to detach the root volume from the original instance and attach it to the temporary instance.
If you launched your original instance from an AWS Marketplace AMI, and your volume contains AWS Marketplace codes, you must first stop the temporary instance before you can attach the volume.
Make a note of the device name. We're going to mount it to the temporary directory.
The next step is to add the new public key to authorized_keys on the original volume mounted to the temporary instance.
If you just created new-key pair as I did, you need to update permissions.
You can get the public IP from the console, then use it to SSH to the temporary EC2.
From the temporary instance, mount the volume that you attached to the instance so that you can access its file system. The device name might appear differently on your instance.
You can check the name with the following command.
In my case, I need to mount the xvdf1 partition to the temp folder.
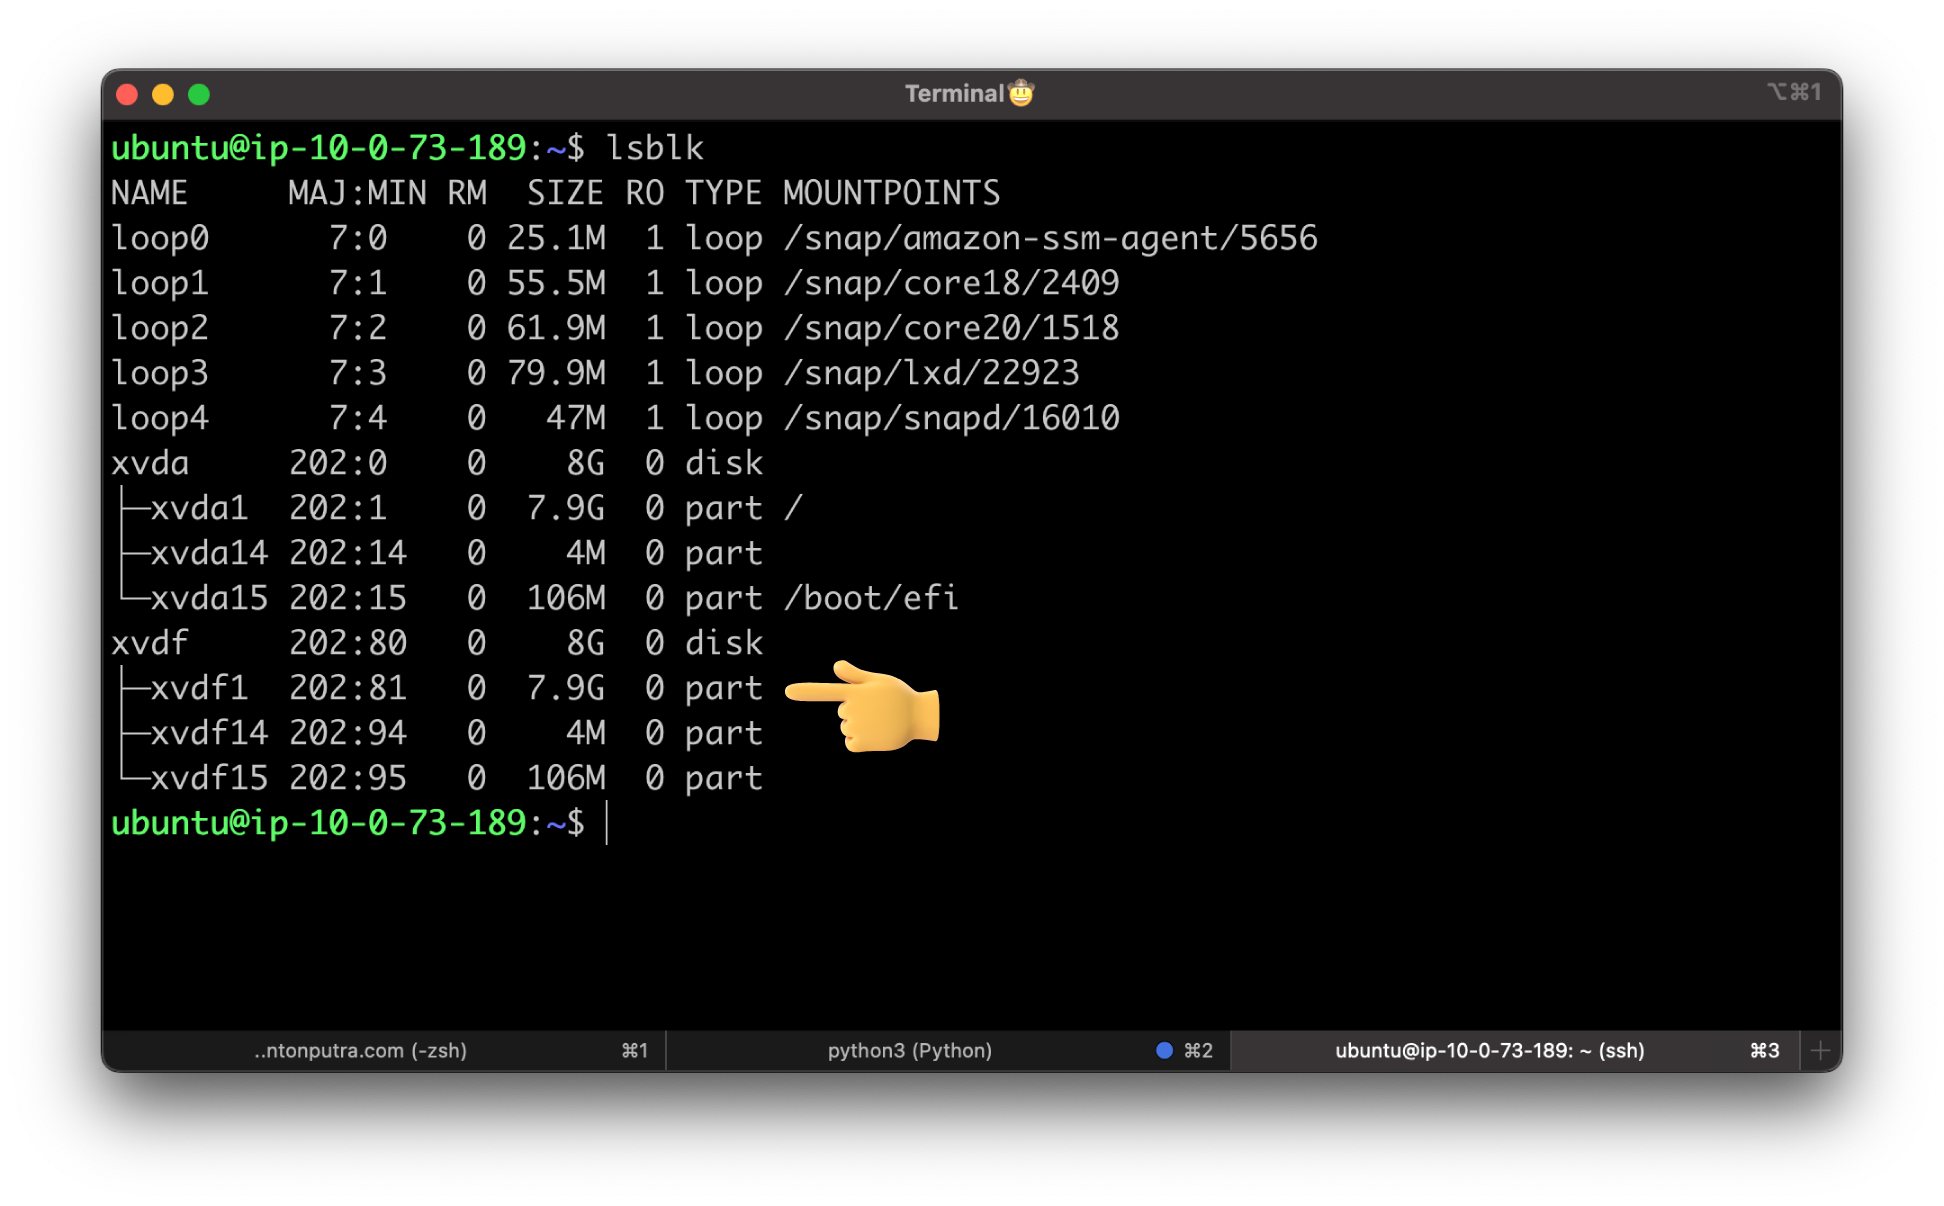
Let's create that temporary folder first.
If you use Amazon Linux, Ubuntu, or Debian as your temporary instance, use the following command to mount partition.
If you have Amazon Linux 2, CentOS, SUSE Linux 12, or RHEL 7.x, use this command.
If you get an error stating that the file system is corrupt, run the following command to use the fsck utility to check the file system and repair any issue.
From the temporary instance, only if you use Ubuntu, use the following command to update authorized_keys on the
mounted volume with the new public key from the authorized_keys for the temporary instance.
The following examples use the Ubuntu user name ubuntu. You might need to substitute a different user name, such as ec2-user, for Amazon Linux instances.
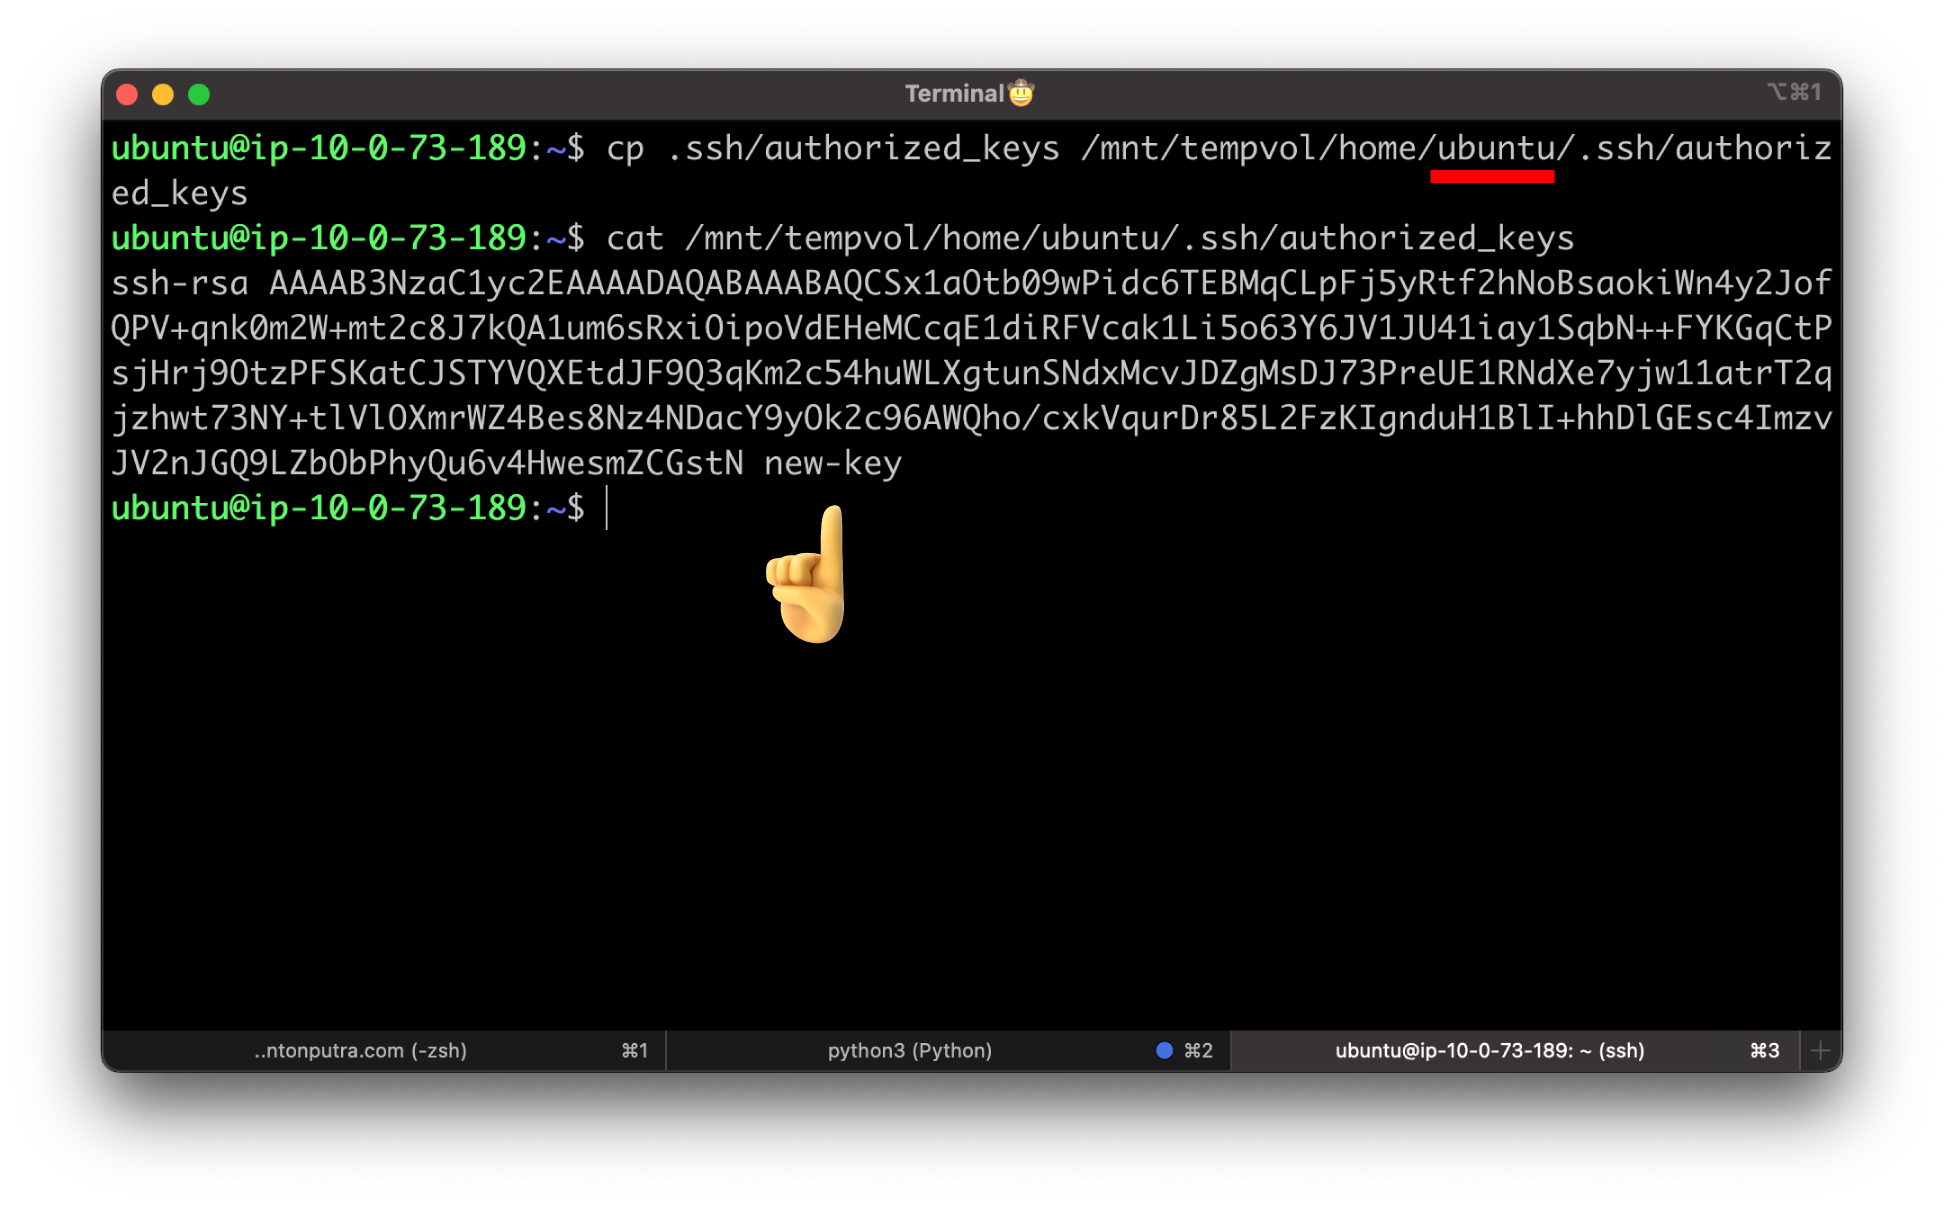
If this copy succeeded, you can go to the next step.
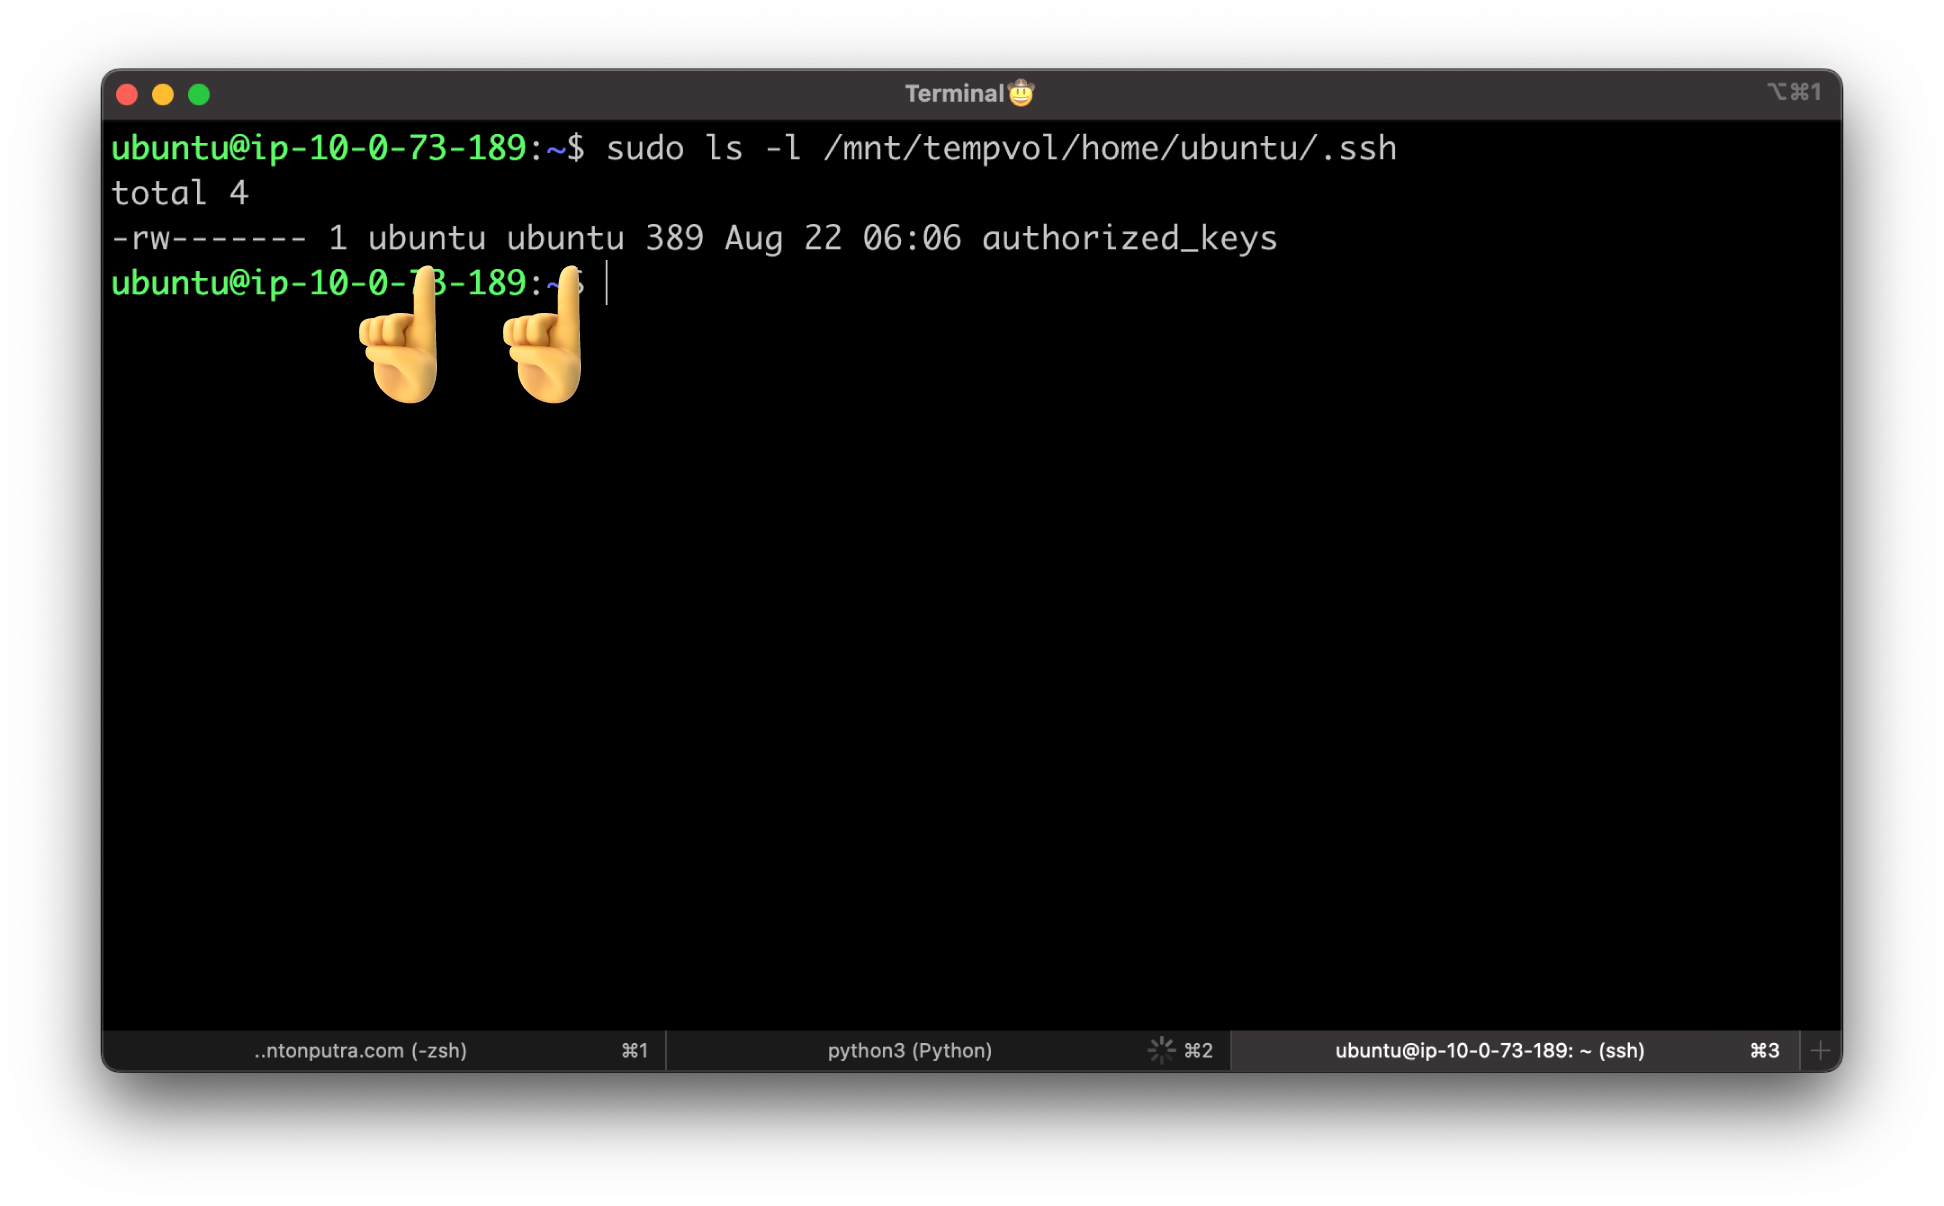
(Optional) Otherwise, if you don't have permission to edit files in /mnt/tempvol, you must update the file using sudo and then check the
permissions on the file to verify that you are able to log into the original instance. Use the following command to check the permissions on the file.
In this example output, ubuntu is the user and ubuntu is the group. Next, use sudo to re-run the copy command that failed.
Then update ownership to the original ubuntu:ubuntu.
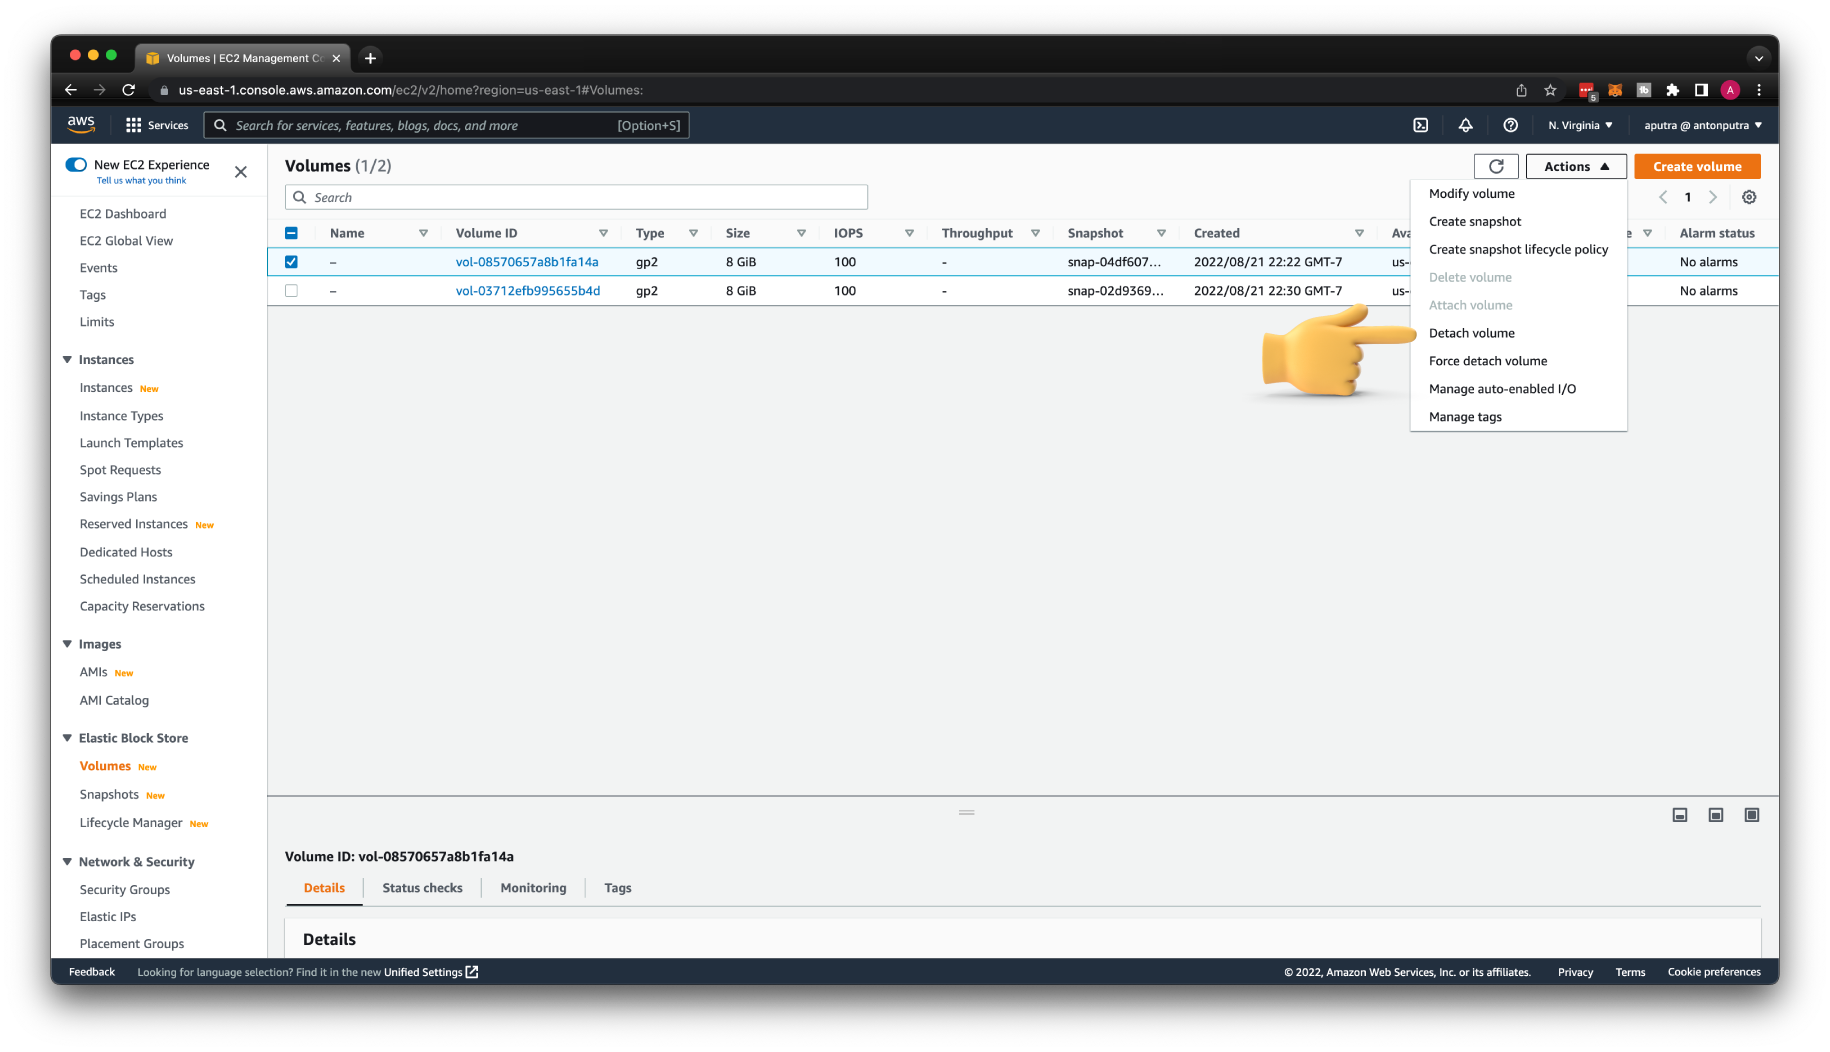
From the temporary instance, unmount the volume that you attached so that you can reattach it to the original instance.
For example, use the following command to unmount the volume at /mnt/tempvol.
Then Detach volume.
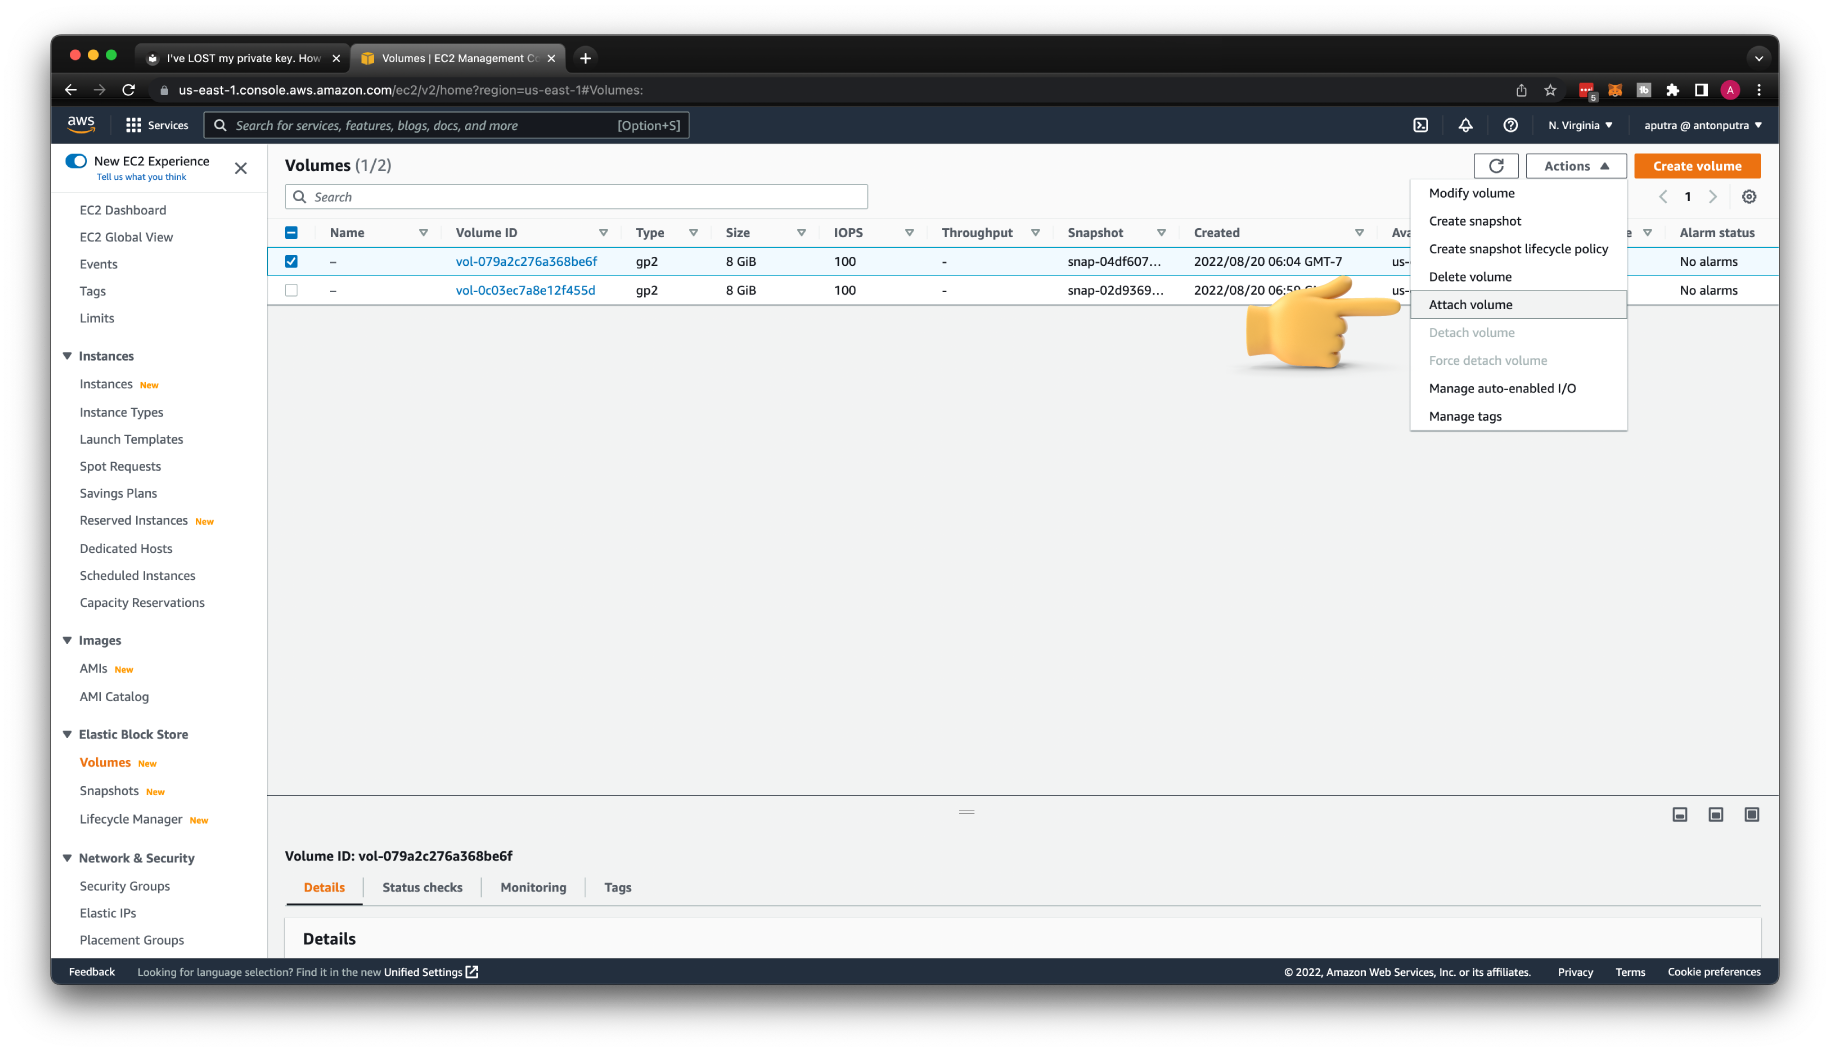
Reattach the volume to the original instance.
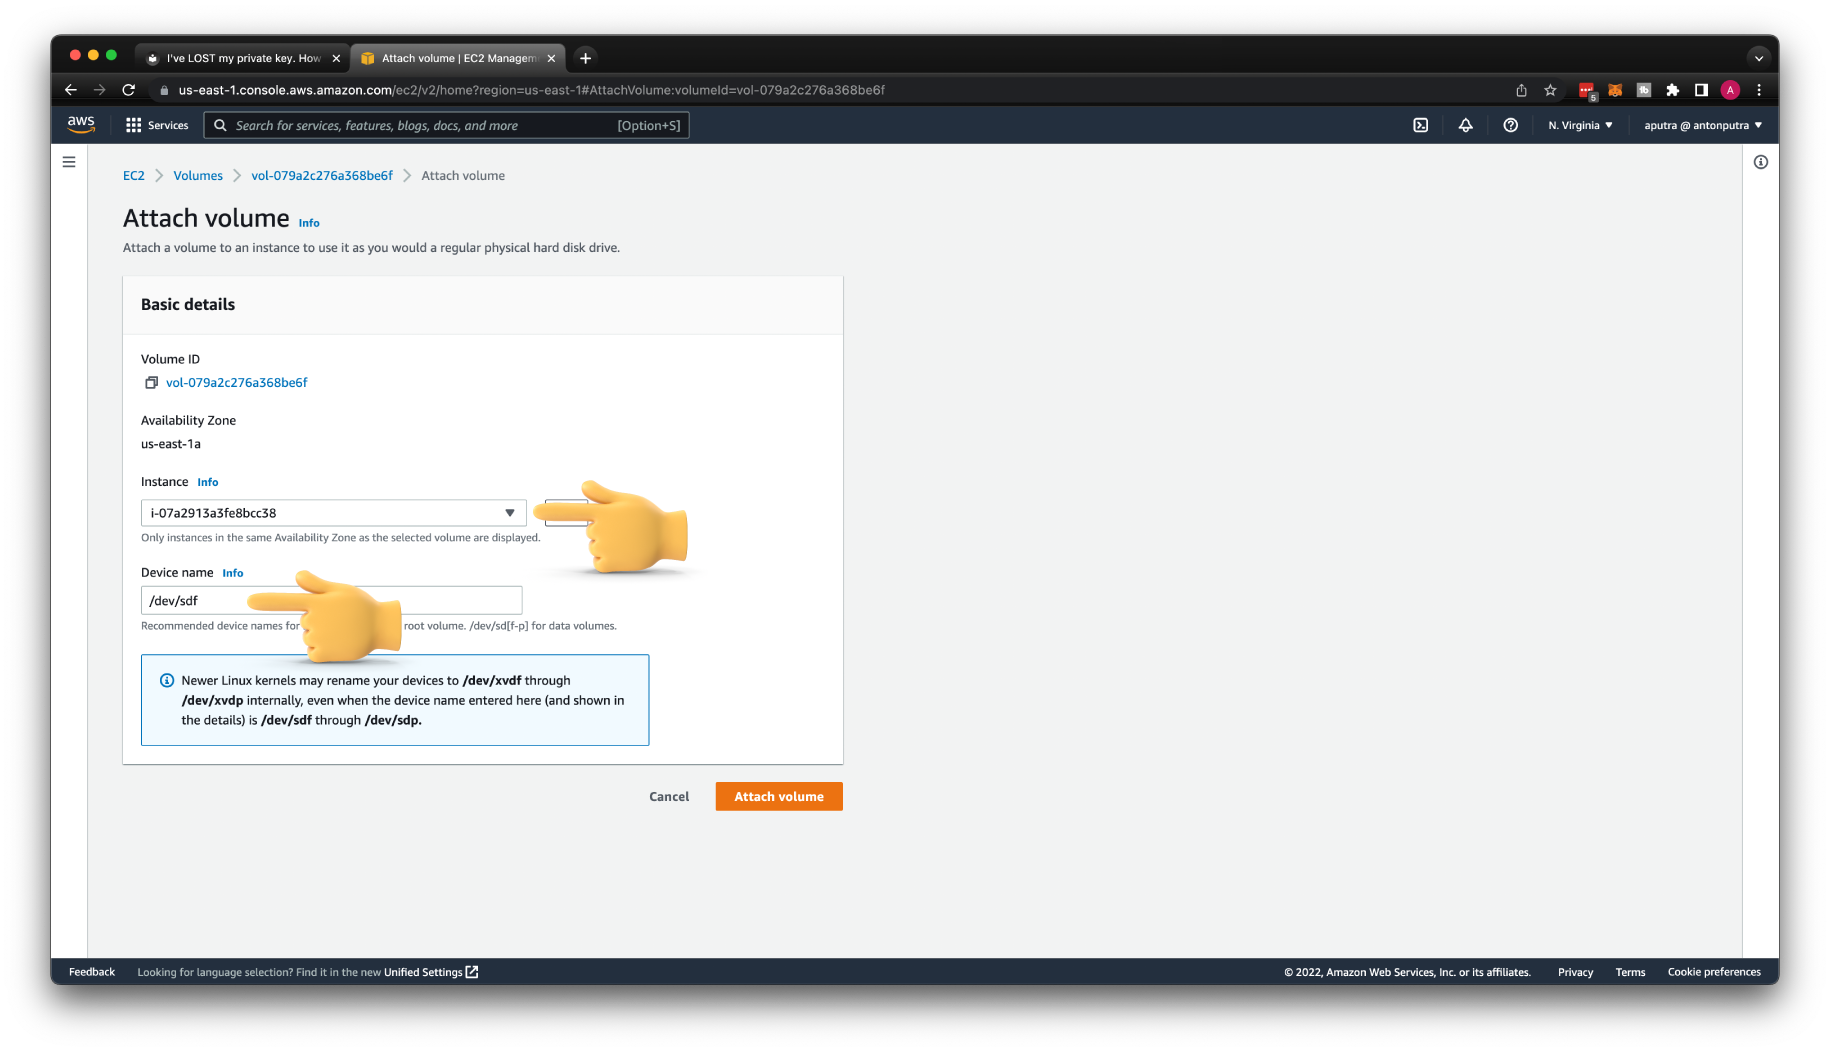
With the volume still selected, choose Actions, Attach Volume. Select the instance ID of the original instance, specify the device name that you noted earlier for the original root device attachment (/dev/sda1 or /dev/xvda), and then choose Attach.
If you don't specify the same device name as the original attachment, you cannot start the original instance. Amazon EC2 expects the root device volume at sda1 or /dev/xvda.

Start the instance and grab a new public IP address.

Now you can use the new-key to SSH to the original instance.
Recover key using Session Manager
In the second part, I'll show you how to recover access to your original instance using AWS Session Manager.
In my opinion, it's the best and most convenient way, not even to say that it can completely remove the need from using key pairs again in the future.
Create an IAM role for your instance that would grant access to Session Manager.

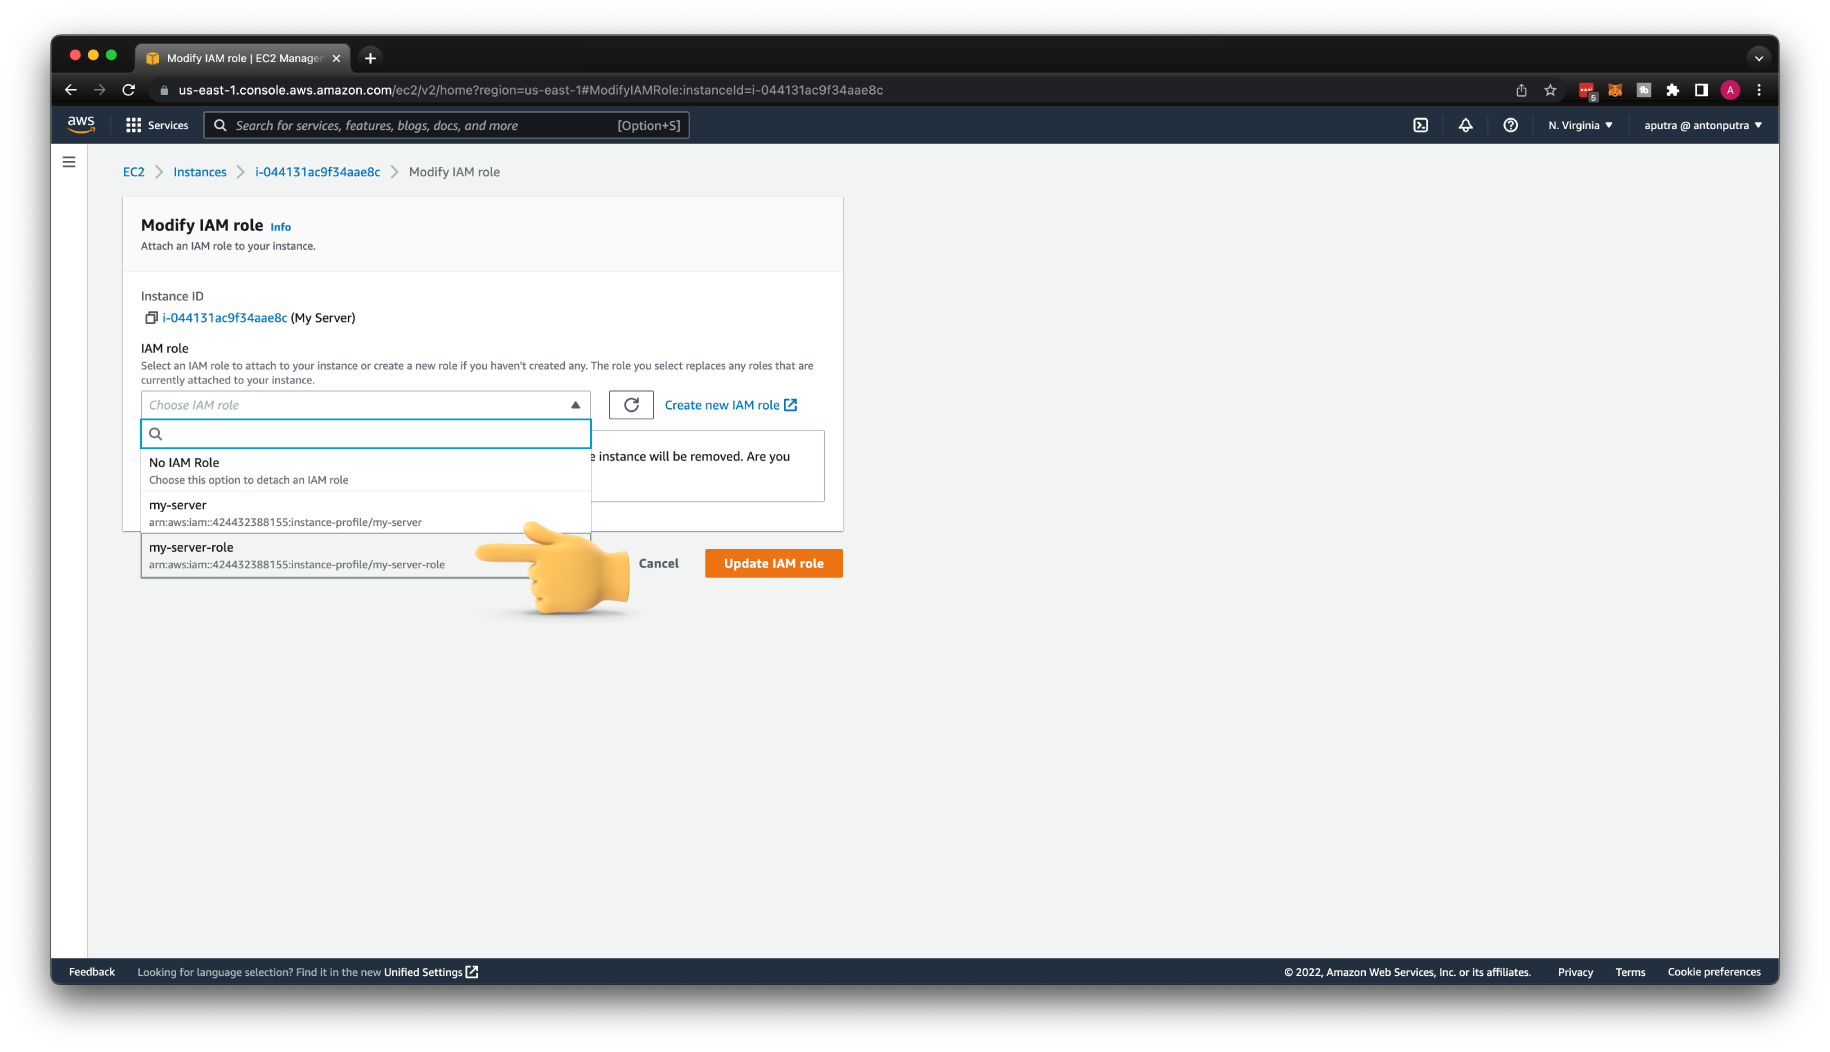
Call it my-server-role and attach AmazonSSMManagedInstanceCore policy to the role.
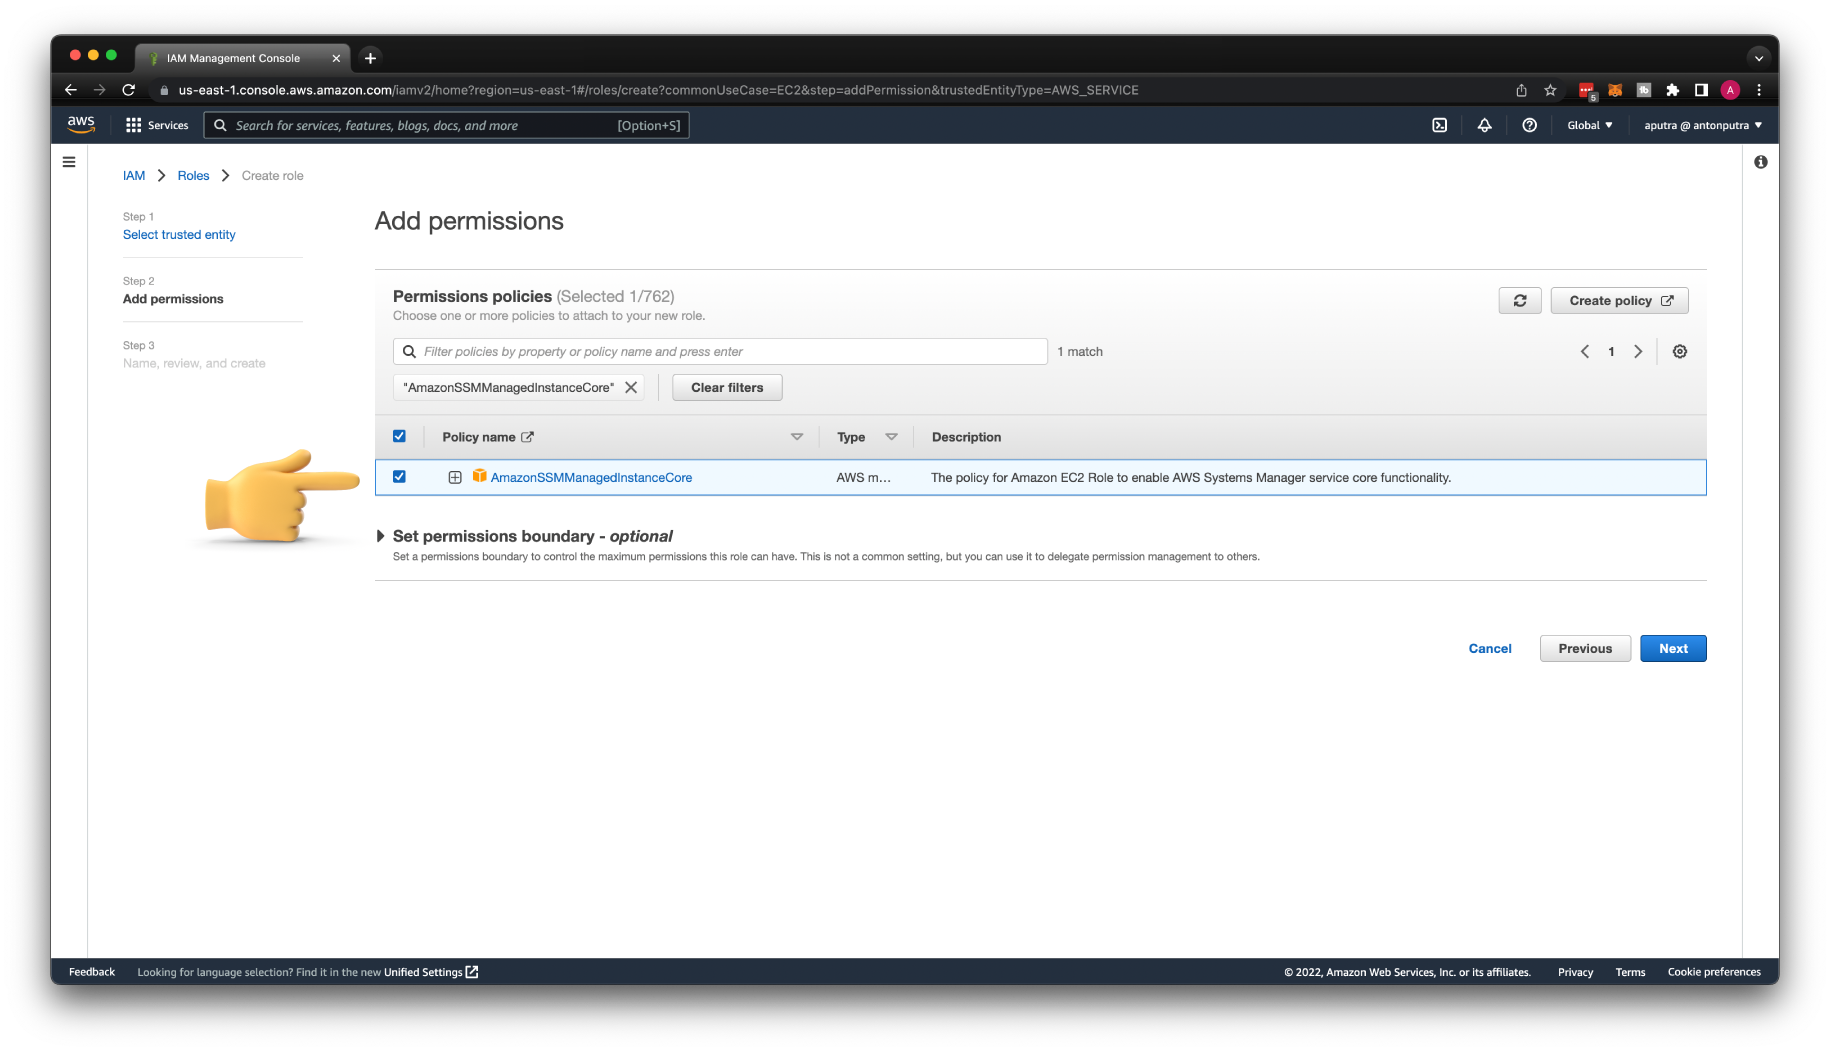
If you already have the IAM role or sometimes called Instance profile, you can simply add that AmazonSSMManagedInstanceCore policy to the existing role.
Otherwise, let's modify the EC2 instance to use this profile.
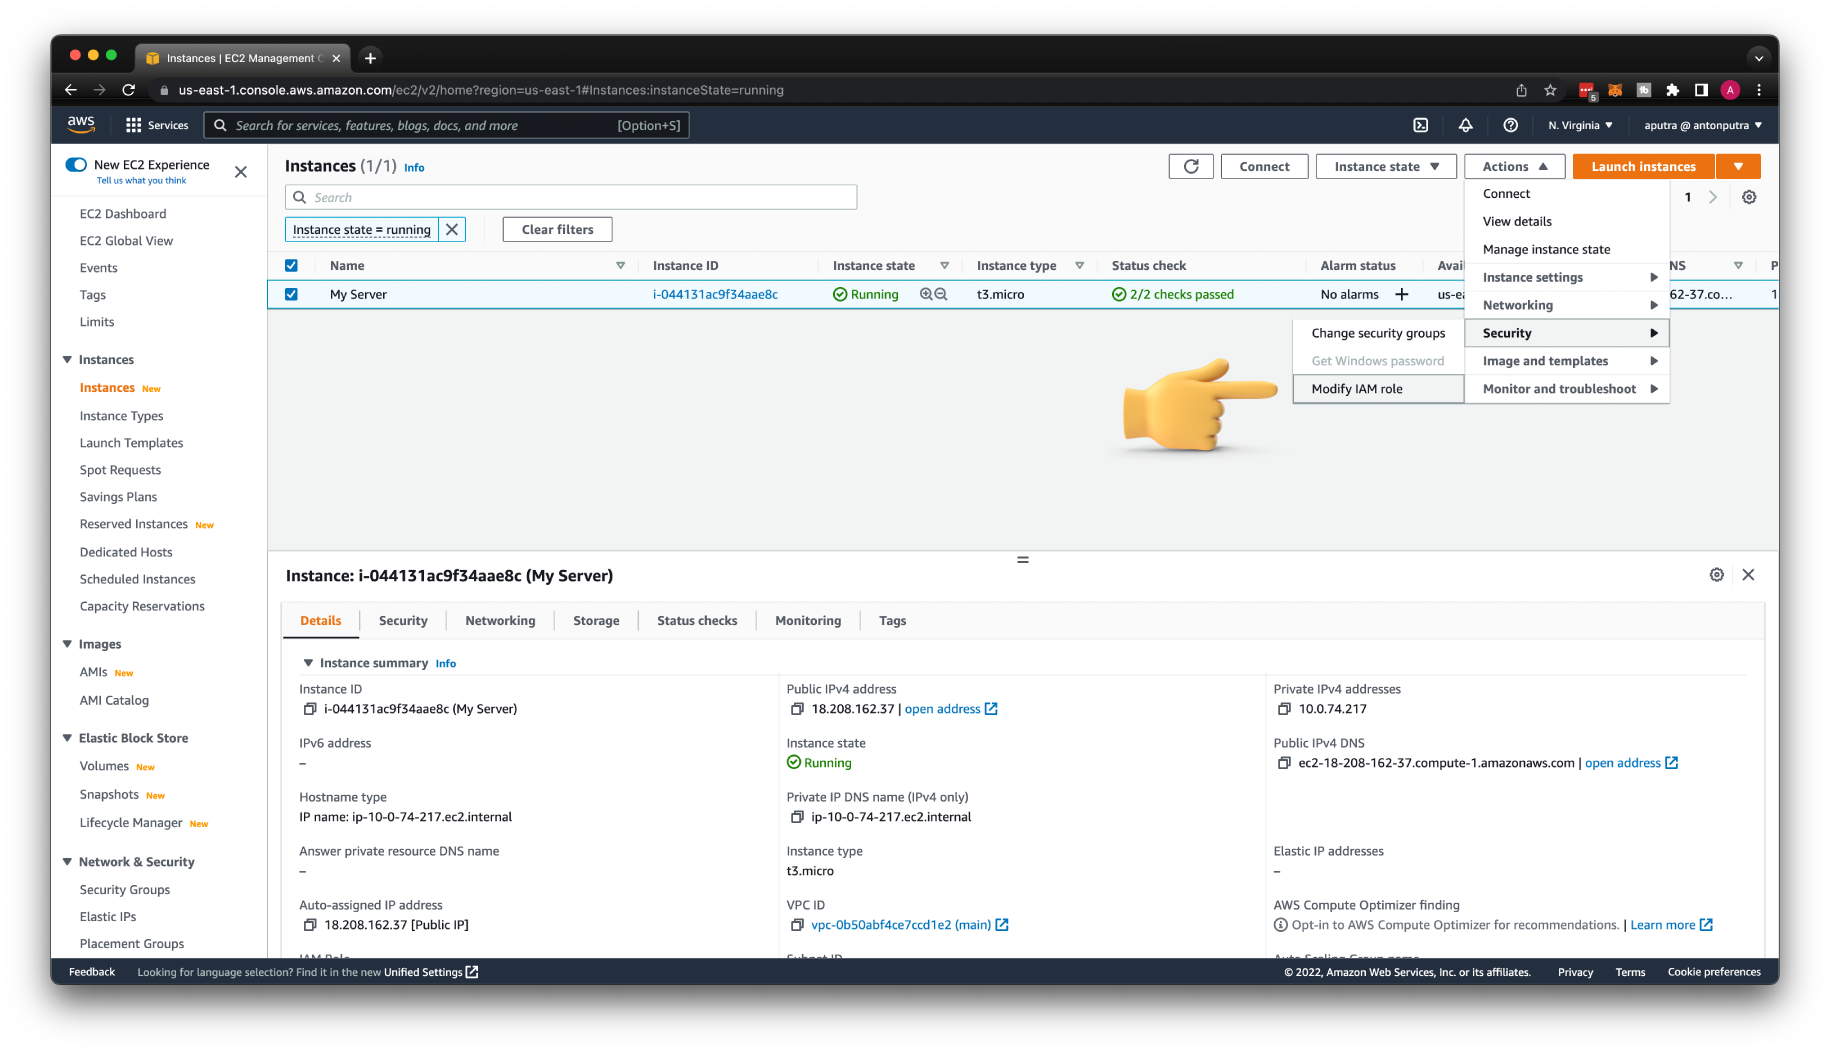
Go to Actions, Security, and Modify IAM role.
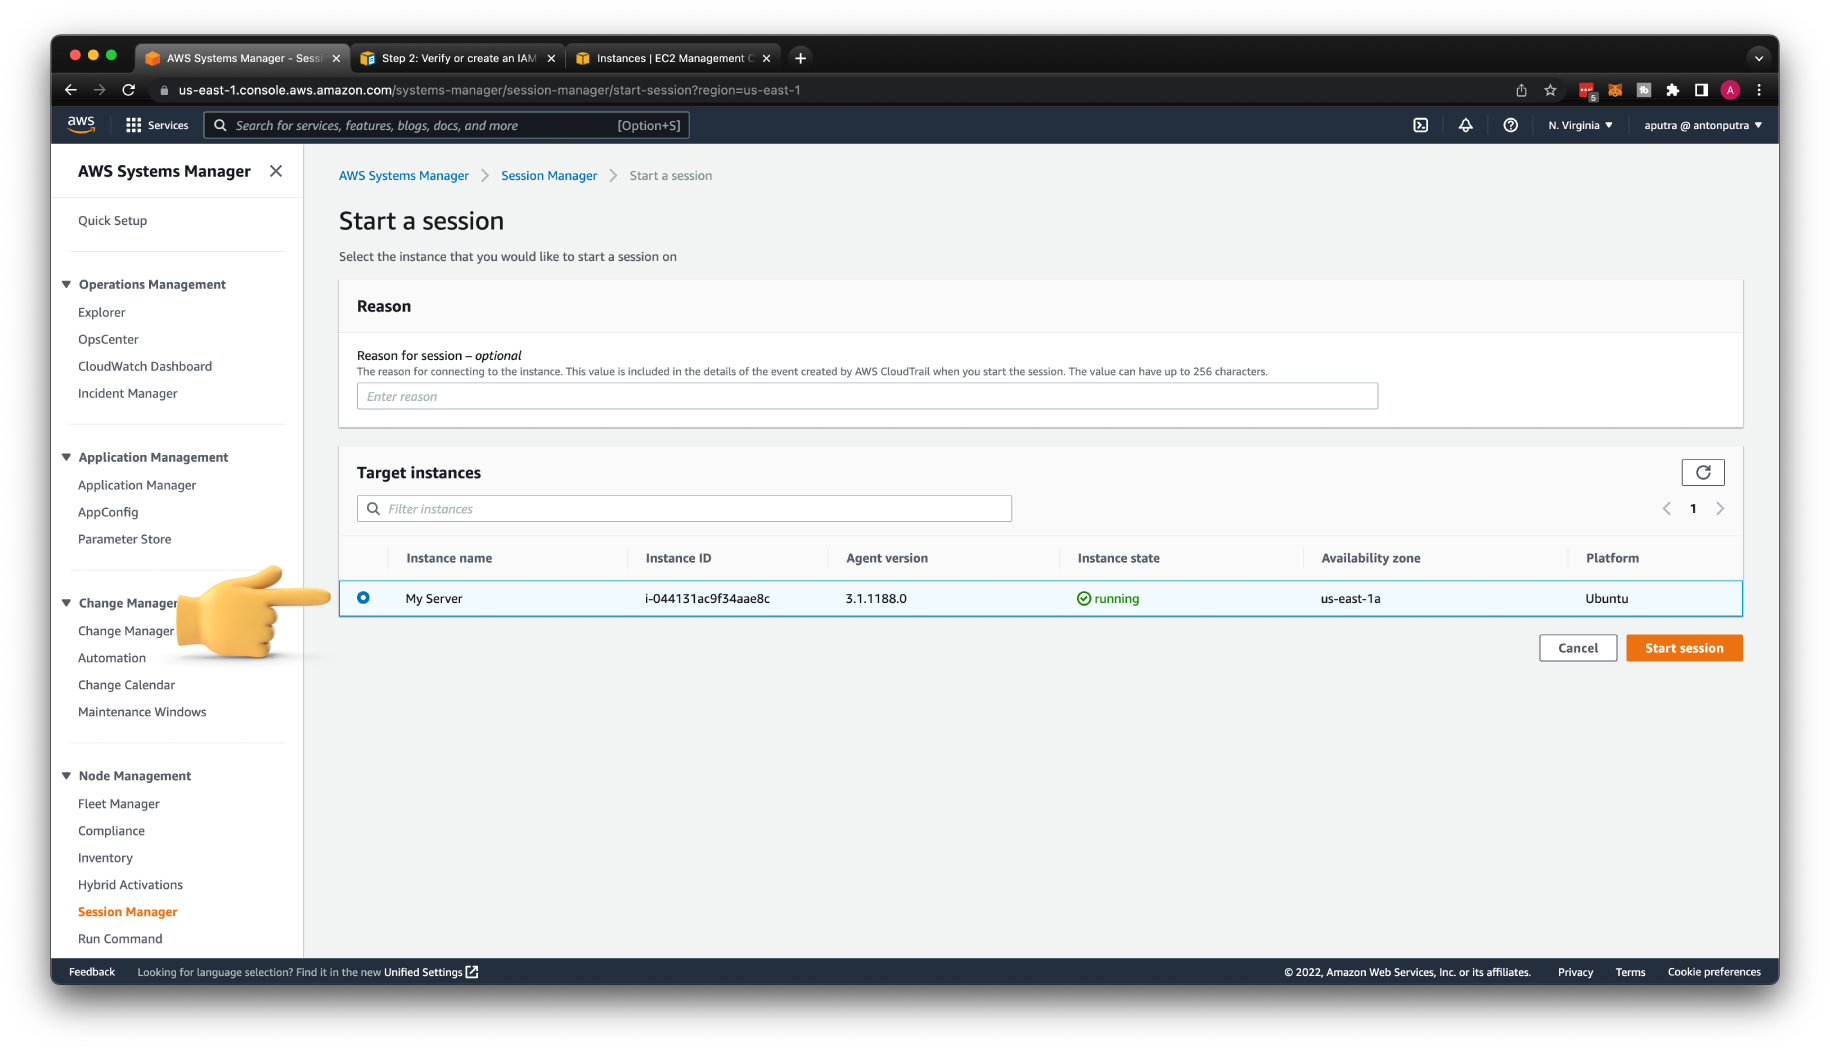
Then you can navigate to AWS Systems Manager. Click Start session under the Session manager pane.
It may take 5 to 10 minutes for your EC2 instance to show up there; just be patient. The last time when I tested, it took more than 30 minutes.
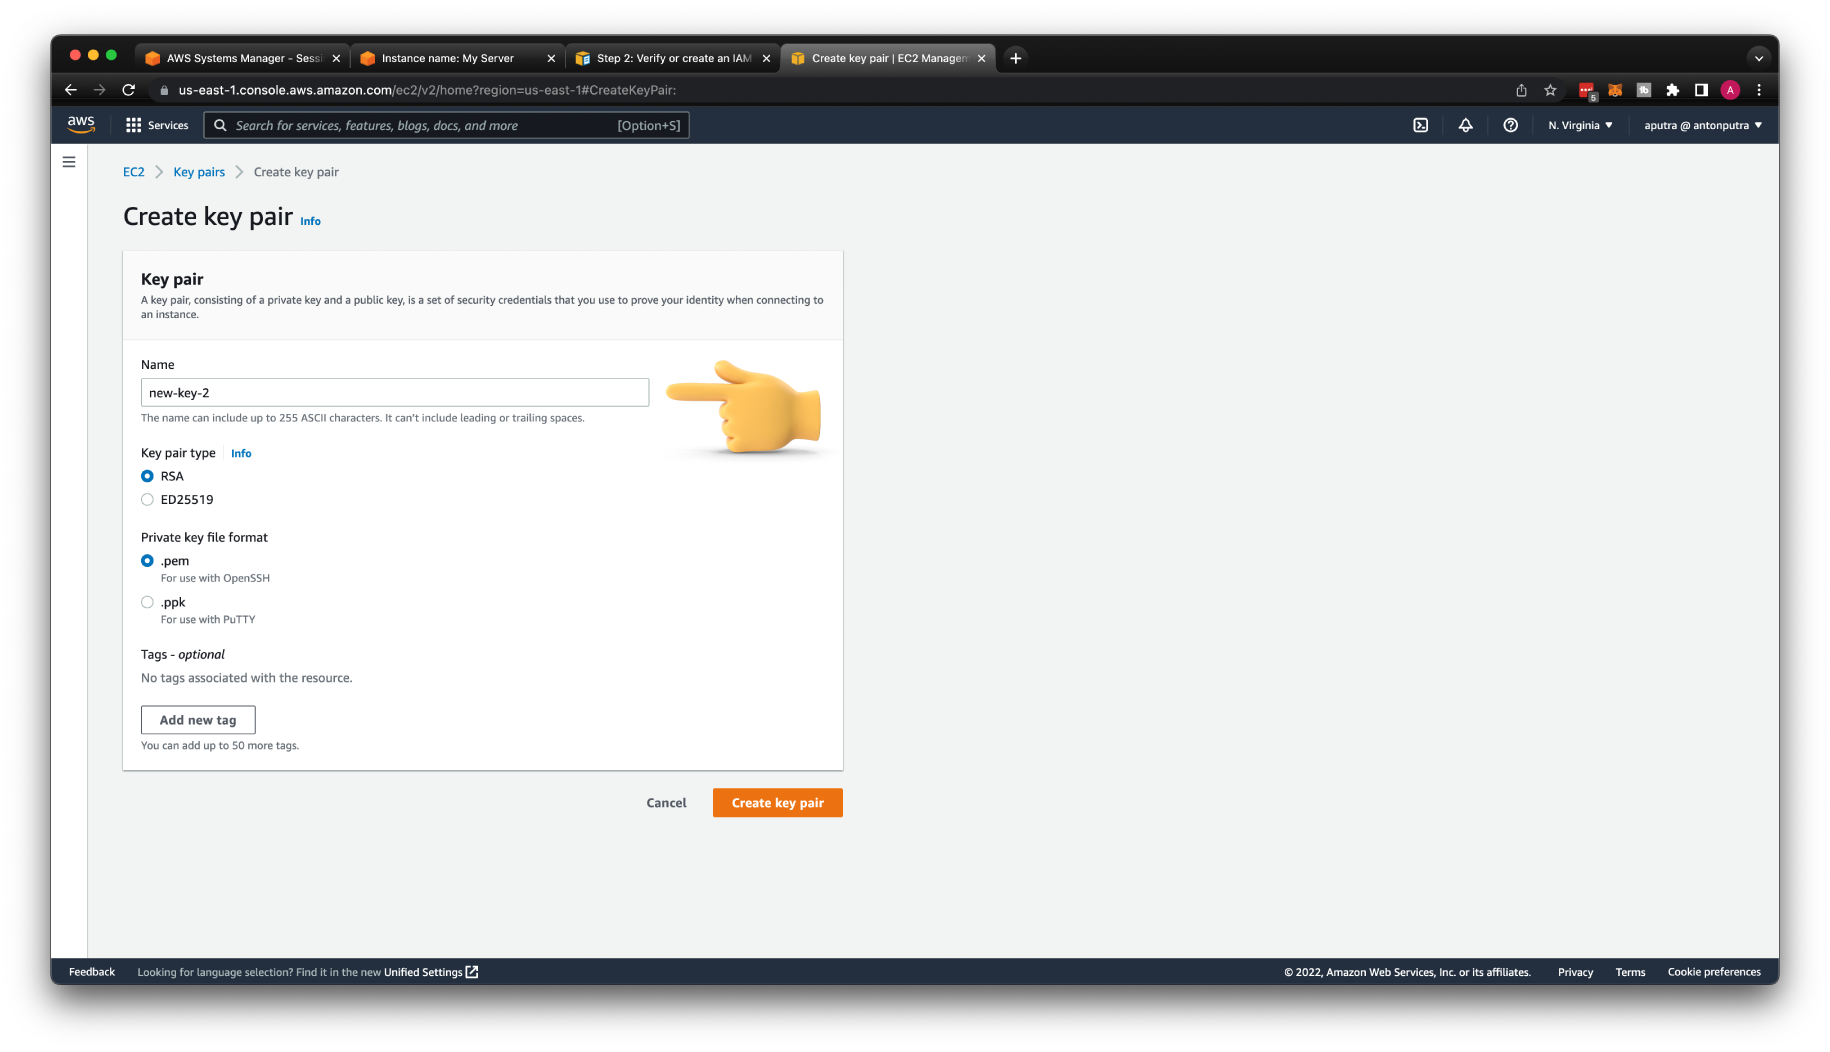
Now, let's create a new key pair and call it new-key-2.
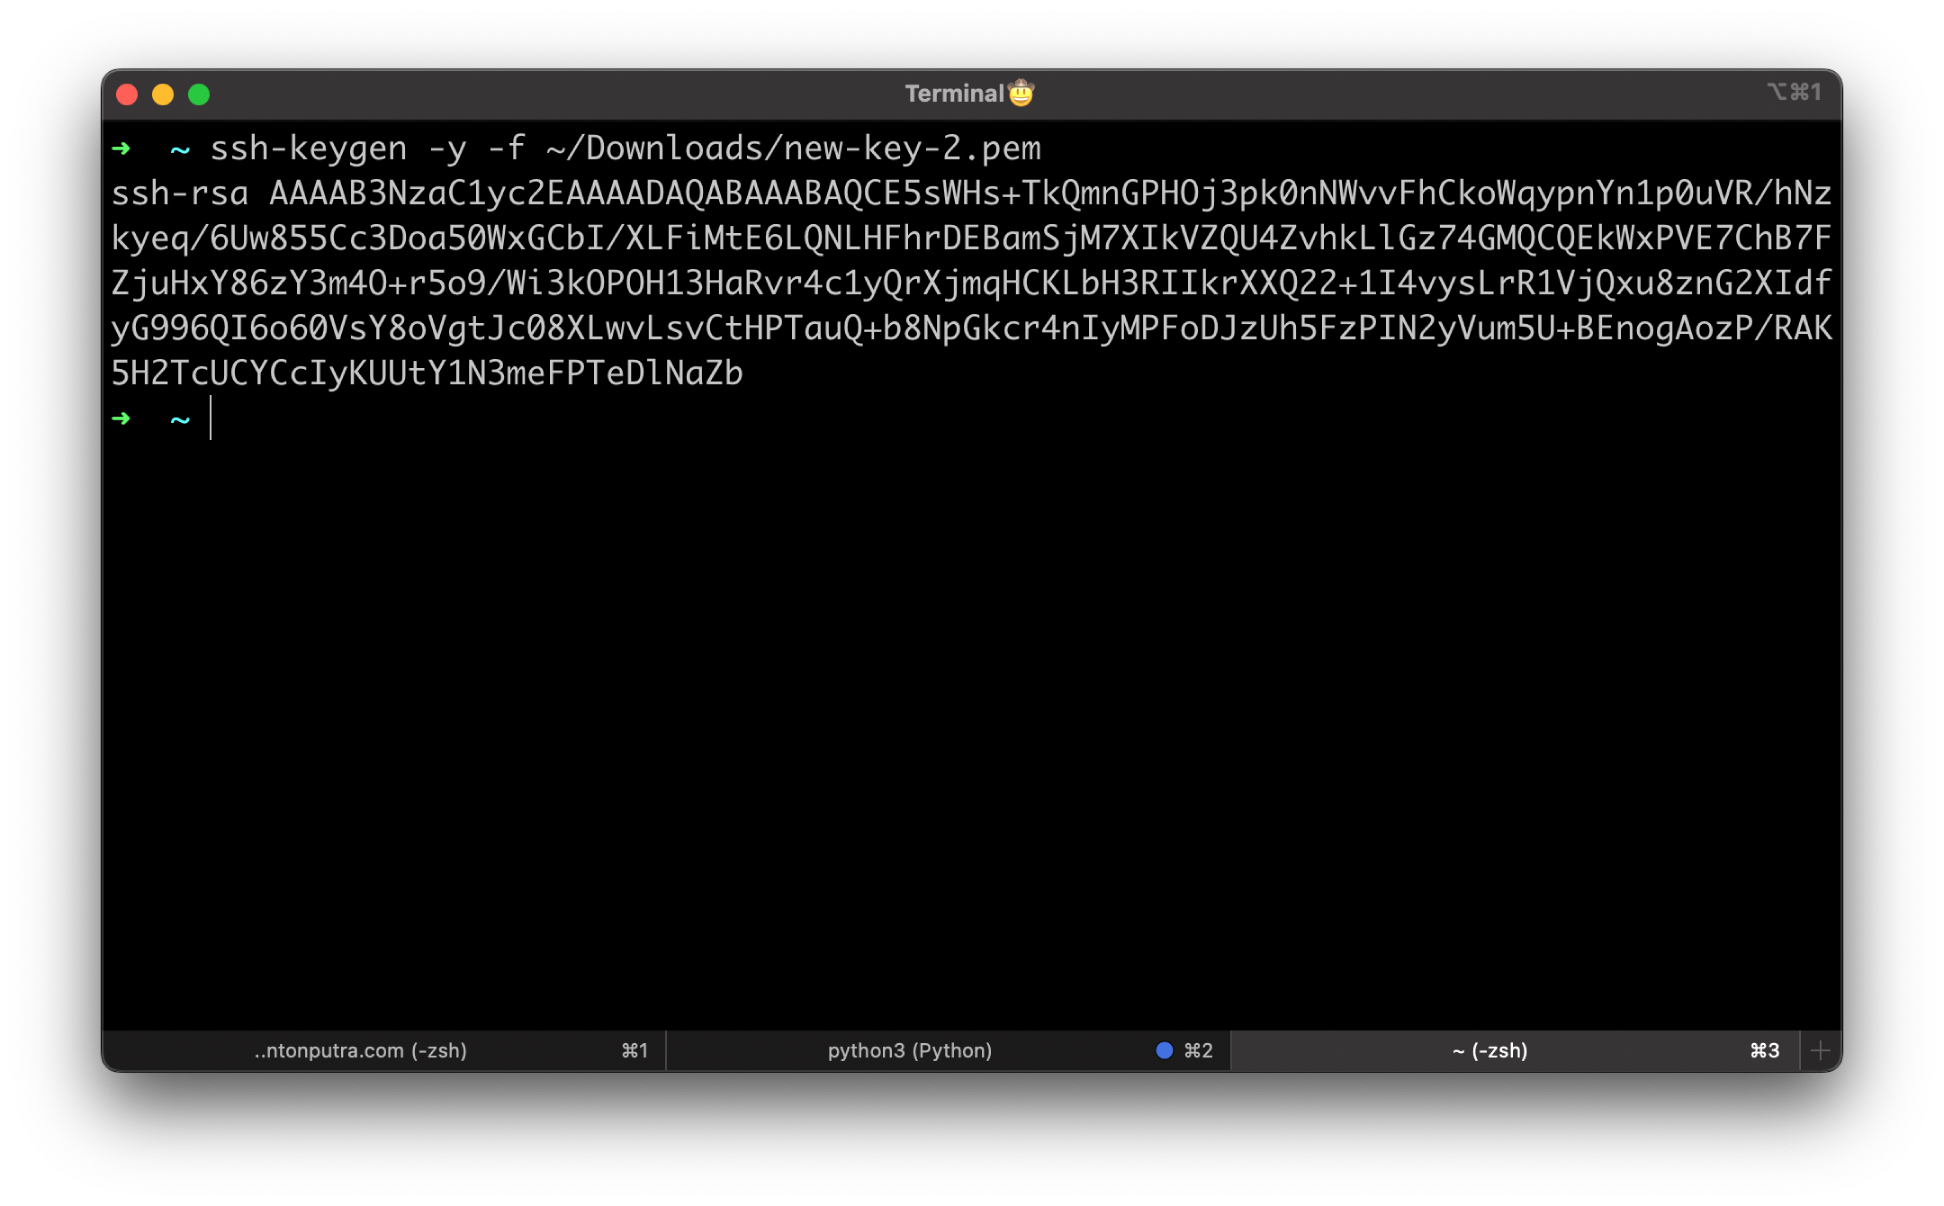
To extract the public key from the key pair, use the following commands.
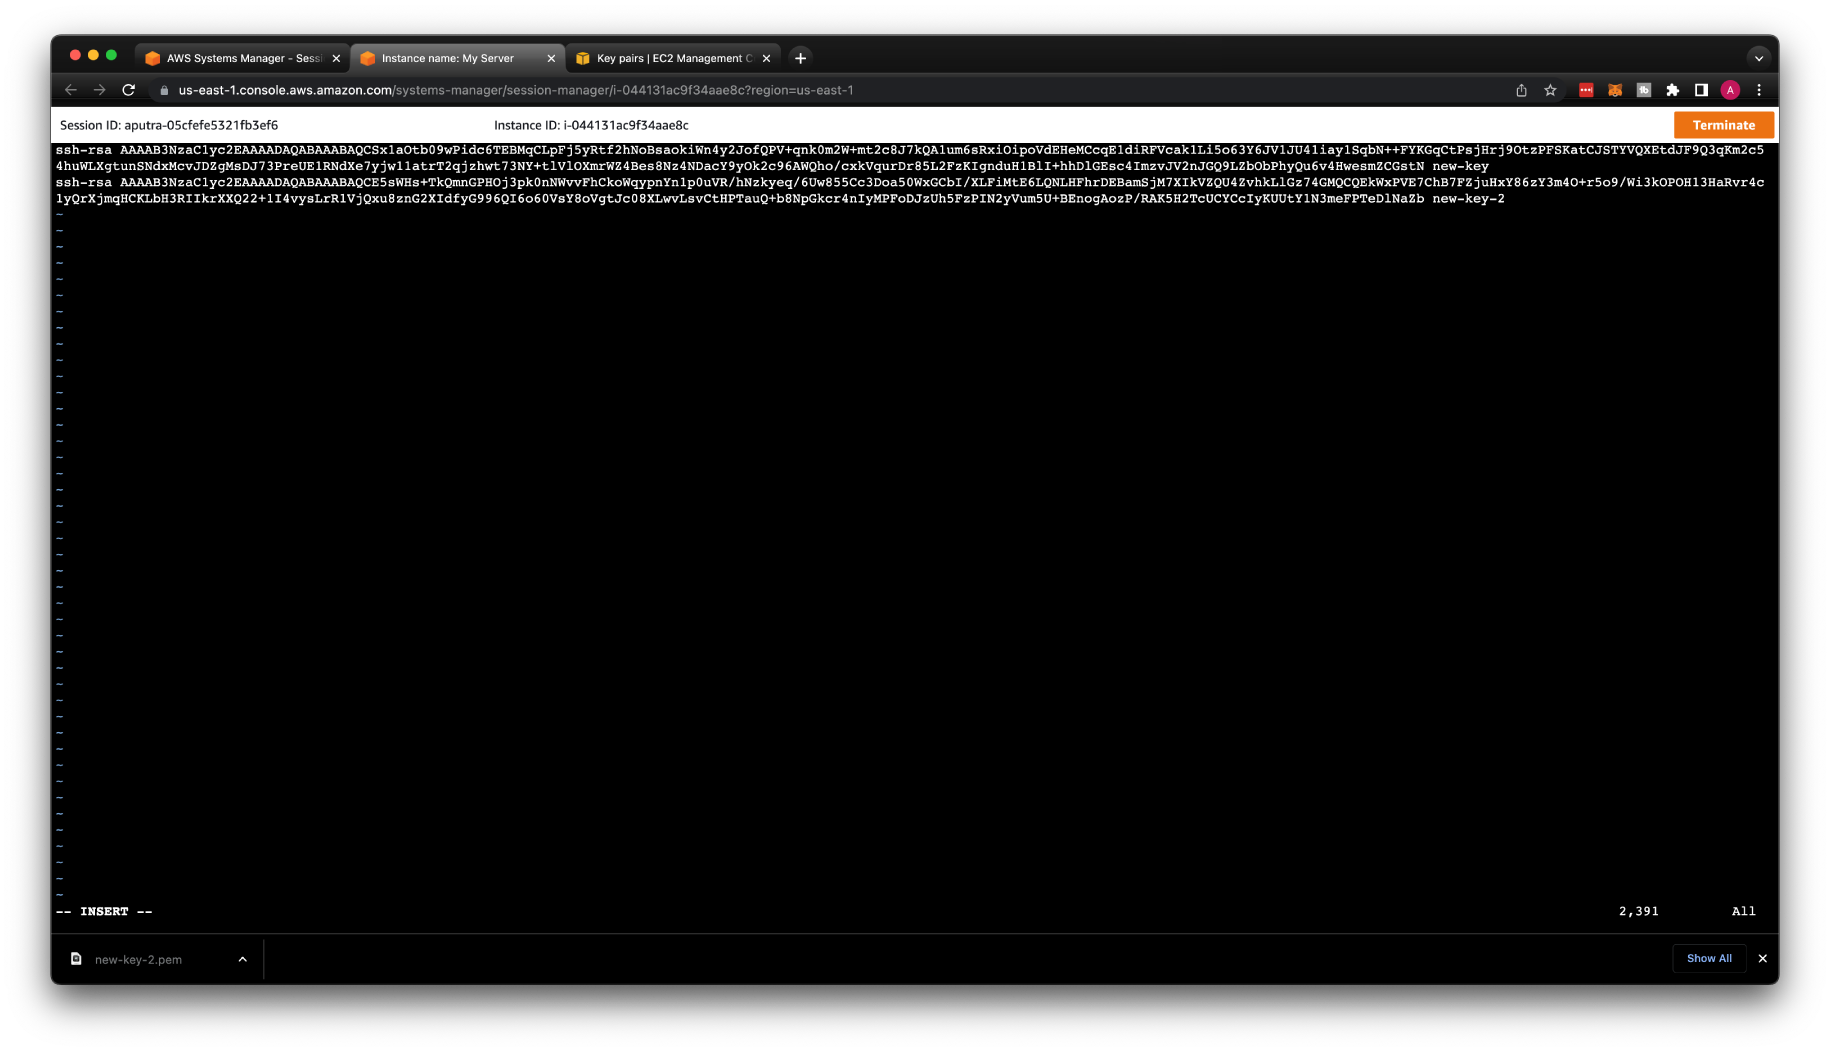
On the original VM, you can simply add the additional public key to the authorized_keys.
One key per line, or you can replace the old one.
If you used Amazon Linux, replace ubuntu with ec2-user.
Press o and add a new public key with a key name new-key-2.
Save and terminate the session.
Try to SSH with a new-key-2.
You should be able to log in to your VM using the new key pair.